


For Thanksgiving, a request was made (um… even though she went to the same class and also got the recipe 😛 ) for biscuits. Sure! I’ve always wanted to try to make biscuits. After all, having them relatively a short period time after taking them out from the oven, when they are still quite warm but moist and light, is key.
Unfortunately, dining out and the realities of a restaurant kitchen means many times the biscuits were made and waiting before I even order so are not the temperature I am hoping for, and may even have hardened or dried some and have to be saved by other items in the dish, likely gravy. But, I also knew that the consistency from working the dough is key to making good biscuits, and worried that I would get all excited making them and then be disappointed at the end product.
So I was glad I had the experience of learning this recipe with professionals making it during a class rather than just following a recipe I picked out. Thanks to having it during the class I also knew what these biscuits would taste like instead of guessing from photos or videos. This is the recipe I used, but there are many out there that use shortening, or add rosemary or chili or cheese. There are so many variations of biscuits out there but yet each has their own distinct taste and personality. This one is very very light and fluffy, they felt like air.
Ingredients (serves 8):
- 1/2 cup butter, frozen
- 1 cup all purpose flour
- 3/4 cup wheat pastry flour
- 2 tablespoons sugar
- 2 1/4 teaspoons baking powder
- 1/4 teaspoon baking soda
- 1/2 teaspoon salt
- 1 cup heavy cream
- 2 tablespoons white wine vinegar
Directions:
- First, you put the butter in the freezer. This will then allow you to very coarsely grate the butter. I have gotten so much use from this grater from Ikea
- Combine the cream and vinegar, which is essentially making homemade buttermilk, and keep in the refrigerator so it stays chilled, and the acid can do its work. It will look like its curdling a little after 5 minutes, which is normal. You can substitut e other acids as well in the same ratio, most commonly lemon juice or another kind of vinegar like apple cider vinegar.

- Meanwhile, combine the flours, sugar, baking powder, baking soda, and salt together in a large mixing bowl- I just sifted it all together by hand. Also, have a well floured working area established . If you can, put your dry mix in the fridge so it can also be cold while grating the butter.

- Now grate (use the largest holes for your grater)the cold butter, and put into the dry mix and again using your hand, just mix it together briefly. It will still be pretty gritty, including still having pea size pieces of butter/dry mix. Don’t overmix- that is the enemy of soft fluffy biscuits, and your want the butter to stay cold so it will melt during the baking process and create air pockets while the biscuits rise in the oven.

- Next, gently add the cream, parts at a time, into the butter flour mix. Each time you add the cream, use your hand (flour it first!) to fold the bottom mix on top of the cream, and fold several more times, and then add the next parts of cream. Do this until a soft dough forms, no need to knead… again being careful not to overmix so that the combination of liquid and flour doesn’t form too much gluten and get tough (this is also why the recipe uses pastry flour not just all purpose) and also that the dough stays cool so heat doesn’t activate the dough until oven time.
- Press the dough onto your floured work area and press, using as few rolls of the rolling pin and a pastry scraper (I use the OXO Pastry Cutter which also handily dandily has a ruler with its blade) into a rectangle that is 1/2 inch thick.
- Fold the sides of the dough in (1/3 from the right, 1/3 from the left), and sprinkle some flour on the top of presumably your new square. Rotate your square dough thingy 90 degrees and roll to 1/2 inch thick. Repeat until you have gone all the way around, aka a total of 4 folds into squares.

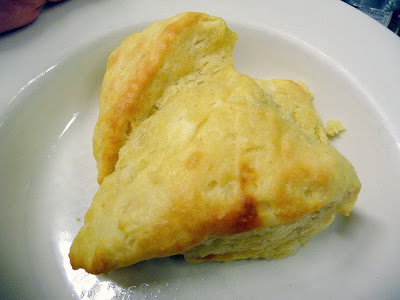
- On the last press, leave it in the 1/2 inch rectangle and cut into squares. I like biscuits to be very doughy rather than flakey, and cut them into these giant triangles instead that are essentially croissant size! I only was meaning to feed four people anyway, so 8 pieces so it was 2 per person seemed good to me (somehow the same amount but less greedy than if it was 4 regular pieces per person). If you are feeding more, do the squares- you’ll get 16 pieces that way. I don’t do round biscuit cutters because then you have scraps that when you try to put together, will probably be tougher. You also don’t want the biscuits any larger than these as they might still be undercooked inside then.

- At this point, you can now let them rest for 30 minutes in the refrigerator while you preheat the oven to 500 degrees F. Or, you can let them rest, and then place the biscuits on parchment paper and freeze until they are all frozen solid (important so they don’t stick together), and then put in freezer bags to pull out individual biscuits to bake just what you need.
- When it’s time to bake the biscuit, place on a well greased sheet pan, each about 1 inch apart, you don’t want them too far or the biscuit will spread instead of rising high. Reduce the heat from your now hot oven to 450 degrees F. Bake until golden brown- about 12-15 minutes, slightly longer if you are baking them from frozen.
The recipe said “cool and serve”, but of course these are best all fresh and warm! And, it will make your place smell so awesome. If you’d like, brush the tops with melted butter.


[…] ← Homemade Biscuits Dinner at King Ludwigs Restaurant and Nightcaps at Icicle Brewing → […]