Spicy Mayo Baby Shrimp Sandwich

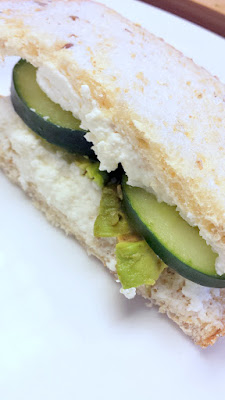
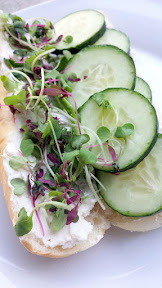
Do you like the taste of the spicy mayo sushi rolls, but 8 rolls is not enough to satisfy you for lunch? I have an alternative way to get those flavors that I sometimes pack for lunch – I make a Spicy Mayo Baby Shrimp Sandwich.
Ridiculously easy way to get a spicy mayo sushi flavor but in a more fulfilling meal via this recipe for Spicy Mayo Baby Shrimp Sandwich Ridiculously easy way to get a spicy mayo sushi flavor but in a more fulfilling meal via this recipe for Spicy Mayo Baby Shrimp Sandwich

This is barely a recipe and more just a guideline, and takes only minutes. In this sandwich form it is more filling and only a fraction of the price of sushi, but I still get my craving fulfilled. This recipe makes 4 sandwiches.
Ridiculously easy way to get a spicy mayo sushi flavor but in a more fulfilling meal via this recipe for Spicy Mayo Baby Shrimp Sandwich Ridiculously easy way to get a spicy mayo sushi flavor but in a more fulfilling meal via this recipe for Spicy Mayo Baby Shrimp Sandwich

Ingredients:

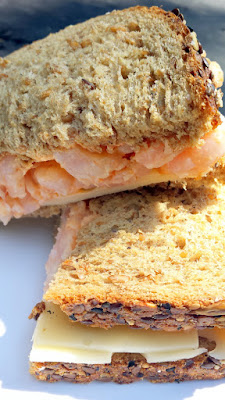
  • 8 pieces of bread – you can see here I used Dave’s Killer Bread 21 Grain
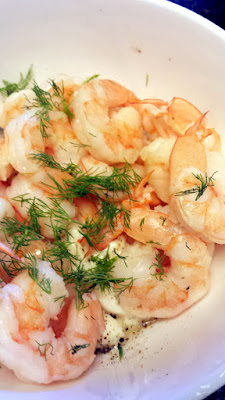
  • ~ 1/2 pound of cooked baby shrimp
  • 1/4 cup of spicy mayo (you can mix 1/4 cup mayo with 1 tablespoon Sriacha hot sauce and an optional 1 teaspoon of lemon juice. Taste and add more Sriracha hot sauce as needed to your desired level of spiciness. Or you can even be lazy and if your grocery store has a sushi section, they often have a small container of spicy mayo you can buy. F often does this when he gets cucumber rolls to help punch up his vegetarian rolls).
  • Optional – slices of Swiss cheese for the sandwich

Directions:

  1. In a mixing bowl, toss the cooked baby shrimp with the spicy mayo sauce. Spoon into the sandwich. You can optionally add cheese or lettuce if you want (I used Swiss).
    Ridiculously easy way to get a spicy mayo sushi flavor but in a more fulfilling meal via this recipe for Spicy Mayo Baby Shrimp Sandwich Ridiculously easy way to get a spicy mayo sushi flavor but in a more fulfilling meal via this recipe for Spicy Mayo Baby Shrimp Sandwich
  2. Eat.

Yep, that’s it.

Are you a fan of the spicy sauce on sushi?
Ridiculously easy way to get a spicy mayo sushi flavor but in a more fulfilling meal via this recipe for Spicy Mayo Baby Shrimp Sandwich Ridiculously easy way to get a spicy mayo sushi flavor but in a more fulfilling meal via this recipe for Spicy Mayo Baby Shrimp Sandwich

Signature

Dill Shrimp Salad Sandwich with Cucumber

This Dill Shrimp Salad Sandwich with Cucumber is delicious with a glass of pinot gris. It feels like a sandwich that so represents summer.
Recipe for a shrimp sandwich with shrimp, cucumber, dill, and a mayo dill lemon sauce Recipe for a shrimp sandwich with shrimp, cucumber, dill, and a mayo dill lemon sauce

This would probably taste just as good if you used crab instead – it reminds me a lot of sandwiches you could enjoy at a rental house on the beach. I can almost hear the waves and smell the ocean and feel the sun and heat radiating back from the sand now from my shaded deck now.

I tend to see these type of sandwiches more on South of the US. I do hear that shrimp sandwiches like these are also popular in Scandinavia, though I think they simply steam the shrimp and may omit the Mayo. The Scandinavians are with me though on feeling this same perfect pairing of shrimp with cucumber.

Recipe for a shrimp sandwich with shrimp, cucumber, dill, and a mayo dill lemon sauce

Ingredients:

  • 4 hoagie buns (I used Franz Bakery Stadium Rolls. They are doughy delicious and sometimes you can find a Spicy Chipotle flavor one with peppers, though the ones you see here are the Franz Bakery Outdoor Rolls!)
    Franz Bakery is local to Portland and makes these delicious Outdoor Stadium Style rolls which are better than any hot dog roll because they are soft and doughy, which means you can also use them for sandwiches, which I do! Franz Bakery is local to Portland and makes these delicious Outdoor Stadium Style rolls which are better than any hot dog roll because they are soft and doughy, which means you can also use them for sandwiches, which I do!
  • 1 tablespoon butter
  • 1 pound uncooked shrimp, peeled and deveined
    Shrimp, raw
  • 1/2 cup – 3/4 cup mayonnaise (adjust based on your preference of how much sauce you want with your shrimp)
  • 2 tablespoons fresh lemon juice (perhaps more in case your guests want to squeeze a wedge worth more upon serving the sandwiches)
  • 1/2 teaspoon salt
  • 1/4 teaspoon pepper
  • 4-6 teaspoons fresh dill (I like adding dill at the end when serving so the sandwich looks nice too)
  • 1 cup chopped cucumber
  • Butter Lettuce

Directions:

  1. In a large skillet, heat butter over medium heat. Add shrimp once the butter is hot and stir for a few minutes until shrimp turn pink. Remove from heat and then let cool so you can remove the tails. My trick for removing shrimp tails so you don’t lose that little bit of shrimp meat encased inside the tail shell portion is to press a bit til you hear a snap before pulling the tail off.
  2. In a small bowl, mix mayonnaise, lemon juice, dill, salt and pepper with the shrimp and the chopped cucumber and toss until everything is coated with the sauce.
    Toss shrimp sauteed in a little bit of butter just until cooked with a mixture of mayo, lemon juice, salt, pepper, and dill Toss shrimp sauteed in a little bit of butter just until cooked with a mixture of mayo, lemon juice, salt, pepper, and dill
  3. In the hoagie buns, first place a couple pieces of butter lettuce (I admit I also spread the leftover butter from cooking the shrimp on the buns before placing the butter lettuce). Then, spoon the shrimp and cucumber mixture into your buns
    Recipe for a shrimp sandwich with shrimp, cucumber, dill, and a mayo dill lemon sauce Recipe for a shrimp sandwich with shrimp, cucumber, dill, and a mayo dill lemon sauce

Make sure you provide a lot of napkins! And maybe, a pinot gris!
Recipe for a shrimp sandwich with shrimp, cucumber, dill, and a mayo dill lemon sauce Recipe for a shrimp sandwich with shrimp, cucumber, dill, and a mayo dill lemon sauce

Have you had shrimp salad sandwiches before? What’s your favorite type of eats on a beach getaway or trip to the coast?

Signature

Radish, Edamame, Ricotta and Greens Sandwich

Last week, I walked you through making your own fresh ricotta. Today, I’m going to share another recipe on how to enjoy that fresh ricotta. This Radish, Edamame, Ricotta and Greens Sandwich is vegetarian and a mix of flavors textures like the soft creamy ricotta and firm edamame and grassy microgreens, crunchy slighly spicy radish and acid of quick pickled red onions. This is my take when I saw the recipe of Summer Pea and Radish Pita in the Vegetarian Times and was inspired to make a version that’s more me and less pea.
My recipe for a summer sandwich of fun textures, a Radish, Edamame, Ricotta and Greens Sandwich My recipe for a summer sandwich of fun textures, a Radish, Edamame, Ricotta and Greens Sandwich

The original recipe made 6 sandwiches, and there was not an easy way to reduce the amount for quick pickling the onions (and you use the leftover liquid to help make vinaigrette), so I followed that portion exactly. So, you will have a bunch of leftover quick pickled onion to enjoy as you will. I only needed to make 2 sandwiches for my household of 2, so you’ll notice I give instructions in the ingredients and directions below for what is needed per each sandwich.
My recipe for a summer sandwich of fun textures, a Radish, Edamame, Ricotta and Greens Sandwich My recipe for a summer sandwich of fun textures, a Radish, Edamame, Ricotta and Greens Sandwich

Rather than making a sandwich, you can totally eat this as a salad as well and ignore the bread (I used regular sandwich bread here and not pita). My version also uses microgreens and edamame, which I used instead of pea shoots and peas as called by the original recipe, though the idea of pea shoots and peas in a sandwich is pretty lovely too.

Ingredients:

  • 1/2 cup apple cider vinegar
  • 1 1/2 teaspoons of sugar
  • 3/4 cup of diced onions
  • 1 cup shelled edamame (you can also use peas instead)
  • 3 tablespoons of olive oil
  • 6 cups microgreens or pea shoots or you can use torn butter lettuce, your call (you will use about a cup of greens per sandwich)
  • About 2 cups of thinly sliced radishes (you will use 1/3 cup per sandwich)
    Slicing radishes thinly thanks to my new mandoline
  • Your choice of sandwich bread – I used multigrain
  • 1 cup of fresh ricotta (especially if you make it yourself, like in my recipe here for homemade ricotta)
  • Directions:
  1. First, place the diced onions in a heat proof bowl. Let me interrupt this step for a second to plug one of my favorite kitchen tools besides my silicon spatulas for scraping every bit of food in containers, KitchenArt ButterMate for measuring and cutting butter with no mess, and my rice cooker. My #4 fave kitchen tool is the Vidalia Onion Chop Wizard. I bought it a couple years ago when after (wearing glasses, not contacts) chopping a large beautiful onion I had procured from the Portland Farmers Market, I noticed at work the next day that the misty morning was continuing in that it was looking a little misty inside my work cubicle looking at my monitor. An emergency appointment that evening at the eye doctor yielded that I had somehow burned my eye with possibly onion vapors and needed steroid eye drops for the rest of the week. Shortly after that I bought this Chop Wizard and now I can get onions diced in less than a minute and there are never any tears. It even measures how many cups of onions I have so I only need to chop what I need. Some people like the repetitive ritual of chopping, but not me – and this chopper helps me get if over faster with all sorts of vegetables, not just onions. It’s awesome.
    <One of my favorite kitchen tools, the Vidalia Chop Wizard makes dicing onions so easy One of my favorite kitchen tools, the Vidalia Chop Wizard makes dicing onions so easy
    Anyway, in a small saucepan bring to a boil a combination of the 1/4 cup water, the 1/2 cup apple cider vinegar, and 1 1/2 teaspoon of sugar to a boil.  Once it is boiling, remove the liquid from heat and pour over your diced onions. Let the onions pickle for about 15 minutes before separating the onions out. Don’t toss the onion vinegar liquid – you’ll be using that as a vinaigrette later! This is a great trick for quick pickling onions for any of your sandwich needs.
    Quick pickling the diced red onions is easy, just onions, and then boiled water with apple cider vinegar and some sugar Quick pickling the diced red onions is easy, just onions, and then boiled water with apple cider vinegar and some sugar Quick pickling the diced red onions is easy, just onions, and then boiled water with apple cider vinegar and some sugar
  2. If you use frozen edamame like I did, you should defrost them by steaming, boiling, or because of the summer heatwave I just used the microwave. They only need to be heated for a few minutes, and then blanched for the same number of minutes (I refreshed mine in water with ice). Drain the edamame from the water and set aside.
  3. Whisk 3 tablespoons of the leftover onion vinegar liquid that was left in a mixing bowl with the olive 3 tablespoons of olive oil. That’s enough dressing for 6 sandwiches, but I only needed to make 2 sandwiches so I eyed only a small amount to keep in the bowl and refrigerated the rest for future sandwiches and salads.
  4. In a mixing bowl I combined that small amount of onion vinaigrette (approximately two tablespoons) with a small amount of the quick pickled onions (probably two tablespoons, one for each sandwich again) as well as 2 cups of microgreens, a tablespon of the shelled edamame, and 1/3 cup of sliced radishes and tossed them all together so everything was coated with the vinaigrette.
    For the greens portion of the Radish, Edamame, Ricotta and Greens Sandwich, toss the onion vinaigrette with microgreens, radishes, edamame, and the quick pickled red onions For the greens portion of the Radish, Edamame, Ricotta and Greens Sandwich, toss the onion vinaigrette with microgreens, radishes, edamame, and the quick pickled red onions
  5. For each sandwich, I first spread the fresh ricotta (about 1 tablespoon for each sandwich half), and then topped each half with 1/2 a cup of the greens edamame radish mixture.
    My recipe for a summer sandwich of fun textures, a Radish, Edamame, Ricotta and Greens Sandwich My recipe for a summer sandwich of fun textures, a Radish, Edamame, Ricotta and Greens Sandwich

I left my sandwiches open-faced because that’s my thing right now, to let the insides of a sandwich be visually enjoyed. I also am a bit greedy and may overstuff my sandwich.
My recipe for a summer sandwich of fun textures, a Radish, Edamame, Ricotta and Greens Sandwich My recipe for a summer sandwich of fun textures, a Radish, Edamame, Ricotta and Greens Sandwich

The next day, instead of sandwiches I added more torn butter lettuce to fill it out (I added a bit more of the leftover vinaigrette to compensate) and had this whole thing in salad form instead of sandwich (and my homemade ricotta had gotten more firm, so was perfect for adding in little 1/4 teaspoon fulls instead of spreading on bread).
Radish, Edamame, Ricotta and Greens salad Radish, Edamame, Ricotta and Greens salad

What’s one of your favorite go to summer sandwiches during the hot summer? What are your favorite kitchen tools/tricks?

Signature

Cucumber and Ricotta Sandwich with a recipe for Homemade Ricotta

Just a simple Cucumber and Ricotta Sandwich that is great for a picnic or dinner on the porch with a glass of white wine on a super hot day, like the heat wave that Portland just went through.

Homemade ricotta on Franz Bakery Stadium Rolls with sliced cucumber and microgreens. Simple sandwich and great for a summer heatwave meal

I make my own ricotta because once I learned how to during a HipCooks Portland class several years back, I haven’t been able to go back. Plastic from the store leaches into the flavor of the mass market Ricotta. You can avoid this for the cost of a a little whole milk, heavy cream and a lemon juice or vinegar (which you probably already have at home anyway). Or instead of the cream and lemon juice/vinegar as your acid ,just use buttermilk instead like when I made ricotta for Pasta Shells with squash and zucchini. Either way it yields a better value if I make it myself than buy it from the store, on top of the superior flavor quality. It really is just those 3 (or 2!) ingredients!

You can never have too much ricotta, which is why I always go for the gallon or half gallon of milk plus pint of heavy cream amounts. If you need more ideas of how to use ricotta besides the obvious smearing it on bread, putting it in pastas, in desserts… check out this Huffington Post roundup of some beautiful Ricotta Recipe Ideas.

Ingredients:

  • 1/2 gallon of whole milk (aka 2 quarts)
  • 1 pint of heavy cream (aka 2 cups)
  • 3 tablespoons white wine vinegar (or another acid like lemon juice also works)

Directions:

  1. In a large pot, add the milk and cream and slowly heat it, stirring to make sure you don’t burn the milk at the bottom, until you start to see lots of little bubbles around the corner but it hasn’t reached a full rolling boil. If you have a thermometer, you are shooting for around 180 degrees F. Make sure you keep stirring so you don’t scorch any milk at the bottom of the pot.
    Making homemade ricotta- so easy, just whole milk, heavy cream, and a little acid via lemon juice or vinegar combined with heat Making homemade ricotta- so easy, just whole milk, heavy cream, and a little acid via lemon juice or vinegar combined with heat. You want it to reach around 140 degrees F - it will not be boiling yet, but be starting to bubbles at the pop sides like this
  2. Once you reach that heat level, turn off the heat and remove the pot of milks from the stove. Add in the vinegar and stir in. Now let it stand for a few minutes while the cheese curdles – you should see the whey (the yellowish part) start to separate from the clumps of ricotta, like below.
    Making homemade ricotta- so easy, just whole milk, heavy cream, and a little acid via lemon juice or vinegar combined with heat. Here you can see the curds starting to separate <Making homemade ricotta- so easy, just whole milk, heavy cream, and a little acid via lemon juice or vinegar combined with heat. Here you can see the curds starting to separate
  3. Using a sieved spoon, I then spoon the ricotta into a sieve that has a cheesecloth folded in half over it. Let the cheese drain – the less time you give it, the softer and moister it will be, while draining it overnight makes it thicker. As you are spooning in the ricotta, if you’d like you can sprinkle in a little salt now and then for flavor. Depending on the size of the curds, I might use the strainer itself instead of a sieved spoon to get all the tiny curds. Here in this batch the curds were chunkier but it’s OK if the curds are smaller,  it all comes together as it drains don’t worry.
    Making homemade ricotta- so easy, just whole milk, heavy cream, and a little acid via lemon juice or vinegar combined with heat. Here you can see the curds have separated, so now strain the cheese from the whey with cheesecloth over a mesh strainer Making homemade ricotta- so easy, just whole milk, heavy cream, and a little acid via lemon juice or vinegar combined with heat. Here you can see the curds have separated, so now strain the cheese from the whey with cheesecloth over a mesh strainer Making homemade ricotta- so easy, just whole milk, heavy cream, and a little acid via lemon juice or vinegar combined with heat. Here you can see the curds have separated, so now strain the cheese from the whey with cheesecloth over a mesh strainer
  4. Let the whey drain further – depending on how soft or firm you want the ricotta. I think it’s best within the first 24 hours, when it’s still really soft and drained for a few hours. As you drain it further such as overnight or place it in the refrigerator, it will get firmer. The ricotta should keep refrigerated for 4 to 5 days, though mine never lasts than 3 days at most and I think it’s best in those first few days unless you are making a pasta dish/cooking with it as it isn’t as fresh tasting as the first days.
    Making homemade ricotta. Now in the cheesecloth, let it drain for a couple hours. The longer you wait, the most more firm it will become, especially if you drain it in the fridge overnight Homemade Ricotta after draining the whey and a little ground pepper

I use it on bread and top it with fruit and veggies as an open sandwich, or on grilled bread with just a drizzle of nice olive oil and balsamic vinegar if I’m fancy. It could be simply in a bowl with fruit, part of breakfast in pancakes or an accompaniment with eggs, or just the start of a big dinner such as stuffed pasta shells (like a Fresh Ricotta, butternut squash, baby zucchini in Pasta Shells recipe I shared in the past), lasagna, and so much more! In fact, next week, I will share one of the other things I made with this ricotta, a Radish, Edamame, Ricotta and Greens Sandwich.
Simple Scrambled eggs with ricotta and microgreens

In the summer, especially during a heat wave when it’s almost 100 degrees and I’m super hot and tired and lazy or combination of all of those, and I want a refreshing sandwich, I just cut up cucumbers and put it in a sandwich with ricotta – maybe even an additional smear of avocado.
California Avocados Homemade ricotta in a cucumber avocado ricotta sandwich, recipe is easy and refreshing in the summer

On a Stadium Roll (my latest favorite bread from Franz Bakery) with microgreens or whatever greens I have.
<Homemade ricotta on Franz Bakery Stadium Rolls with sliced cucumber and microgreens. Simple sandwich and great for a summer heatwave meal Homemade ricotta on Franz Bakery Stadium Rolls with sliced cucumber and microgreens. Simple sandwich and great for a summer heatwave meal Homemade ricotta on Franz Bakery Stadium Rolls with sliced cucumber and microgreens. Simple sandwich and great for a summer heatwave meal

Or, no bread at all and just cucumber and ricotta with a few grinds of freshly ground pepper.
Homemade Ricotta after draining the whey and a little ground pepper plus cucumbers for a vegetarian sandwich that is nice and cool for the summer heat

I definitely enjoyed ricotta sandwiches as meals during the Portland heat wave. Have you ever made homemade ricotta? Do you use ricotta in sandwiches? What’s your favorite food during a heat wave?

Homemade ricotta on Franz Bakery Stadium Rolls with sliced cucumber and microgreens. Simple sandwich and great for a summer heatwave meal

Signature