Food Should Taste Good chips with Mexican Street Corn Dip recipe

I had the opportunity to attend a Food Should Taste Good event in late summer. I’m familiar with the Food Should Taste Good chips, as I have often grabbed a bag for gatherings at my house because I know they are tasty and are certified gluten free and kosher and non-GMO.

Their Multi-grain tortilla chips, with stone ground corn, brown rice flour, flax seeds, sesame seeds, sunflower seeds, and quinoa are all natural, low sodium, cholesterol free, and go to with a wide variety of cheeses or meats and I like their slightly nutty flavor.

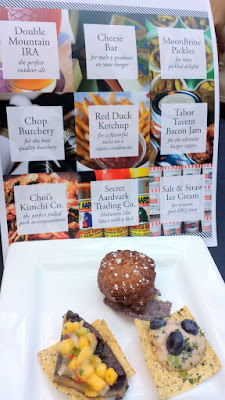
Thanks to this event, I was also able to sample many new to me flavors, and was introduced to more sophisticated ways to serve these healthy and good for you snacks. Food Should Taste Good partnered with The Eastburn as well as blog Manmade DIY who pointed out other great products to upgrade your bbq.
Grilled Portobello with Mango Salsa by Eastburn to accompany Food Should Taste Good The Works! Tortilla chips Fried Goat Cheese and Mango Fritters by Eastburn to accompany Food Should Taste Good Blue Corn chips, and Blueberry Avocado Salmon Mousse and also Grilled Portobello with Mango Salsa accompany Food Should Taste Good The Works! Tortilla chips

For instance, consider

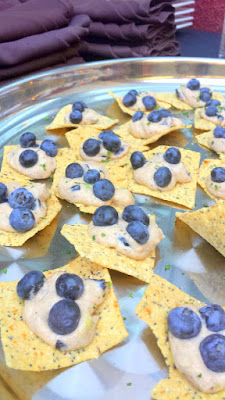
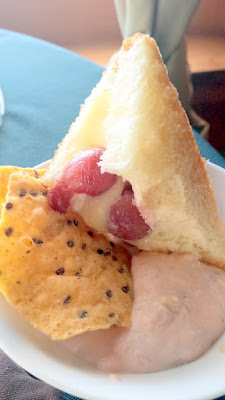
  • Blueberry Avocado Salmon Mousse to accompany Food Should Taste Good The Works! Tortilla chips. The Works! has includes poppy seeds, caraway seeds, onion and garlic remiscent of an everything bagel.
    Blueberry Avocado Salmon Mousse by Eastburn to accompany Food Should Taste Good The Works! Tortilla chips Blueberry Avocado Salmon Mousse by Eastburn to accompany Food Should Taste Good The Works! Tortilla chips
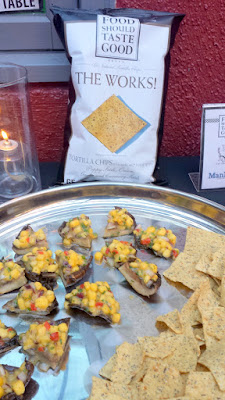
  • For a vegan pairing, there was a Grilled Portobello with Mango Salsa that went with those same The Works! Tortilla chips
    Grilled Portobello with Mango Salsa by Eastburn to accompany Food Should Taste Good The Works! Tortilla chips Grilled Portobello with Mango Salsa by Eastburn to accompany Food Should Taste Good The Works! Tortilla chips
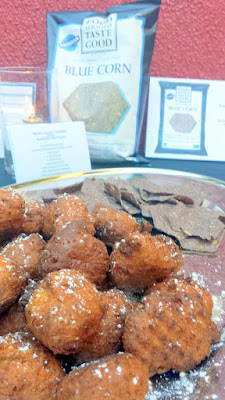
  • A favorite for many of us were the Fried Goat Cheese and Mango Fritters served with the Food Should Taste Good Blue Corn chips
    Fried Goat Cheese and Mango Fritters by Eastburn to accompany Food Should Taste Good Blue Corn chips Fried Goat Cheese and Mango Fritters by Eastburn to accompany Food Should Taste Good Blue Corn chips
  • I loved the visual presentation of the Avocado and Pear Salad topped with Sliced Radish on the Blue Corn chips
    Avocado and Pear Salad topped with Sliced Radish by Eastburn to accompany Food Should Taste Good Blue Corn chips Avocado and Pear Salad topped with Sliced Radish by Eastburn to accompany Food Should Taste Good Blue Corn chips
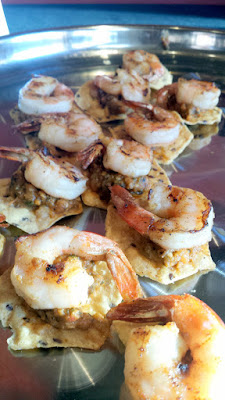
  • Another hit were the Fire Roasted Tomato and Poblano Dip with Grilled Shrimp on Multigrain Chips
    Fire Roasted Tomato and Poblano Dip with Grilled Shrimp by EastBurn paired with some Food Should Taste Good The Works! Multigrain Chips

However, there’s possibilities beyond chips with toppings as appetizers. They can be part of the main meal too, such as

  • Roasted Grape and Brie Grilled Cheese with Strawberry Apple Dip served with Multigrain Chips
    Roasted Grape and Brie Grilled Cheese with Strawberry Apple Dip by Eastburn paired with some Food Should Taste Good Multigrain Chips Roasted Grape and Brie Grilled Cheese with Strawberry Apple Dip by Eastburn paired with some Food Should Taste Good Multigrain Chips
  • Sliders served with a side of Sweet Potato Chips: either go carnivore with Beef Sliders with Pluot, Goat Cheese, and Fire Roasted Peppers or vegan with BBQ Tofu Slider with Fig Compote!
    Sliders served with a side of Food Should Taste GoodSweet Potato Chips are a way to use these healthy gluten free chips as part of the main meal Eastburn Beef Sliders with Pluot, Goat Cheese, and Fire Roasted Peppers BBQ Tofu Slider with Fig Compote by EastBurn

I had never visited the website before, and had no idea they had a mouthwatering Crunch Feed and a Recipes area with all sorts of pairing and recipe suggestions for healthy yet fun snacks and party food.

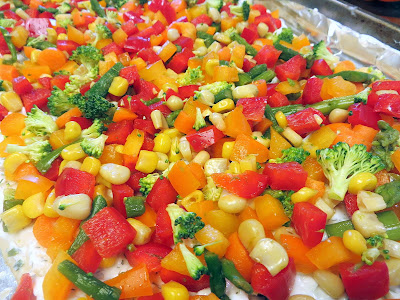
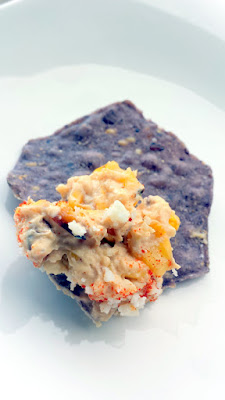
I was first drawn to this recipe for a Mexican Street Corn Dip. With its use of corn it is perfect for late summer and fall entertaining.

Mexican Street Corn Dip Recipe

Mexican Street Corn Dip recipe served with Food Should Taste Good Blue Corn, all natural, gluten free, and non GMO Mexican Street Corn Dip recipe served with Food Should Taste Good Blue Corn, all natural, gluten free, and non GMO

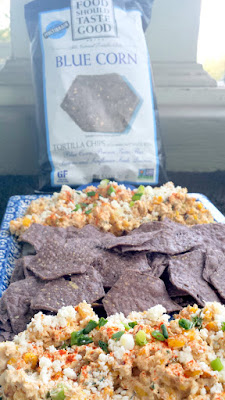
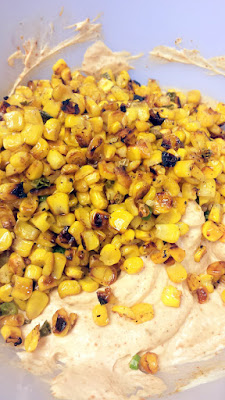
I made a few adjustments in that I wanted to make it a little healthier by using olive oil instead of butter and made sure to really brown my corn. Then I turned up the heat by using Thai Chili peppers and stronger chili seasoning. The recipe is originally by Justine of Cooking and Beer, courtesy of the Food Should Taste Good website.
Ingredients:

  • 8 ounces of softened tofu or light cream cheese
  • 3 tablespoons olive oil mayonnaise
  • 1 teaspoon ground cumin
  • 1/2 teaspoon of chipotle chili pepper (plus extra for garnish)
  • salt and black pepper to taste
  • 2 tablespoons of olive oil
  • 3 cups corn kernels, either cut from the cob or thawed if previously frozen
  • 3 Thai chili peppers, finely chopped (or use 1-2 jalapenos)
  • 3 sliced green onions (2 in the dip, and 1 for garnish)
  • 1/2 cup cotija cheese (plus extra for garnish)
  • 1 bag of Food Should Taste Good Blue Corn tortilla chips

Directions:

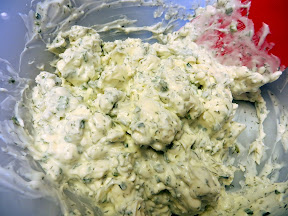
  1. In a large mixing bowl, add the 8 ounces of softened cream cheese, 3 tablespoons mayo, 1 teaspoon of cumin, 1/2 teaspoon of chili powder and a dash of salt and black pepper to taste. Mix until smooth and creamy. Set aside.
    Mexican Street Corn Dip recipe- making the creamy sauce before adding the corn Mexican Street Corn Dip recipe- making the creamy sauce before adding the corn
  2. In a large skillet, heat the olive oil over over medium heat. When melted, now add your 3 cups of corn kernals and finely diced Thai chili peppers (or jalapenos). Don’t stir right away – let the heat sear and brown the corn a bit first, and then turn the corn so brown on the other side. This might take 4-6 minutes on each side. Then, remove from heat and add to your mixing bowl with the cream cheese and sour cream mixture. Stir to combine so all the cream mix is distributed evenly.
    For my version of this Mexican Corn Dip recipe, make sure you char the corn by being patient before stirring After charring your corn slighly, continue with the Mexican corn dip by combining it with the creamy sauce you made earlier
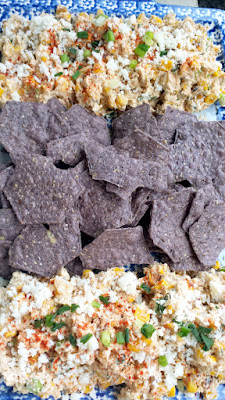
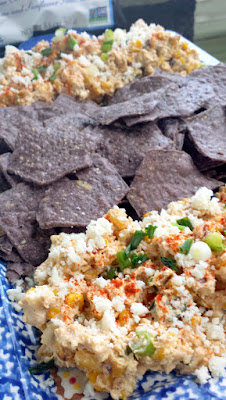
  3. Add 2 sliced green onions and crumble in small pieces your 1/2 cup cotija cheese. Mix, and now pour everything into your serving bowl. Garnish with additional chili powder, green onions and cotija cheese.
  4. Enjoy immediately with your Food Should Taste Good Blue Corn tortilla chips.
    Mexican Street Corn Dip recipe served with Food Should Taste Good Blue Corn, all natural, gluten free, and non GMO

I really like that these blue corn chips add a different color instead of traditional yellow or white corn.

Mexican Street Corn Dip recipe served with Food Should Taste Good Blue Corn, all natural, gluten free, and non GMO Mexican Street Corn Dip recipe served with Food Should Taste Good Blue Corn, all natural, gluten free, and non GMO

Have you ever had or seen these chips before? Which type of chip or combo with the chip sounds most intriguing to you?

Signature

Recipe: Cashew Cheese on Cucumbers

With the heat wave in the past couple weeks,  I wouldn’t be surprised to hear that you might want to keep things simple when making food. I have been mostly doing quick sautés or dishes that require no cooking at all.

This recipe for Cashew Cheese on Cucumber does require a little forethought to soak the cashews in water for a few hours. Otherwise you only need a processor and a knife plus the ingredients to put together appetizers for a potluck or picnic, or just a healthy snack at home.
Cucumber with cashew ricotta and pesto

I like this combination for the refreshing cool crunch of the cucumber,  creamy but cheesy flavors with hint of garlic of the cashew cheese, and touch of salty herb from the pesto. I eyeballed a lot of these so make sure you taste to see what amounts fit your taste levels. The more nutritional yeast you use, the cheesier the flavor while being dairy free. Nutritional yeast is also a great topper to sprinkle on popcorn to have cheese popcorn with your movie!

Ingredients:

For the Cashew Cheese

  • 1 1/2 cups raw cashews soaked in water for 2 hours
  • 1/4 cup – 1/2 cup water; the more water used, the thinner and creamier the cashew cheese will be, so you want to add to your liking for consistentcy a bit at a time
  • 3 or so tablespoons of freshly squeezed lemon juice, more to taste if you’d like
  • 1-2 tablespoons of nutritional yeast, or more to taste if you’d like
  • 1 clove of minced garlic, or more to taste if you’d like
  • Dash of onion powder
  • 1 teaspoon sea salt or more to taste
  • 1 teaspoon of freshly ground pepper or more to taste

For the Pesto – this is more of a rough guideline as I often just eye it after grabbing handfuls from my plant

  • 2 cups fresh basil
  • 1/4 cup or so of olive oil
  • 1/8 cup or so of pine nuts (for more flavor, toast the pine nuts in a dry skillet for a few moments until aromatic, but be careful it doesn’t burn)
  • 1/2 tablespoon of minced fresh garlic
  • pinch or so of salt
  • a few grounds of freshly ground pepper

Directions:

For the Cashew Cheese

  1. First, you will need to soak the raw, unsalted cashews in water for about 2 hours. The water level should cover the tops of your cashews.
    1 1/2 cups of unsalted cashews Soak 1 1/2 cups of unsalted cashews in water for 2 hours
  2. Then, drain the water. Place the cashews, nutritional yeast, 1/4 cup water, lemon juice, the minced garlic and onion powder and salt in the food processor and pulse until roughly blended.
    After 2 hours of soaking, drain the water from the cashews To make the cashew cheese, place the drained pre-soaked cashews, nutritional yeast, 1/4 cup water, lemon juice, the minced garlic and salt in the food processor and pulse until roughly blended
  3. Now as you continue to taste, add in the remainder of the water to get the consistency you would like. If you’d like, you can choose to add more lemon juice, or more nutritional yeast, or more minced garlic or salt to your preference depending on how garlicky, cheesy (from the nutritional yeast), lemony, etc you enjoy.
    To make the cashew cheese, place the drained pre-soaked cashews, nutritional yeast, 1/4 cup water, lemon juice, the minced garlic and salt in the food processor and pulse until roughly blended. Add more water if you want it to be creamier, or leave it rustic and more dense To make the cashew cheese, place the drained pre-soaked cashews, nutritional yeast, 1/4 cup water, lemon juice, the minced garlic and salt in the food processor and pulse until roughly blended. Add more water if you want it to be creamier, or leave it rustic and more dense
  4. Add a few grounds of freshly ground pepper. You can serve as is immediately, but if you refrigerate it for a couple hours the flavors will develop more and texture get a bit thicker so  it will be even more tasty the next day – put it in a container to be used as a dip for a picnic with veggies, or spread on a sandwich, so many possibilities!

For the Pesto

Blend all the ingredients for pesto together – you may want to add a little bit more olive oil, salt, or pepper to taste. Puree until the mixture is smooth. Make sure you pause once in a while to scrape the sides of the bowl with a rubber spatula as needed to make sure it all gets mixed well, as well as to taste and adjust to your liking.

For the final Cucumber Cashew Cheese appetizers

Slice the cucumbers and slather on a bit of the cashew cheese. With a spoon, add on a bit of the pesto. Serve!

Cucumber with cashew ricotta and pesto Cucumber with cashew ricotta and pesto

I put this combo on cucumbers buy it’s also great in sandwiches and the cashew cheese can be substituted in pasta like Ricotta in pasta shells or lasagna too.

What have you been making in the kitchen during this extended heat wave in Portland (or wherever you may be when it’s hot in the summer!)?

Signature

Champagne and Sparkling Wine Food Pairings

For a Ladies Night get together with the theme of Bubbles (the beverage – such as champagne or sparkling wine) a couple weeks ago, I came up with a few ideas of what to pair the champagne or sparkling wine with. Here are three ideas, with 2 recipes!

Fried Chicken

I know, it’s shocking that this pairing doesn’t involve cheese!

For a small get together, you might consider fried chicken with the champagne! I had heard it was a hot thing, thanks to a restaurant called Birds & Bubbles in New York that was doing elevated southern comfort food. This high low combination is also endorsed by Lisa Dupar at her Redmond restaurant Pomegranate, Fried Chicken and Champagne is what she named her cookbook a few years ago.

Fried chicken tenders with Iron Horse Vineyards Commander's Palace Brut
The bubbly combination of carbonation and acidity is a great way to balance the rich heaviness of fried food, and it’s just fun. I went with chicken tenders so that we could be classy and not deal with chicken bones.

Cheddar Rosemary Gougeres

Cheddar Rosemary Gougeres dough, after forming it into the balls about 1 inch in order to make these cheesy puffs bite size to eat between sips of champagne or sparkling wine!
Then, I went with tried and true pairing with champagne and sparkling wine. A classic with bubbles is gougeres, light cheese puff bread appetizers. For mine, instead of gougeres I decided to use a combination of cheddar and rosemary. But, you could use any cheese, and you could use no herbs at all, or use another herb combination to your tastes.

The best part of the gougeres is that you can prepare it ahead of time and freeze it, and then on party day just pop them straight from the freezer into the oven and serve them warm, which is the best way to eat gougeres. I love party food that I can prep days ahead! And, they seem so fancy!

This recipe makes enough for about 48 of these appetizer sized, which is about an inch each to pop in between sips of champagne or sparkling wine, but you can also make them larger, say slider sized, and make mini sandwiches with them.

Ingredients:

  • 1 cup whole milk, at room temperature
  • 4 tablespoons unsalted butter
  • 1 cup flour
  • 1 teaspoon of salt
  • 1/4 teaspoon of ground black pepper
  • 4 large eggs
  • 2 tablespoons of chopped rosemary (or other herb, or none at all)
  • 1 cup grated Cheese (Cheddar, Gruyere, a combination of Goat with Blue… your choice)

Directions:

  1. Line a large baking sheet with parchment paper or a silicone mat or aluminum foil. This recipe makes enough for two baking sheets worth, and I like to do them 1 sheet at a time so that I can bake the second one as we are down to the last warm ones from the first baking sheet! If you are not making them right away though, you can do two baking sheets at the same time since you are freezing the gougeres dough anyway, if both baking sheets fit in your freezer.
  2. First, we will make the pate a choux dough, which is the starter for any puffy pastries, and is just milk, butter, flour, salt. So let’s start! Heat the milk and the 4 tablespoons of unsalted butter in a medium saucepan over medium-high heat, stirring to keep the bottom from burning. When the butter and milk is simmering, remove from the pot from heat. Now all at once, add the 1 cup flour, teaspoon of salt, and 1/4 teaspoon of ground black pepper all at once. Stir well to combine the mixture – I used my handy silicone spatula, one of my favorite kitchen tools. Return the pan to medium heat and stir hard for 1 to 2 minutes to add as much air bubble as you can, stir until the mixture thickens and becomes stiff.
    Making cheddar rosemary gougeres - here is the milk and butter and flour and salt to make the pate a choux dough
  3. Transfer the mixture to stand mixer with the paddle attachment. I mixed the dough at low speed for a few minutes, watching the steam rise from the bowl, in order to cool it and get more bubbles into the mix. Once I didn’t see any more steam, I knew it was time for the eggs. In a separate small bowl, break the 4 eggs into a bowl and whisk with a fork. Now add the egg 1/4 at a time, with the mixer beating the egg and mixture at medium speed each time until the egg you just poured in is fully incorporated into the dough.
  4. So now that we have the pate a choux dough, it’s now on us to add our creative extras for flavor. For this recipe, add the cheese and rosemary to the dough mixture and stir it all together until the ingredients are well distributed.
    Cheddar Rosemary Gougeres dough, before forming it into the balls
  5. Some people now transfer the mixture to a pastry bag and pipe the gougeres circles, but I still don’t have a tip (I suppose I could always use a big ziploc with a corner cut though), so I used use two teaspoons that I wetted with water in order to make small little balls from the dough. I made mine very small, about 1 inch in diameter, appetizer size. If you want to make little sliders, make them 4 inches. Make sure you leave at least enough to fit another ball in between each of your dough balls because when they bake, they will spread out and get stuck to each other. In my photo below, I was about to freeze them, otherwise I would have spaced them much farther apart.
    Cheddar Rosemary Gougeres dough, after forming it into the balls and now ready to freeze. If I was baking them I would have spaced these much farther apart Cheddar Rosemary Gougeres dough, after forming it into the balls and now ready to freeze. If I was baking them I would have spaced these much farther apart
  6. At this point, I just froze the balls to the baking sheets, and once frozen just put them in freezer bags. Or skip to
  7. To bake them, preheat the oven to 425 F. I put two baking sheets on top of each other in order to insulate the bottoms from the heat of the oven so it wouldn’t brown as much. You don’t need to defrost the dough – I just lined them all up and into the oven they went! Bake the tray for 12 minutes, and then lower the heat to 375 F. Now bake for another 10 to 12 minutes more – make sure you check on them so they don’t brown at the bottom! You want it golden all over.
    Cheddar Rosemary Gougeres dough, after forming it into the balls about 1 inch in order to make these cheesy puffs bite size to eat between sips of champagne or sparkling wine!

Before serving, let them cool for a few minutes, and then serve warm!
Cheddar Rosemary Gougeres dough, after forming it into the balls about 1 inch in order to make these cheesy puffs bite size to eat between sips of champagne or sparkling wine! Cheddar Rosemary Gougeres dough, after forming it into the balls about 1 inch in order to make these cheesy puffs bite size to eat between sips of champagne or sparkling wine!

Apple Slices with Brie and Walnut and Honey or Agave Nectar

Red and Green Apple Slices with a bit of Aloutte Smoked Bourbon Brie, Walnut and Agave Nectar
I happened to use Aloutte Smoked Bourbon Creme de Brie, but you can use any brie you want, it doesn’t need to be flavored. The plus of using Aloutte Creme de Brie is that I didn’t have to deal with any rind, and could go right into spreading the cheese.
Red and Green Apple Slices with a bit of Aloutte Smoked Bourbon Brie, Walnut and Agave Nectar
I personally also chose to use Agave Nectar instead of honey. I used red and green apple slices, it’s your choice on what kind of apple exactly you want to use. And, no one will judge you if you happen to buy those pre-sliced apples either.

Ingredients:

  • 7 Red and Green Apples, sliced. Or just use one color, or more colors, your choice.
  • 5 ounces of Brie – spreadable brie is easiest, but you can also use any brie as long as you do not use the rind
  • 1/4 pound of walnuts
  • Honey or Agave Nectar

Directions:

It’s ridiculously easy- slice the apples, smear a bit of brie, top with the walnut and agave nectar or honey.

Red and Green Apple Slices with a bit of Aloutte Smoked Bourbon Brie, Walnut and Agave Nectar

To serve – I alternated the colors of red and green apple for fun.
Red and Green Apple Slices with a bit of Aloutte Smoked Bourbon Brie, Walnut and Agave Nectar Red and Green Apple Slices with a bit of Aloutte Smoked Bourbon Brie, Walnut and Agave Nectar

Which of these pairings with champagne or sparkling wine intrigues you?

And here’s the damage from a dozen ladies that night…

A photo posted by Pechluck Laskey (@pechluck) on

Signature

Potluck Appetizer Recipe: Chilled Vegetable Pizza

This recipe for a Chilled Vegetable Pizza appetizer was for a weekday wine potluck in August. It was inspired by a photo/recipe on Pinterest from Mom on Timeout for Veggie Crescent Bites, though a guest mentioned that it also looks like a Pampered Chef Cool Veggie Pizza creation, and there is a similar recipe on the Pillsbury site for Easy Crescent Veggie Pizza!

Wherever this Chilled Vegetable Pizza recipe came from, I love the bright colors of the vegetables. And, I love dill, so making this with the dilly cream cheese spread was right up my alley, though I suppose you could up the vegetables by using a vegetable cream cheese, or ranch it up (as in this version at AllRecipes)!

Summer Appetizer Recipe: Chilled Vegetable Pizza with dill/chive cream cheese mixture and broccoli, asparagus, baby carrots, red and orange bell peppers, corn kernels!

You can probably use any base you would like for your “flatbread” bottom of the vegetable pizza, including actual pizza dough, but I followed her lead in pinching together reduced-fat Pillsbury Crescent Rolls. This made two pizzas, and using a pizza cutter I was able to cut about twenty four 3-bite sized square slices from each pizza, so overall this yielded 48 little appetizer bites of Chilled Vegetable Pizza from this entire recipe.

Ingredients:

  • 2 cans of reduced-fat Pillsbury Crescent Rolls, or use pizza dough- including wheat, or a gluten free, your call!
  • 1 package (8 oz reduced-fat cream cheese or neufchatel cheese or tofutti “cream cheese”, softened)
  • 1 cup light sour cream or Tofutti Sour Supreme sour cream substittute
  • 1 tablespoon of chopped dill
  • 1 tablespoon of chopped chives
  • 4 cups of chopped vegetables. Pick a rainbow of colors: I chose broccoli, asparagus, baby carrots, red and orange bell peppers, and corn kernels

Directions:

  1. Combine the sour cream, softened cream cheese, dill, and chives together. You can mix this up the day before to reduce your prep work.
    Chilled Vegetable Pizza recipe: Softened cream cheese, sour cream, chives and dill mixed together. Ok, maybe the cream cheese isn't as soft as it needed to be and I used my arm to further mush it
  2. Same thing with cutting all the vegetables into small pieces. That way, when it came for my get together that evening, I came home from work and just had to really assemble everything, and it took me less than 20 minutes! You can choose how you want your vegetables. For instance, for me the broccoli and bell peppers were raw. But, I steamed the asparagus, cut baby carrots, and corn.
    Chilled Vegetable Pizza recipe: Prepare your choice of beautifully colored vegetables to top your chilled vegetable pizza Chilled Vegetable Pizza recipe: Prepare your choice of beautifully colored vegetables to top your chilled vegetable pizza
  3. When you are ready to make the chilled vegetable pizza, take out the dill/chive cream cheese mixture to let soften again for spreading. Next, preheat the oven to 350 degrees F.
  4. Open the packages of crescent rolls. Unroll each can (8 triangular pieces of crescent roll) so they become one long rectangular sheet, or you can settle for two square sheets. Make sure that you pinch any of the pre-cut seams between the pieces so that everything will stay together. Put each one on a lined baking sheet.
  5. Bake for 10 minutes, and then remove the two baking sheets from the oven and let cool.  Remove and let cool for a few minutes so you won’t hurt yourself during the next step, which is spreading the dill/chive cream cheese mixture onto the crescent roll sheet.
    Chilled Vegetable Pizza recipe: After baking a crescent dough roll which was rolled out and pinched at the seams, spread the cream cheese/sour cream mixture
  6. Top with fresh veggies. Use a pizza cutter or knife to cut down to appetizer size pieces and serve! I did not refrigerate mine, since I barely finished before my co-host arrived, but you can chill it in the fridge if you’d like.
    Chilled Vegetable Pizza recipe: Veggie Crescent Bites with cream cheese/sour cream/dill and chives on crescent roll and topped with pretty veggies

I suppose I could have fancied it up by grilling flatbread to give it a bit of smoky flavor, and ooo done that with the corn too. But I didn’t. And it was still great, and continues my theme of super easy recipes this summer.

Oooo… or you could make this a dessert version using fruit and crème fraîche or marscarpone… the possibilities!

Summer Appetizer Recipe: Chilled Vegetable Pizza with dill/chive cream cheese mixture and broccoli, asparagus, baby carrots, red and orange bell peppers, corn kernels! Summer Appetizer Recipe: Chilled Vegetable Pizza with dill/chive cream cheese mixture and broccoli, asparagus, baby carrots, red and orange bell peppers, corn kernels!

Signature