I made all three of these vegetarian side dishes this past Thanksgiving, for the sake of nostalgia.
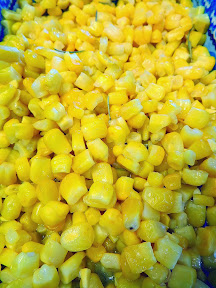
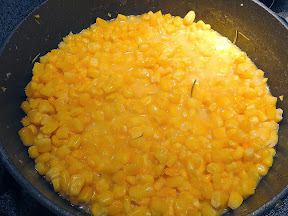
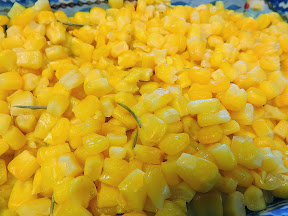
Growing up, the corn I had were either on the cob (which we boiled/steamed) or Green Giant Corn Niblets frozen boxes. Essentially, it’s just corn niblets in butter, but the butter sauce is slightly thickened. When I grew up, I learned about grilling corn, and I gave up the processed Green Giant that uses the additive of xanthan gum because it just seemed unnecessary with the cornstarch- and what is enzyme modified butter and why do I need annatto extract color?
Sometimes though, I still want to remember the days when my family attempted an American style Thanksgiving, albeit that by high school it was Boston Market that was providing us our meal, after a lineage of various grocery stores’ precooked items (my favorite that I remember was Auchon, though I have never quite forgotten the soft rolls from Cub Foods). My family was not really a turkey family- we were all about honey ham. I vaguely remember one time my mom bought sliced ham, and we were roasting each slice in the oven on a baking sheet, and we brushed each side with some sort of honey mixture. We only did that once (apparently we discovered we could just buy partial pre-sliced hams- thanks HoneyBaked Hams), but I loved the motion of brushing each piece lovingly.
Instead of the Green Giant original, I now use this Food.com Green Giant Corn Niblts in Butter copycat recipe every time, and can pick local sweet corn and I can make more since I can eat a whole box of the frozen stuff by myself thanks.
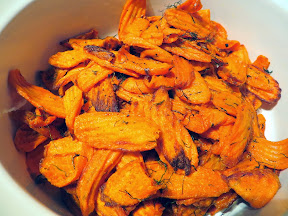
Meanwhile, my main experience with carrots were in TV dinners in my childhood, thanks to Banquet. My family had almost all Asian food, with the once in a while exception of spaghetti, everything else was usually prepared (varying from Gordon’s fish sticks to Micromagic cheeseburgers) so it was thanks to Banquet that I learned about meat loaf, chicken parmigiana, Salisbury steak, and pot pies.
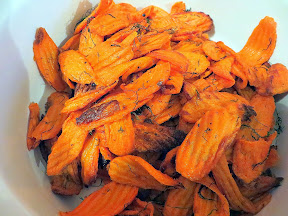
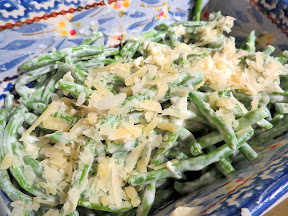
This recipe for roasted carrots brings back memories of those little super tender carrots in their little compartments with the little ridges, and the little inch long green beans cut in perfect tubes almost like pasta, but without the chance for mushiness for either (depending on how much you vented the TV tray!). I know it may not sound like an endorsement to say it brings back those nostalgia food of the 80s via TV Tray, but it is!! The recipe for the Sauteed Carrots are based from one from the Barefoot Contessa and the green beans from Sandra Lee’s Haricot Verts with Shaved Parmesan. Can you tell I was watching Food Network for a while?
All of these recipes yields enough for about 6 servings as a side dish.
Corn Niblets in Butter
Ingredients:
- 16 ounces of corn niblets (this equals about 1 bag of frozen corn, I like sweet corn but you can use any type you wish)
- 1 teaspoon salt
- 1/4 cup butter, cut up
- 1/2 teaspoon sugar
- 1/2 cup water
- 3/4 teaspoon cornstarch
- 1/2 teaspoon rosemary (optional)
Directions:
- Add corn to large sauce pan along with all ingredients except water and cornstarch.
- Stir corn mixture over medium heat until butter is melted.
- Combine water and cornstarch and stir until cornstarch is dissolved. Slowly add water to corn in sauce pan, stirring constantly.
- Reduce heat to simmer and stir occasionally, until corn is tender and sauce thickens. If you’d like, you can optionally add in a little ot of rosemary or other seasoning you’d like to additionally flavor the butter sauce.
Roasted Carrots with Dill
Ingredients:
- 2 pounds (6 cups) of carrots
- 4 tablespoons olive oil
- 1 teaspoon kosher salt + more to taste
- 1/2 teaspoon freshly ground black pepper+ more to taste
- 2 tablespoons chopped fresh dill + more to taste
Directions:
- Preheat the oven to 400 degrees F.
- If you bought the whole carrots, peel the carrots and cut them diagonally in 1/4-inch slices. Or if you’re into a Thanksgiving where you are drinking wine and eating cheese instead of cutting carrots, buy baby carrots or my favorite, already crinkle cut carrots.
- Toss the carrots in a bowl with the olive oil, black pepper, and salt. On two foil covered baking sheets, place the carrots flat, try not to have them overlap too much so they can be touching the baking sheet, lying flat on 1 layer. Roast in the oven for 20 minutes, turning them halfway through- you should be able to fit more flat because the carrots will shrink as they cook and brown. I admit I roasted mine for much longer because I was making mac and cheese and forgot what time I put them in, I just kept checking on them until they were as browned as I liked.
- Off the heat, toss with the dill. Sprinkle with salt and pepper and serve to taste.
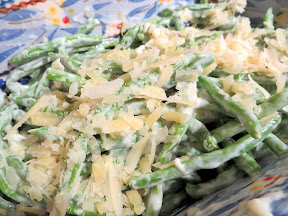
Green Beans with Shaved Parmesan
Ingredients:
- 3/4 pound ready-to-cook haricots verts/green beans
- 2 tablespoons sour cream
- 1 teaspoon lemon juice
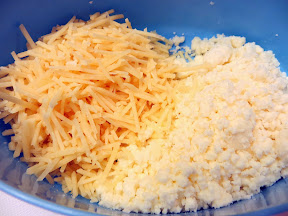
- 1/4 cup shaved parmesan cheese
- Freshly ground black pepper
Directions:
- Place the haricots verts in a large microwave-safe bowl. Cover and microwave on high for 5 to 7 minutes. Remove and drain, if necessary.
- In a small bowl, whisk together the sour cream and lemon juice. Pour over the haricots verts and toss to coat. Serve immediately with shaved parmesan and freshly ground pepper. I totally admit I used much more than 1/4 cup of parmesan.
Do you have simple side dishes like this that you make, thinking back to microwavable food memories?