Saison Beer Ricotta on Cucumber

Inspired by the Beeroness’ Homemade Beer Ricotta, for a beer potluck get together I decided to make this the third offering of beer cheese. I decided to make three times the amount in her version since I was feeding more and hers yielded ~1 1/4 cups of ricotta at the end. My usual ricotta recipe is with a half gallon of whole milk and pint of buttermilk, and I have never had to throw any away, so I figure more is better (so you’ll see a lot more yield in my photos). In the end, I only needed double of the original recipe to make about 45 slices from 2 cucumbers worth.
Saison Beer Ricotta on Cucumber

I then put the beer ricotta on sliced cucumbers as appetizers. For the beer, I used Portland U-Brew Saison, which was a citrusy addition to the creamy ricotta.

It is important that you don’t use Ultra-Pasteurized milk, because it does not have the important calcium chloride which is needed for coagulation and curds (the pasteurization process removes calcium). Whole milk is better because it will also taste richer, as the flavor of the cheese is related to the amount of butterfat in the milk.

Saison Beer Ricotta on Cucumber Slices

Ingredients:

  • 3 cups whole milk- use the best and freshest milk you can find
  • 1 cup heavy cream
  • 1/2 tsp salt
  • 1/3 cup Saison beer and also 2 tablespoons of Saison Beer separated for later
  • 3 tablespoons Lemon Juice, or you can use Apple Cider Vinegar or a combination of the two
  • 1 English cucumber
  • ground pepper to taste

Directions:

  1. Cheesemaking is 4 main ingredients: milk, heat, acid, and then extras (any additions like herbs or mold, or aging, or handling and atmosphere like pulling it, smoking, etc). So first, the milk and heat. Combine the 3 cups whole milk and the 1 cup cream and 1/3 cup of beer in a non-reactive pot and heat on your stovetop on medium.
    The Beeroness’s version puts the salt in now, but I held off until later to put it directly on the ricotta- your choice. I am accustomed to adding in the extras after the acid step because that’s when it is done with the steps to make a goat cheese chevre.
    making homemade ricotta
  2. Use a thermometer to track when the contents of your pot reaches 190 degrees F, stirring as you watch so avoid scorching, and scrape the bottom as you stir.
  3. As soon as you reach 190 degrees F with your milk/cream, immediately remove the pot from heat and add your acid, which is the apple cider vinegar/lemon juice. This is the acid to start the curdling process. Stir just a little to get the acid throughout your milk/cream, and then let the heat and coagulation process work.
    You will start to see the white chunks (curds) rise to the surface away from the yellowish part (whey). The Beeroness put in the 2 tablespoons of beer at this point, but I held off as I didn’t want to lose the beer in the whey.making homemade ricotta
  4. Next, time to separate the curds and whey. use a cheesecloth over a strainer such as a large sieve or colander over a larger mixing bowl. I happen to have both a large and smaller sieve so I lined the larger one with the cheesecloth folded in half, and used the smaller one to ladle the curd and whey mixture through the sieve as an initial drain of whey. Place the curds into the cheesecloth so that the curds will stick with the cheesecloth and the whey flow below to the bowl.
    This is the part where I added the salt and drizzled the saison, adding a small little bit with every layer as I ladled. Run your wooden spoon along the bottom of your pot to free up any stuck curds partway through the pour, and they may need to be scraped from your smaller sieve ladle.making homemade ricotta making homemade ricotta
  5. You can pull up on the sides of the cheesecloth to drain off any extra liquid, but don’t press on the curds. Gather the edges of the cloth and fasten them into a knot and over the bowl so the whey can continue to drain for at least another 15-20 minutes. The longer you let it drain, the more firm it will be instead of creamy.
  6. You can move to an airtight container and put in the refrigerator if you aren’t going to use immediately, and you should eat it within a few days while it is nice and fresh. Meanwhile, what I did was take my English cucumbers and slice them to about 1/3 inch thick. Remember your yield will be less than pictured because I upped the recipe for more yield.
    Saison Beer Ricotta on Cucumber Saison Beer Ricotta on Cucumber
  7. When the whey had finished draining from the cheese, I just spooned a smear onto each cucumber, and finished with a pinch everywhere of salt and ground pepper
    Saison Beer Ricotta on Cucumber Saison Beer Ricotta on Cucumber

I kept mine simple because I wanted the subtle taste of the saison to still be detected, but this cucumber and ricotta idea can certainly be further elevated by more additions on top, such as herbs or half a cherry tomato, etc! Meanwhile, since I had tripled this recipe, I still had a good leftover portion that I have been eating with pasta for dinner.

Signature

Beer Cheese Faceoff

In preparation for a beer potluck, I decided to try some of the recipes I've been saving that incorporate beer as an ingredient. The first of these is the simple beer cheese. You can use beer in your fridge that has been sitting around, leftover from not finishing the bottle, or just any beer you feel like trying flavor-wise. The orange-ness of the beer dip (thanks to the cheddar) also makes it an appropriate one for this Halloween time period.

Hidden Valley Beer Cheese Dip

This first one is courtesy of Hidden Valley, and is a recipe easily found on the internet but which I will repeat here. It normally will yield 24 ounces of dip total, enough for 6 people, but I increased and altered the recipe because I wanted higher yield for more people. I also used sour cream when increasing the recipe to give it more of a softer smoother consistency for actual dipping of soft pretzels and potato chips than cream cheese alone would have given. But, I did not increase the amount of mix in the recipe, trusting the beer to add enough flavor along with the original lower yield amount of Ranch mix.

Ingredients:

  • 2 8 ounce packages of softened cream cheese (I picked specifically Neufchatel Cream Cheese both because it is softer and less fat)
  • 1 16 ounce container of light sour cream or tofu “sour cream"
  • 3 cups freshly finely shredded sharp cheddar cheese
  • 1 package of Hidden Valley Original Ranch mix
  • 1/2-3/4 bottle of 12 ounce beer, based on desired taste/consistency
  • Optional: chopped green onions and bacon bits for garnish. I only used green onions, about 1/8 cup full.

 The steps are easy enough:

Directions:

  1. Combine cheddar cheese and cream cheese and sour cream and dip mix in a large bowl. Mix.
  2. beer cheese recipe

  3. Gradually stir in beer to desired consistency and taste. I happened to go with Kona Brewing Longboard Lager
  4. beer cheese recipe beer cheese recipe

  5. Chill in fridge at least overnight- the flavors improve with time, so can even wait 24 hours…
  6. beer cheese recipe

  7. Garnish optionally with the chopped green onions, bacon bits, a bit more sprinkle of cheese as desired. Serve with pretzels, crackers or vegetables. You can serve this hot or chilled.

Wynkoop Brewing's Beer Cheese Spread

In the other corner is a Beer Cheese Spread courtesy of Wynkoop Brewing Company of Denver, Colorado but which I got the recipe thanks to a Cooking with Homebrew article by Daria Labinsky at Brew Your Own, a homebrew magazine. The yield here of this recipe is 24 ounces.

Ingredients:

  • 6 ounces softened cream cheese
  • 6 ounces blue cheese, crumbled
  • 12 ounces sharp white cheddar cheese, grated finely and fresh (I used X-sharp cheddar, not white)
  • 1/4 cup minced green onions
  • 1 teaspoon paprika
  • 1/2 teaspoon celery seed – but I didn't have any and instead used ground coriander
  • 1/2 teaspoon ground black pepper
  • 1/2 teaspoon Tabasco sauce
  • 1/2 cup any full-bodied ale can be used. Its strong flavor can enough to stand up to the biggest, hoppiest beers, even a barley wine

Directions:

  1. Combine all ingredients except beer in the bowl of a food processor or electric mixer. Mix or blend until everything is well incorporated.
  2. beer cheese recipe beer cheese recipe beer cheese recipe beer cheese recipe

  3. Slowly add beer while processor or mixer is running. I used some Longboard Lager… but I had also drank from the bottle a bit, so then I switched it out to a beer that had come in a Sam Adams Seasonal Sampler pack that I didn't think was special enough to need to savor on its own, the Sam Adams Boston Lager.
  4. Place mixture into a crock or serving bowl, and chill for at least 2 hours. You can serve this heated or cold, but if served cold I recommend letting it sit for a little bit to soften. This is a spread so is really chunky and thick (at least the way I had it, room temperature/chilled), and great for spreading on bread- not for dipping- as long as it's not so hard that you are tearing your soft fresh bread.
  5. beer cheese recipe beer cheese recipe

So how did these two do? Well first of all, I have to say this was a ridiculous night of making these. My cheap blender couldn't handle the thickness of the cream cheese. Meanwhile, my Ninja Mixer blades didn't turn anymore when I put the motor on top because the plastic parts had worn down too much. And my Kitchenaid mixer only works for a certain amount of time before the motor burns out and it has to take a nap for 30 min.

That explains a bit why in some of the pictures, you see everything being moved from container to container. After working out with weights earlier in the day, and then shredding all that cheese, my arm was not loving all the hand mixing. It was frustrating but in retrospect comedic how all the mixing mechanisms I had in the kitchen failed all in one night.

As mentioned, the beer dip is a softer consistency, so is great for literal dipping of chips, pretzels, etc as it will not break the "vehicle for cheese" so seems more versatile than the spread. However, the beer spread definitely has much more depth in flavor thanks to the 3 cheeses and hint of heat, even if you need to use a utensil to spread it on the baguette slices.
beer cheese recipe beer cheese recipe

In terms of highlighting the beer ingredient, the beer spread has a flavor that overpowers a light beer- if I make it again I would definitely use a much darker, stronger tasting beer than a lager. The beer dip though worked perfectly with the Longboard Lager, and I can definitely taste the beer woven in the flavor, I think partially because of the reduced ratio of the Hidden Ranch in the recipe (which I found a bit salty at the original recipe's ratio for my taste), and because the (tofu) sour cream adds just a bit of light flavor that would have been too heavy if I had only used cream cheese.

The cheesiness of the beer spread is very high, if you are a cheese lover, and it has a nice tang from the mix of cheeses. Though, dipping is an easier party gathering option than spreading (which requires a utenstil, rather than a carb vehicle for dipping). The beer dip list of ingredients is definitely a better value pricewise as part of your grocery bill, as well as a value in making more for a crowd. Also keep in mind if not everyone likes blue cheese, the beer dip may be a safer bet.

Signature

Cheese Soufflé 101

Soufflés have a reputation of being difficult, but there are only two things you need to be concerned about. Both relate to timing.

First, you need to keep the egg whites as full as air as possible so don’t overmix and as soon as the egg whites have been beaten, you want to quickly get it into the soufflé and into the oven.

Second, it doesn’t look quite as nice if you wait too long to serve it, so timing the prep and cooking time so you can immediately eat your soufflé with your family/guests when done is important before it deflates too much. I like these as a nice lazy Sunday activity, so I only have to worry about myself and I don’t care about deflation. Though, you can also cover up deflation with sauce or cheese or other such toppings, so not really worth sweating over anyway- the only thing you’ve lost is the ability to impress with its looks- it will still taste fine!.

I decided to make soufflés for the first time because it was somewhat fresh on my mind after a Dr. Who episode (Asylum of the Daleks) in which one of the characters made soufflés.  I also had some leftover cheddar from making some beer cheese (upcoming post). I have read in several places that you can make the base of a soufflé a day ahead and refrigerate it, stopping before adding the egg yolks. Just reheat your roux a bit the next day if premade to loosen it before whisking the egg yolks in and continuing on in.

This recipe is enough for 6 servings (usually the rule of thumb is 1 egg per serving). There are plenty of recipes out there that combine more interesting flavor combinations of ingredients, but in my case since I was trying to use up some eggs and cheese leftover from other recipes, so kept it simple. You can definitely reduce this to 2, 3, and 4 egg variations as well.

Ingredients:

  • Enough butter to butter the size and bottom of your soufflé container(s), plus 3 tablespoons of butter for the soufflé itself
  • 3 tablespoons all-purpose flour
  • 1-1/2 cups milk
  • 1/2 teaspoon kosher salt
  • 1/2 teaspoon freshly ground black pepper
  • 1/4 teaspoon cayenne pepper or other spicy addition (I used chili powder)
  • 1/4 teaspoon ground nutmeg
  • 2  cups lightly packed freshly grated cheese, in this case I used extra-sharp aged cheddar (8 ounces). I like freshly grated rather than that from a packaged because it has more flavor and the ones in the bag seem to have additives to them that coat the cheese.
  • 1/4 cup finely grated fresh Parmigiano-Reggiano, plus enough (a couple tablespoons at most) to dust the inside of your soufflé container(s)
  • 6 egg yolks
  • 7 egg whites
  • 3/8 teaspoon cream of tartar or lemon juice (optional- I did not use this)

Directions:

  1. First, an hour or so in advance take out your eggs and separate the yolks from the whites. This step is because it is easier to separate the yolk and whites when the eggs are cold, but the egg whites whip up better for step 8 at room temperature. You can return the egg yolks to the fridge, but let the egg whites stand out, covered, on the counter.
    Also, even though I have an egg separator, I never use it. I still always use my hand to separate eggs, letting the whites run through my fingers and wondering how fertilized versions of these form into fluffy chicks (or any other form of life starting from an egg) as the snotty-like whites drip. It’s both messy and gross while simultaneously filling me with wonder.
    alt=
  2. Butter the bottom and sides of an 8-cup round ovenware dish or two 4-cup round dish, or multiple small 1-2 cup dishes, whatever round container dish you may be using. Make sure that it is round, and that there is at least 1/2 inch from where the souffle will be and the top of the container so it can rise the 2-3 inches in the baking process. Some people actually place them in smaller containers in order to show off the rise more.
    After the buttering, then dust it with the grated Parmesan (turn it on its side and sprinkle the grated cheese through your fingers as you rotate the container). You want this ready because once you get to the get to the egg white step, you want to be able to get it in the oven with as much air as possible.
    alt=
  3. Heat the oven to 375 degrees F – you will need it to be ready temperature wise before you add in the egg whites. Grate or shred your cheese if you haven’t already. With fine grated cheese I can use my measuring cup, but for shredded cheese I prefer my digital scale (ok, this is the first time I’ve used it, but it was awesome!) since different cheeses may pack differently.
    alt= alt=
  4. In a medium saucepan, melt the 3 tablespoons butter over low heat. Then, add the 3 tablespoons of flour and whisk until smooth and a light tan- now you have a roux from your equal parts fat (butter) and flour.
    alt= alt=
  5. Meanwhile, microwave the milk for 45 seconds so it is slightly warm but not too hot to the touch. Pour in the milk into the flour and butter, whisking constantly. Bring the sauce to a very gentle boil and cook, whisking frequently, for 2 to 3 minutes until thickened.
    Use the coat the back of the spoon test for this- if you put liquid on the back of the spoon, hold it vertically and draw a line, the liquid should not run because it has enough tension and thickness to not cross that drawn line. This is a béchamel sauce, one of the mother sauces of French cuisine.You’ve got the basic foundation for white sauce for many recipes!
  6. Remove the heat from the pan. Whisk in the nutmeg, cayenne, salt and pepper, then slowly in steps add the cheese so it is melted- so now you have turned your béchamel sauce into a Mornay sauce (Béchamel with cheese).  Yes, you’ve made roux and now béchamel and mornay on your way to make your soufflé, leveling up your experience in  French cooking a la the videogame Cooking Mama…
    This is the point to taste and make sure it is very well seasoned as you are about to add the eggs which are going to be for texture, not taste. Remember the egg addition will dilute the flavor a bit, so overseason to account for this.
    alt= alt=alt=
  7. Make sure this mixture is not very hot, as you don’t want the egg yolks to scramble or temper at all and ruin the texture when you whisk in the egg yolk. After that you may even want to set it aside a little longer until the mixture is lukewarm.
  8. As an extra note, if you want to add more to your soufflé – let’s say bits of bacon or ham, or pre-cooked spinach, broccoli florets, etc, this is where you would do so.
  9. Ok, it’s time for the important egg whites. The oven should have reached the right temperature by now before this final whisk, because this is going to go down quickly! Is it ready? Ok! Next, in a large bowl, whip the room temperature egg whites, slowly at first until they’re quite foamy, and then increase the speed (an electric mixer can really help out your whisking arm) . Whip until thick defined peaks form and then stop (otherwise you will start making it look like a meringue). I know some people use cream of tartar or lemon juice, both acids, to further fluff their whites but I did not use it (just use 1/8 teaspoon for every 2 eggs).
    alt= alt=
  10. Hopefully by now your cheese sauce has reached room temperature as well. Put a 1/4 of the egg whites into the cheese sauce and fold the two together once. Turn a quarter turn and repeat, scooping from the bottom and just gently folding the mixtures together from one side to your other hand to preserve as much volume as possible.
    Put in the next quarter of egg whites, and repeat the casual folding and turning, until all the whites are added. You do not need to worry about blending all the whites streaks, remember the key is to add and keep as much air as possible. You are barely mixing the two together, it does not need to look homogenous.
  11. Gently pour the soufflé batter into the buttered mold. Now I forgot this step, but you can use a knife to flatten and swirl the top of your soufflé and then depress all around the edges by the dish so when it does rise, it will have a center plateau like in those professional versions. I was getting hungry and just put it straight into the heated oven after the pour.
    Oh well- it pretty much gets destroyed when you dig in for your serving anyway, so its a brief moment of fluffy looking loveliness- and is also why I don’t know why people make such a big deal about it looks a bit deflated, though I do understand the accomplishment of making something that looks so professional and you have heard for so long is difficult (say, Beef Bourguignon, which sounds both delicious and so classic but is really an insane amount of work for a beef stew). As you can see from this recipe for soufflé though, it is more straightforward as long as you pay attention to the timing.
    As I had mentioned before, toppings can help make it look more attractive, and it should still be fluffy and light inside for actual eating. I actually was a bit charmed how mine sort of reminded me of a hot cross bun, or a volcano, either way it was teasing me by showing me its airy cheesy insides as a tease.
  12. Cook until the soufflé is a golden brown on the top, approximately 22 to 30 minutes. I don’t know if this is true enough, but I’ve heard to not open the oven for the first 20 minutes or the soufflé may fall. If you insert a knife it should come out clean so you know the liquid has cooked through. For smaller bowls, I have put it in a pan and then poured water in the pan so that it goes up halfway up the smaller dish.
    alt= alt=

It will deflate as you take it out of the oven, and then continue to further do so over time, so you want to serve this immediately. To serve, you probably want to put your soufflé dish on a platter, with a towel underneath the soufflé dish.

Consider serving your soufflé with some fresh crusty french bread and a bright salad, and a French wine, or try it topped with a tapenade or salsa. I went with a citrusy berry beer that happened to be on sale at the grocery store, Leinelkugel Lemon Berry Shandy, a Weiss style beer with blackberry juice and lemon flavor, and topped my serving of soufflé with more grated Parmesan and chopped green onion.

alt= alt=alt="cheese alt= alt= alt=

Signature

Hash Brown Casserole

My kitchen remodel is finally done! It looks great- now instead of all the white which always had me looking around to wipe up food stains and splatters and spills, I can relax with the darker tone. I also love the Cambria quartz countertop, so much more useful than the countertops we got with the house in that they are so easy to clean and keep clean and can be used as a great workspace since it is a harder surface. Unlike granite it is also more durable, while still looking like beautiful natural stone (it actually is a combination of natural quartz and man made extras) and without worrying about sealing it.  And, the best part of which was part of the costs of the countertops was gifted by Floform Countertops!

Yes, that’s right! I had entered their national contest hoping to win their grand prize, which included both a kitchen remodel and a catered party, but I was so excited to have won a secondary price which was a generous credit towards countertops. Even when we were purchasing the house, a kitchen update has been on my wishlist. One thing led to another as we were looking at our many countertop options, and we went from just replacing our wine stained white countertops to wanting better looking cabinets to go with the beautiful quartz.

And then we decided on redoing our floors so we had more flexibility in our cabinet layout (particularly the “island” which was meant to have breakfast stools was never used that way, and we wanted more depth for in-cabinet garbage cans) and which would be more comfortable to stand on and clean than old Italian terra cotta tiles, some of which were cracked from the previous owners. And, we repainted the kitchen walls a “Butter Up” yellow.

Amazing what those countertops inspired us to do because they were so elegant. Here are before and after pictures of the previous green walled, white kitchen to the new look. I particularly love how we have so much more room for all our beverage glasses…

Hash Brown Casserole, a breakfast casserole that feeds a group and is vegetarian and easy Hash Brown Casserole, a breakfast casserole that feeds a group and is vegetarian and easy
Hash Brown Casserole, a breakfast casserole that feeds a group and is vegetarian and easy Hash Brown Casserole, a breakfast casserole that feeds a group and is vegetarian and easyHash Brown Casserole, a breakfast casserole that feeds a group and is vegetarian and easy Hash Brown Casserole, a breakfast casserole that feeds a group and is vegetarian and easy

During the kitchen remodel though, I was out of a kitchen for 5 months, from late spring to early autumn! Oh well. At least now I love coming into my beautiful new kitchen! During the kitchen outage though, there were some ingredients that just sat around since the stove and oven were unavailable, and when I unpacked everything back into my new cabinets I started to realize I needed to start using some of these pantry items up soon before they expired.

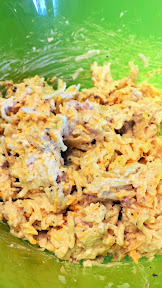
Some of these ingredients included some dehydrated dried hash browns from Costco, panko bread crumbs from Trader Joes’s, a can of condensed Campbells cream of chicken soup, leftover Mexican shredded cheese from a taco dinner, and some corn kernals in the freezer. What immediately came to mind was this recipe, which I have seen passed around on several websites, a copycat recipe for Cracker Barrel’s Hashbrown Casserole. I’ve only been to Cracker Barrel’s once, and I didn’t even have the Hash Brown Casserole when I was there, but I’ve seen the signs and saw rave reviews for it, so was curious to try it anyway.

Ingredients:

  • 2 pounds frozen hash browns, thawed (my package had 24 oz, and was dried and I had to use water, but I used it anyway)
  • 1/4 cup olive oil
  • 2 cups corn kernals. The original recipe uses 1/2 cup chopped onion, but I didn’t have any on hand but I did have corn, and I upped the amount since I was using 24 oz of hash browns.
  • 1 tablespoon butter
  • 1 can (10.75 ounces) condensed cream of chicken soup + 1 can of water (the recipe just calls for 1 can of regular cream of chicken, but I only had condensed. This is going to make my version more mushy)
  • 8 ounces sour cream, though you can also use tofu sour cream or yogurt as a substitute
  • 1 cup grated colby cheese, although I used reduced fat shredded Mexican Cheese instead
  • 1/4 cup panko bread crumbs – or you can also use crumbled potato chips or crunchy onion

Directions:

  1. Preheat oven to 400 degrees F. Spray 11 x 14 inch casserole or baking dish with cooking spray.
  2. Fry the hash browns until they are crispy in a pan with the olive oil (I put in half the olive oil to cook the first side, and then the second half for browning the second side of the hash browns). Remove and put into an even layer in the casserole dish.
    Hash Brown Casserole, a breakfast casserole that feeds a group and is vegetarian and easyHash Brown Casserole, a breakfast casserole that feeds a group and is vegetarian and easy
  3. Meanwhile, I used the same hot pan right after removing the hash browns to pan fry the corn until a little burnt with the 1 tablespoon of butter.
    Hash Brown Casserole, a breakfast casserole that feeds a group and is vegetarian and easy
  4. Combine all the ingredients (except the hash browns and panko) and stir together. Pour the mixture on top of the hash browns in the casserole dish. Top with the panko.
    Hash Brown Casserole, a breakfast casserole that feeds a group and is vegetarian and easy Hash Brown Casserole, a breakfast casserole that feeds a group and is vegetarian and easy Hash Brown Casserole, a breakfast casserole that feeds a group and is vegetarian and easy
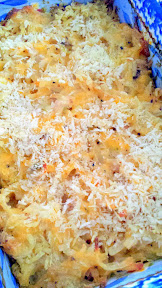
  5. Bake for 45 minutes until top is golden brown. Let cool for 15 minutes so when you cut the casserole it will stay more together as wedges.
    Hash Brown Casserole, a breakfast casserole that feeds a group and is vegetarian and easy Hash Brown Casserole, a breakfast casserole that feeds a group and is vegetarian and easy

Other twists you can add into this casserole is adding meat (Italian sausage particularly comes to mind), or some spiciness or other veggies (especially that which could add some crunch- such as adding chopped celery) and chopped nuts, it is very versatile and I can see it as a good base for many side dish variations. Who says hash browns are only for breakfast?

When I had my piece, I sprinkled a little bit of crushed red pepper on it and ate it in front of the tv, cuddled under a blanket with my kitty while F was out of town for work. Other pieces were fine during the rest of the week warmed up for lunch. Serves as a side dish 6 people.

Hash Brown Casserole, a breakfast casserole that feeds a group and is vegetarian and easy

You can also halve this recipe, and do it without the corn, as in below for just the 2 or 4 of you!

Hash Brown Casserole, a breakfast casserole that feeds a group and is vegetarian and easy Hash Brown Casserole, a breakfast casserole that feeds a group and is vegetarian and easy Hash Brown Casserole, a breakfast casserole that feeds a group and is vegetarian and easy
Hash Brown Casserole, a breakfast casserole that feeds a group and is vegetarian and easy

Signature

Wedge 2012

The Portland Celebrates Cheese Festival “The Wedge” was back this year on the streets just outside Green Dragon. At a requested $5 donation to benefit the non-profit Oregon Cheese Guild, the entrance to this tasting farmers market of 25 cheese and artisan producers of the Northwest, as well as being able to enjoy in the street “beer garden” music and beers from Green Dragon/Buckman Brewing is well worth it. In addition, Murray’s Cheese from New York (now experimenting with mini-stores at three local Fred Meyers) was offering 3 Cheese Seminars. Unlike last year where from entering the festival it seemed like I was in a neverending line from booth to booth, this year the festival was more organized and spread out, so that I could easily skip and move booth to booth, with never more than a handful of people between me and cheese samples.

Since I love cheese so much, I was already pretty familiar with most of the cheese producers present as I am already a customer at the Farmers Market or the grocery store. It is still a great opportunity to sample cheeses from these vendors that you may have seen and wondered about, try samples from their offerings that are not available to try before you buy (for instance Fraga Farm Goat Cheese and Willamette Valley Cheese had all their cheeses available to sample this day) or try new cheeses they didn’t know they produced. The vendors also are selling the cheeses so you can do your cheese market shopping at the same time! Next time I think I will be more prepared and bring a little cooler bag.
Tillamook Loaf little van  cheeses from Willamette Valley in the case they brought for their boothLa Mariposa cheese has Argentinean roots La Mariposa cheese has Argentinean roots Portland Creamery sells theirs in pretty small packagesfresh cheeses of Bellweather Farms

New to me was trying out the Cheese Plate PDX food cart, as they were offering tastes of their own homemade crackers along with their own fromage fort and fruit or Cavi-art Seaweed “Caviar”. Meanwhile, although I have loved Tumalo Farms Pondhopper cheese as it is spiced with beer, I found a new crush on their nutty Classico. I also enjoyed the sweet burn of Ssmith’s Hot Pepper Sensation “Merlot” spread. Definitely filing all these away for the future.

My favorite cheese vendors of the day were 1. Fern’s Edge Goat Dairy who I believe offers the best local chevres, though they are only at a few select local retailers. Their Apricot–Honey Chèvre, Pear Anise Chèvre, Blueberry Ginger chevre, and my favorite of them all the Fig Walnut Sweet Chèvre with fig, walnut, honey, offer a lot of depth of flavor along with the creaminess of the goats milk cheese that is better than any flavored cream cheese ever. 2. Cypress Grove and their always dependable tasty cheeses, such as Midnight Moon, Humboldt Fog, Truffle Tremor, and a new dill goat cheese called PsycheDillic that uses dill pollen.

The seminars from Murray’s cheese included including one for beer and cheese pairing, one to educate you on the cheeses of the NorthWest region, and how to complement your cheeses with honey, jams, nuts and fresh fruits to make a killer cheese plate experience. I went with the beer and cheese pairing one, which was a partnership of Murray’s with Rogue.

I loved that they gave out a little packet of class notes that we could write on, and best of all, which included a section of different adjectives to describe cheese and tips about how salt reinforces bitter (so you want to put saltier cheeses with sweet), pairing the beverage and cheese so they have finishes of similar lengths. The “what grows together goes together” might be a bit more difficult beer wise as a theme, but would be great for wine and cheese pairing. The matches that we tried and discussed included

  • Good Chit Pilner with Mt Townsend Creamery Cirrus
  • Morimoto Soba Ale with River’s Edge Chevre Siltcoos
  • Ore-gasmic Ale with Rogue Creamery Hopyard Cheddar
  • Chipotle Ale with Willamette Valley Brindisi
  • Chocolate Stout with Tumalo Farms Pondhopper
  • Hazelnut Brown Nectar with Rogue Creamery Smoky Blue

Rogue Ales also hosted a Grilled Cheese Bar station that offered 3 artisan cheeses for the ultimate Grilled Cheese Sandwich: Rogue Creamery Oregon Blue, Rogue Creamery & Rogue Ales collaboration of Rogue Hopyard Cheddar, and Portland Creamery’s Oregon Chevre. Paired with a couple more beers from Green Dragon, it was a perfect finish.

Signature