Elote Pasta Salad

I had some leftover light sour cream from making the Chilled Vegetable Pizza, and it happened to be about 1/3 cup. Immediately I was able to rationalize making a version of another Pinterest recipe I had pinned in the same board, Mexican Street Corn Pasta Salad from the blog Cinnamon, Spice and Everything Nice. Mmmm Elote Pasta Salad.

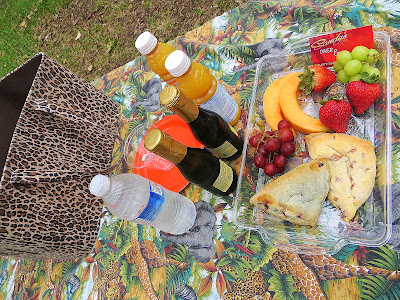
I am a huge fan of elote- I first had it when I lived in Chicago, from the New Maxwell Street Market which actually is not on Maxwell street anymore since being relocated (twice!), but still offers an international array of goods in an open market on summer Sundays that is a mix of flea market with Asian and Hispanic vendors and also Mexican street food fair.

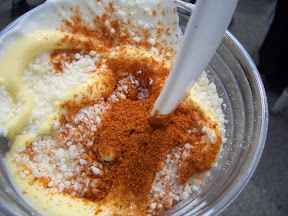
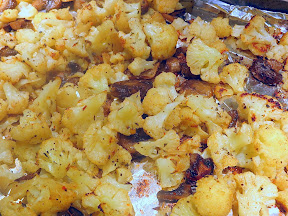
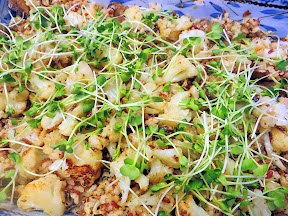
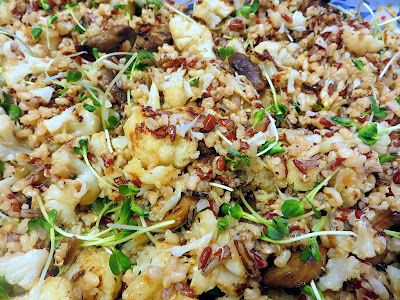
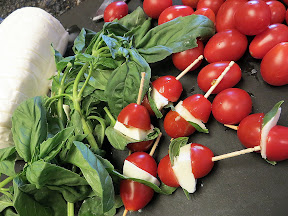
Examples of Elote from my past… the first set of 4 are actually from the New Maxwell Street Market in Chicago, the next two from the farmers market at Pike Place Market in Seattle, and the last from Elote Cafe in Sedona. I wanted to combine the stronger bursts of flavor from those two market experiences with the less scary visual presentation of the last one.
5/18/2008 New Maxwell Street Market, where I saw a few people ordering this roasted corn. You could have it two ways- with the stuff rolled on the cob, or they could cut the corn from the cob and serve it to you in a cup. I chose the latter. You could choose which corn you wanted, lots of black or not so much... 5/18/2008 New Maxwell Street Market what the corn looks like rolled in the butter cheese and chile when still on the cob. 5/18/2008 New Maxwell Street, my roasted corn in a cup, topped with everything: mayo, cheese, parkay butter and chile, for $2 5/18/2008 New Maxwell Street Market, don't know why they were surprised I asked for the chili- what, I can't take it? I totally can, no sweat. It was the mayo and butter that I paused at but since that's how the other people in line had it, so did I.  Elote in progress at the Pike Place Market in Seattle in 2009 Elote at the Pike Place Market in Seattle in 2009 Sedona's Elote Cafe's Elote= Fire roasted corn with spicy mayo, lime and Cotija cheese

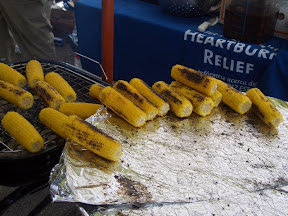
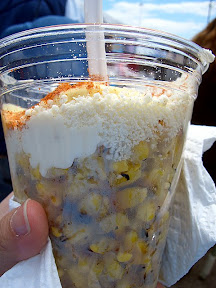
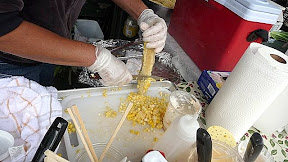
Elote is a popular street food in Mexico that consists of corn on the cob that is grilled and then slathered with mayonnaise, sour cream, Cotija cheese, lime juice, salt and spices, and sometimes liquid margarine. F rolls his eyes when he sees me making a beeline for this because of the ingredients, but the flavors are irresistible. You can eat this messily from the cob, or also ask them to cut the kernels into a cup to eat with a spoon for a little less messy face.

It’s hot and smoky from the grill, but creamy from the mayo sour cream mix, a bit of salt from the well salt and cheese, and has a brightness from the lime juice and maybe a bit of spice depending on the amount of chili. For my version I upgraded the call for chili powder or cayenne pepper with ground chipotle chili for more spice and smoke in the flavor profile. And, at least there is no liquid margarine. I adapted the recipe also because didn’t have corn on the cob, but I had some frozen corn kernels and took a cue from Esquites which is similar to elote but using pan roasted corn.
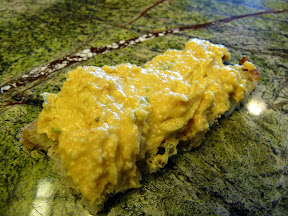
Elote Pasta Salad

Elote Pasta Salad - mixing pasta, pan roasted corn, cotija cheese and avocado Elote Pasta Salad - mixing pasta, pan roasted corn, cotija cheese and avocado

Ingredients:

  • 8 ounces pasta
  • 1/3 cup mayonnaise
  • 1/3 cup sour cream
  • 1 tablespoon chile powder or cayenne pepper, or 2 teaspoons of ground chipotle chili
  • The juice from one lime and the zest, or about 2 tablespoons and 2 teaspoons of lime juice
  • 1 tablespoon olive oil
  • 3 cups corn kernels
  • 1 diced avocado
  • 1 cup Cotija cheese, crumbled. You can also use Parmesan, Asiago, or Feta but may want to reduce the amount since the cheese flavor is more intense.

Directions:

  1. First, the pasta. Cook it the normal way in your favorite pot with boiling salted water.You can use any type of pasta you would like, but get one that has a lot of ridges that can hold the dressing- rotini, radiatore, fusilli, and I like little scoopy conchiglie shells or ditalini small tube too
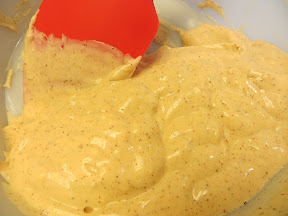
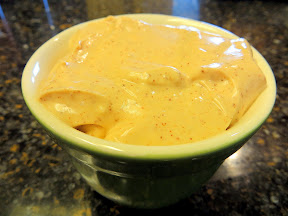
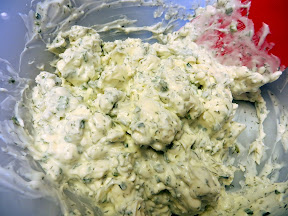
  2. While the water is boiling/pasta cooking, create the elote dressing. Mix together the mayonnaise, sour cream, chili, lime until smooth. Once the pasta is al dente and rained, put one tablespoon of this dressing into the pasta and stir so all the pasta is coated and won’t stick to each other. Then I put the pasta, as well as the rest of the dressing, into the refrigerator to chill.
    Elote Pasta Salad - elote dressing with the  mayonnaise, sour cream, chili, lime Elote Pasta Salad - elote dressing with the  mayonnaise, sour cream, chili, lime
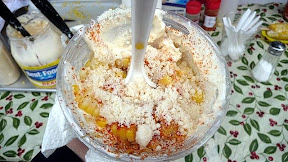
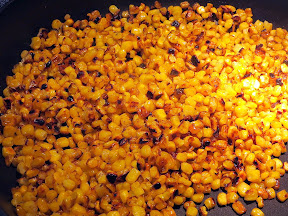
  3. Now, the corn. Heat the olive oil in large nonstick skillet over high heat. Once the oil is hot, add the corn. Cook 5 to 6 minutes without moving or until corn starts to char. Then toss corn, stir, and repeat to let the corn brown on both sides.
    Elote Pasta Salad - pan roasted corn kernels in process
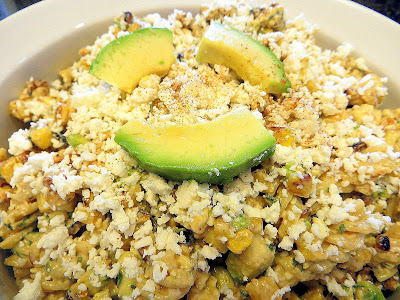
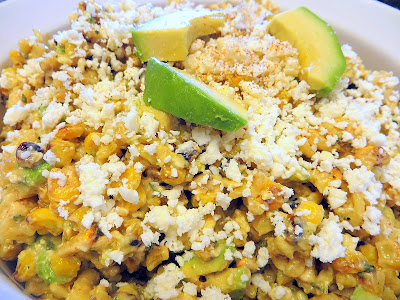
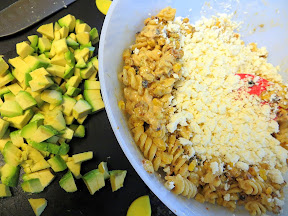
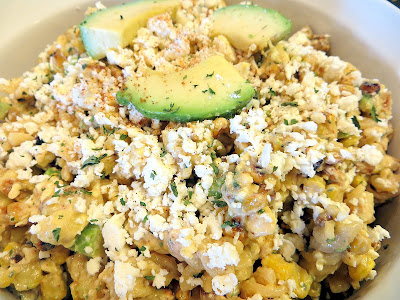
  4. The easy part is now just bringing all these together. Add the pasta and corn together. Add the dressing a little at a time, mixing gently to coat as you go, until you achieve  your desired flavor mix. Gently toss in the avocado and cheese. If you’d like, top with a dusting of the chili powder and bit more of the crumbled Cotija cheese, and garnish upon serving with a lime wedge.
    Elote Pasta Salad - mixing pasta and corn in elote dressing, cheese and avocado are next Elote Pasta Salad - mixing pasta and corn cheese and avocado in elote dressing

You can make this without the pasta of course, but this made for a nice summer lunch dish for F and I.


Elote Pasta Salad recipe, vegetarian, summer recipe, easy recipe, pasta salad, picnic recipe, avocado, corn salad Elote Pasta Salad recipe, vegetarian, summer recipe, easy recipe, pasta salad, picnic recipe, avocado, corn salad

Signature

Potluck Appetizer Recipe: Chilled Vegetable Pizza

This recipe for a Chilled Vegetable Pizza appetizer was for a weekday wine potluck in August. It was inspired by a photo/recipe on Pinterest from Mom on Timeout for Veggie Crescent Bites, though a guest mentioned that it also looks like a Pampered Chef Cool Veggie Pizza creation, and there is a similar recipe on the Pillsbury site for Easy Crescent Veggie Pizza!

Wherever this Chilled Vegetable Pizza recipe came from, I love the bright colors of the vegetables. And, I love dill, so making this with the dilly cream cheese spread was right up my alley, though I suppose you could up the vegetables by using a vegetable cream cheese, or ranch it up (as in this version at AllRecipes)!

Summer Appetizer Recipe: Chilled Vegetable Pizza with dill/chive cream cheese mixture and broccoli, asparagus, baby carrots, red and orange bell peppers, corn kernels!

You can probably use any base you would like for your “flatbread” bottom of the vegetable pizza, including actual pizza dough, but I followed her lead in pinching together reduced-fat Pillsbury Crescent Rolls. This made two pizzas, and using a pizza cutter I was able to cut about twenty four 3-bite sized square slices from each pizza, so overall this yielded 48 little appetizer bites of Chilled Vegetable Pizza from this entire recipe.

Ingredients:

  • 2 cans of reduced-fat Pillsbury Crescent Rolls, or use pizza dough- including wheat, or a gluten free, your call!
  • 1 package (8 oz reduced-fat cream cheese or neufchatel cheese or tofutti “cream cheese”, softened)
  • 1 cup light sour cream or Tofutti Sour Supreme sour cream substittute
  • 1 tablespoon of chopped dill
  • 1 tablespoon of chopped chives
  • 4 cups of chopped vegetables. Pick a rainbow of colors: I chose broccoli, asparagus, baby carrots, red and orange bell peppers, and corn kernels

Directions:

  1. Combine the sour cream, softened cream cheese, dill, and chives together. You can mix this up the day before to reduce your prep work.
    Chilled Vegetable Pizza recipe: Softened cream cheese, sour cream, chives and dill mixed together. Ok, maybe the cream cheese isn't as soft as it needed to be and I used my arm to further mush it
  2. Same thing with cutting all the vegetables into small pieces. That way, when it came for my get together that evening, I came home from work and just had to really assemble everything, and it took me less than 20 minutes! You can choose how you want your vegetables. For instance, for me the broccoli and bell peppers were raw. But, I steamed the asparagus, cut baby carrots, and corn.
    Chilled Vegetable Pizza recipe: Prepare your choice of beautifully colored vegetables to top your chilled vegetable pizza Chilled Vegetable Pizza recipe: Prepare your choice of beautifully colored vegetables to top your chilled vegetable pizza
  3. When you are ready to make the chilled vegetable pizza, take out the dill/chive cream cheese mixture to let soften again for spreading. Next, preheat the oven to 350 degrees F.
  4. Open the packages of crescent rolls. Unroll each can (8 triangular pieces of crescent roll) so they become one long rectangular sheet, or you can settle for two square sheets. Make sure that you pinch any of the pre-cut seams between the pieces so that everything will stay together. Put each one on a lined baking sheet.
  5. Bake for 10 minutes, and then remove the two baking sheets from the oven and let cool.  Remove and let cool for a few minutes so you won’t hurt yourself during the next step, which is spreading the dill/chive cream cheese mixture onto the crescent roll sheet.
    Chilled Vegetable Pizza recipe: After baking a crescent dough roll which was rolled out and pinched at the seams, spread the cream cheese/sour cream mixture
  6. Top with fresh veggies. Use a pizza cutter or knife to cut down to appetizer size pieces and serve! I did not refrigerate mine, since I barely finished before my co-host arrived, but you can chill it in the fridge if you’d like.
    Chilled Vegetable Pizza recipe: Veggie Crescent Bites with cream cheese/sour cream/dill and chives on crescent roll and topped with pretty veggies

I suppose I could have fancied it up by grilling flatbread to give it a bit of smoky flavor, and ooo done that with the corn too. But I didn’t. And it was still great, and continues my theme of super easy recipes this summer.

Oooo… or you could make this a dessert version using fruit and crème fraîche or marscarpone… the possibilities!

Summer Appetizer Recipe: Chilled Vegetable Pizza with dill/chive cream cheese mixture and broccoli, asparagus, baby carrots, red and orange bell peppers, corn kernels! Summer Appetizer Recipe: Chilled Vegetable Pizza with dill/chive cream cheese mixture and broccoli, asparagus, baby carrots, red and orange bell peppers, corn kernels!

Signature

Potluck Dish: Quinoa with Roasted Cauliflower and Mushrooms

Attending a neighborhood potluck/bbq earlier this month, I signed up for a vegetarian main dish that could feed the possibly 24 people who had signed up as a yes. The potluck/bbq was occurring on a Thursday evening, a night which I also have a regular scheduled call with someone at work in India after my normal full work day, so I wanted something that was very easy to prepare. I love sharing food to entertain, but mentally I just haven’t wanted to “cook” as much and seem to keep picking recipes that are more prep heavy than on cooking execution. This is pretty much why you never see any dessert recipes- I am NOT a baker. I always admire the photos and how beautiful they are, and then my eyes glaze over when it comes to the recipe portion, much less the directions. Heh heh, glaze…

At the same time of wanting something easy to make, I wanted it also be healthy, as well as satiating since I was unsure there would be enough hearty filling food for those who are vegetarian. Besides, all omnivores can always eat a vegetarian dish: it’s a win win for everyone. I had a few options to choose from, and then let F select the final dish. This recipe for quinoa with roasted cauliflower and mushrooms was the winner.

Quinoa with Roasted Cauliflower and Mushrooms

I quadrupled up on the Quinoa with Roasted Cauliflower and Mushrooms recipe in order to make enough, and when I brought it back there was probably only enough for two servings left! The original recipe makes enough for 4-6 depending on whether it’s a main or side, and what you see below is what I used to make enough for a crowd at a potluck. This is a very adaptable recipe based on your own tastes and preferences.

Quinoa with Roasted Cauliflower and Mushrooms

Weather-wise, it was one of the few days this summer where we have had rain in Portland, and it was because of that a little bit cool, so I thought having the dish hot (it could be served cold as well) was the way to go. The leftovers were great the next day, and even the next day after that, just eaten cold straight from the refrigerator!

Ingredients:

  • 2 cups of Quinoa, or a Sprouted rice and quinoa blend like I used that included sprouted brown and red rice, quinoa, and wild rice from truRoots
  • 1 1/2 to 1 3/4 stock or water- see directions on your quinoa
  • 2 heads of cauliflower
  • 16 ounces mushrooms
  • 4 tablespoon olive oil
  • 2 tablespoon thyme
  • 2 tablespoon rubbed sage
  • 2 tablespoon dill weed
  • 2 tablespoon coriander
  • 1 tablespoon red pepper flakes
  • salt and pepper to taste
  • 2 tablespoons of lemon juice
  • Optional: sprinkles of Parmesan
  • Greens of your choice- I used radish sprouts, but you can bed the entire thing on top of sauteed or fresh spinach, kale, lettuce, etc!

Directions:

  1. Heat up a vegetable stock: the amount depend son your quinoa so check your package: mine uses 1 3/4 cups liquid for every cup of quinoa. I prefer to use vegetable stock to impart flavor- other options might be to use water, or water with added flavorings like tomato paste. Rinse the quinoa. When the vegetable stock is boiling, add the quinoa and cover, lowering the heat or whatever the instructions are for your quinoa or quinoa/rice. This part can be prepared beforehand if you wish. I did this step the evening before, and then after the quinoa was done, I put it in the serving container and put in the refrigerator overnight. It’s one of the great things about quinoa- besides being healthy, you can easily prepare a cup or two that you can utilize to add to dishes all week!
    Quinoa with Roasted Cauliflower and Mushrooms Recipe: Making quinoa/wild rice in vegetable stock Quinoa with Roasted Cauliflower and Mushrooms Recipe: Quinoa/sprouted and wild rice in vegetable stock
  2. When you are preparing to roast, preheat the oven to 425 degrees F. Put aluminum foil on two baking sheets in order to make cleanup easier, and then put the baking sheets in the oven during the preheating.
  3. While the oven is heating up, cut the cauliflower into florets. Also slice the mushrooms. You want to try to have flat surfaces to it can lie flat on the pans in one layer. In a large mixing bowl (I had to use two), put mix the cauliflower and mushrooms with the olive oil and seasonings from above. If you are using two mixing bowls like I did, obviously you split 1 tablespoon in one bowl and 1 in the other in terms of the oil and seasonings. You can use any combination of seasonings you would like to your taste, or keep it simple with salt and pepper. Roasting the cauliflower makes it tender and you get lots of caramelized edges, so it will be guaranteed good flavor already! Mix everything well with your clean hands.
    Quinoa with Roasted Cauliflower and Mushrooms Recipe: Preparing for the roasting the cauliflower and mushrooms
  4. Once you are ready, take out the hot pans and place the mixed cauliflower and mushrooms on top so they are arranged in one flat even layer. Roast in the oven for 30-45 minutes: however long it takes until they get tender and golden brown. Make sure that halfway you turn them over to evenly brown them. If you’d like, during that turn you can add more flavor by sprinkling in the lemon juice, and also parmesan. I went with just lemon juice.
    Quinoa with Roasted Cauliflower and Mushrooms Recipe: Roasted Cauliflower and Mushroom Quinoa with Roasted Cauliflower and Mushrooms Recipe: Roasted Cauliflower and Mushroom
  5. When they cauliflower and mushrooms are done, add them on top of your hot or cold quinoa. I used radish sprouts that I mixed in throughout, and I used an amount that gave a greater ratio to the cauliflower and mushrooms and quinoa so it was more a hearty dish than a salad. But you can salad this up as well by adding the greens of your chocie! Or, leave the greens out and it could easily be a main course also!
    Quinoa with Roasted Cauliflower and Mushrooms Recipe: Quinoa with Roasted Cauliflower and Mushrooms Quinoa with Roasted Cauliflower and Mushrooms Recipe: Quinoa with Roasted Cauliflower and Mushrooms

   Quinoa with Roasted Cauliflower and Mushrooms Recipe: Quinoa with Roasted Cauliflower and Mushrooms

Signature

Summer Picnic Recipes that Travel Well for Two and a Group

Picnics- a meal outside, in the sunshine/shade and open breezes. Shoes off, legs stretched out, the feel of the beach of the sand or blades of grass underneath you. The images that come to mind are wicker baskets and slightly rumpled gingham blanket and a glass of wine and certainly for me, a cheese plate (of course).

It might be a special occasion like the concerts on the lawns I used to attend multiple times during my summers in Chicago- the orchestra filling the air with a symphony while you lie back on the blanket staring at the clouds. Or, it was on the 4th of July, with fireworks, and the buzz of people around you sharing that experience and joining in group “oooos” while you still have your own space.

It doesn’t have to be a special occasion though. It might be a matter of logistics on a long day hike. It might be a romantic getaway where you can focus on just the two of you. Or maybe, it’s just a celebration of a normal day and beautiful weather.

The last time I had a picnic, it was at Wildlife Safari in Winston, OR after walking with a cheetah, and it was a breakfast picnic that included soft doughy marionberry scones, fresh fruit, and fixings for mimosas on a safari printed tablecloth. Overall, it was a picnic recipe for fun!

Wildlife Safari, Winston OR, breakfast picnic with marionberry scones, fresh fruit, and mimosas Wildlife Safari, Winston OR, breakfast picnic with marionberry scones, fresh fruit, and mimosas

For a July picnic with the Portland Bloggers group, I decided to go more out than the typical “gathering” of cheese plate and various deli items from stores with a few items I would put together at home. Here are my picnic recipes, geared towards being picnic recipes that are easy to prep, require little effort, travel and keep well, and can be healthy. They can easily be made for two, or a group.

First, I started out for myself with a Buffalo Blue Cheese Chicken Salad sandwich, and a Vegetarian Hummus Avocado Tomato and Greens Sandwich for F. I only made enough for one sandwich for F, but I made a larger yielding batch of the buffalo chicken so that I could eat more of the sandwiches all this week (or in some cases, just eat the buffalo chicken out of Tupperware).

For the group, I wasn’t sure how many people would be there and decided to lean on the generous side. Worst case scenario, I would have some to bring to work the next day. I like these because you can put these together while watching TV, they are relatively healthy and fresh, and they are easy to eat on the skewers/toothpicks and can be refreshing if it happens to be a hot day. Mine are all red, but if you got a mix of colors from heirloom tomatoes this would be so much prettier!

Picnic Recipe 1: Vegetarian Hummus Avocado Tomato and Greens Sandwich

Ingredients (yields 1 sandwich):
Vegetarian Hummus Avocado Greens Sandwich ingredients Vegetarian Hummus Avocado Greens Sandwich

  • 2 slices of your favorite bread
  • 1/4 cup of hummus of your choice
  • 1/2 large avocado
  • 1 teaspoon of lime juice
  • 1/2 cup microgreens (or you may choose 1/2 cup spinach, arugula, or whatever greens you would like)
  • Tomatoes- I used grape tomatoes, but you can also use regular slices of tomatoes, or roasted tomatoes, or sun dried tomatoes. You want enough to be happy with your sandwich 🙂

Directions

  1. Spread the hummus on one side of the bread, and top with the microgreens
  2. In a bowl, mash up the avocado (for 1 sandwich you only need 1/2, but I mashed a whole one and used the other half for my sandwich below) and add 1 teaspoon for half the avocado, or in my case 2 teaspoons, of the lime juice. Mash and mix well, and then spread on the other slice of bread

Vegetarian Hummus Avocado Greens Sandwich Vegetarian Hummus Avocado Greens Sandwich

Picnic Recipe 2: Buffalo Blue Cheese Chicken Salad with Avocado and Greens Sandwich

Buffalo Chicken Salad with Avocado and Microgreens Sandwich

Ingredients (yields 4 cups of chicken salad, I overload my sandwich with almost 1 cup each but you also just use 1/2 a cup and be sensible about it):

  • 1 pound of skinless chicken breast (2 chicken breasts) for poaching
  • 5 oz non-fat plain Greek yogurt
  • 1/3 cup Franks Red Hot Wings Buffalo sauce
  • 1/2 tsp garlic powder
  • 1/4 tsp fresh ground black pepper
  • 1/2 cup (2 oz) crumbled blue cheese
  • 4 slices of your favorite bread
  • 1/2 cup microgreens (or you 1/2 cup chopped celery or whatever greens you would like)

Directions

  1. I started by poaching the chicken. Alternatively, you can also buy cooked chicken or reuse other leftover chicken of course to get you started a little faster. I like poaching in that it still keeps the chicken tender, and it lets me multitask as I’m cooking it low and slow with other kitchen prep. You can choose to poach it in just water, but that doesn’t add any flavor. So you can use the stock of your choice in the pot (I started with 2 cups, and then poured in a smidge more to cover the chicken by another inch) that I also added a tablespoon of chopped basil, a tablespoon of rosemary, and some ground pepper. But you can choose to also/instead add a little sherry, or wine, or fresh vegetables, whatever you want to add. After bringing the liquid to a boil, reduce heat to a bare simmer, partly cover the pot. Cook longer for about 10 minutes, then turn off the heat, leaving the chicken to finish cooking in your liquid of choice for 15 more minutes. Remove chicken, then shred it for the chicken salad.
    poaching chicken breasts in broth and herbs
  2. In bowl, whisk together the other ingredients: the yogurt, buffalo sauce, garlic powder, and black pepper. Stir in chicken, celery (if you are using it), and blue cheese.
  3. For my sandwich for the picnic, I decided to use some of the leftover avocado lime juice spread I still had for the other half of my sandwich (so half an avocado with 1 teaspoon of lime juice mashed together). I also added the radish microgreens, though again any of greens you enjoy would work here. And let’s say I forgot to add the blue cheese earlier so just decided to put it on top of my avocado (you can omit the blue cheese altogether if you are not a fan or want to make it optional for those eating the sandwich). Overall, of the buffalo chicken salad there was enough left for probably 4-5 more sandwiches for me to put away for the rest of the week. Refrigerate until serving or up to 5 days in the fridge.
    Buffalo Chicken Salad with Avocado and Microgreens Sandwich Buffalo Chicken Salad with Avocado and Microgreens Sandwich Buffalo Chicken Salad with Avocado and Microgreens Sandwich Buffalo Chicken Salad with Avocado and Microgreens Sandwich

Picnic Recipe 3: Caprese Skewers

Ingredients (yields 136 skewers):
Caprese Skewers, appetizer, picnic food Caprese Skewers, appetizer, picnic food

  • 4 pints (~40 oz) of cherry tomatoes
  • 12 ounces of fresh mozzarella
  • 2 ounces of fresh basil, which was about 6 stems for me, depending on how full each stem is of leaves
  • olive oil (approximately 1/3 cup)
  • balsamic vinegar  (approximately 1/4 cup)

Directions

  1. Cutting: Cut all the cherry tomatoes in half. Also cut the mozzarella into small pieces about 1/3 inch squares. Also, remove the basil leaves from the steam, for the larger basil leaves you may want to cut them in half as well.
  2. Assembly: On each toothpick, in between the cherry halves add one piece of the mozzarella and one medium or 1/2 of a large basil leaf.
  3. After filling your first row (in case you decide to do a pile like I did), use a spoon or a pastry brush to carefully add a little drizzle line or light touch of olive oil, and then the balsamic.
    Caprese Skewers, appetizer, picnic food Caprese Skewers, appetizer, picnic food

F helped a friend moved, so the sandwich disappeared before any photo could be shot of the sandwich cut in half.The best I can show you from our afternoon picnic with the Portland Food Bloggers was our additional tray to accompany our sandwiches. I like to always bring cheeses, and this time went with two cheeses (Fiscalini Hopscotch Cheddar a cheddar soaked in Devil’s Canyon Scotch Ale and Mariposa’s Chubut a mild Argentiean cheese).

I also like a little protein, and I picked a Chop Butchery & Charcuterie farmhouse pate (not shown, on another board to separate from the vegetarian options, and I think the best pate in Portland). I rounded out this picnic with hummus, and organic seedless green grapes (anything you eat the skin on be it fruits, vegetables, potatoes I believe are worth buying organic), cut up some artisan seedy bread and Mary’s Gone Crackers. This part of the picnic recipe is easy- just a matter of gathering some good individual ingredients together.

Thank you Portland Bloggers group for making me put together a Family Picnic, and setting up this event! It was very laid back with no agenda other then just a little chatting to see the people we read online in person, and the new Portland Bloggers logo was also unveiled. Check out the twitter hashtag #portlandbloggers for more photos from this event. I’m sure there will be posts coming soon too, and I’m excited to read all about all the other perspectives!

Signature

July is Oregon Craft Beer Month 2013

As I have mentioned a few posts ago, July is Oregon Craft Beer month. Throughout this month, there are breweries and beer festivals celebrating the craft of beer all over Oregon. Here in Portland, there are some particular events that caught my eye.
Oregon Craft Beer Month in July

  • Belmont Station’s Puckerfest, which celebrates sour, wild and funky beers from July 12 to the end of this week. If you have not been to Belmont Station for a while, check out their new larger space that includes a patio and also a food cart, Italian Market for a taste of Philly.
  • This Thursday (July 18), I will be attending a Smallwares and Breakside Brewing five course beer dinner pairing: I’ll be sure to report out, don’t worry!
  • This weekend  July 19-21 is the International Beer festival located in the North Park blocks with 150 beers from around the world
  • And then, the biggest of them all- the Oregon Brewer’s Festival, this time starting a day earlier than previously from Wednesday July 24 to Sunday July 28 offering the ability to taste 80 beers along the beautiful waterfront. This year, instead of the plastic glasses, they are going to actual glass glasses for your tasters.
    Sign showing the way to beer at Oregon Brewer's Festival
  • Fred Eckhart’s is hosting his 23rd Beer and Cheese tasting event at Rogue Public House in the Pearl that pairs 10 beers and 10 cheeses on July 22
    Rogue Dead Guy Ale and the smelly Monteillet Mejean
  • Another beer and food dinner event, Gigantic Brewing and Restaurant Beck which benefits Le Cordon Bleu’s Student ACF Hot Foods Team and Ronald McDonald House Charities of Oregon and SW Washington on July 25
  • July 27 is apparently Oakshire day- there is an Oakshire Barrel Aging Seminar at The Upper Lip over Bailey’s Taproom at 1:30pm, and you can warm up to taste those 4 beers pouring with Raven and Rose’s Oakshire Brewer’s Brunch with 3 courses at 11am… my arteries made me pass on the full Irish Breakfast at Raven and Rose, but I’ll be at the Upper Lip
  • The McMenamins at Cornelius Pass is releasing a special spicy beer trio for what they dub Pepperfest ’13 on July 31
  • Also on July 31 is the 3rd Annual Brewer’s Burger Brawl at Hop & Vine boasting a battle of burger and beer!
  • And ALSO on July 31 (you guys are killing me) is the 3rd Ben Fest, celebrating all the brewers named Ben that we have here, and they are all bringing a beer!

You don’t have to only drink your beer of course- check out recipes I have made in the past using beer, including beer cheese faceoff with two beer cheese recipes, beer ricotta, and my favorite beer recipe so far, beer soup of Butternut Squash and Ale Soup with Candied Almonds and homemade Mascarpone and with Cambozola. I’ll be sharing another beer food recipe in just a bit.

beer cheese recipe Saison Beer Ricotta on Cucumber Butternut Squash and Ale Soup with Candied Almonds and homemade Mascarpone with Cambozola

Or, perhaps you are just looking for something to pair with your beer. This recipe was shared by Cha Cha Cha and posted also at the Oregon Brewer’s Guild. This recipe from Cha Cha Cha was recommended to pair with a Full Sail Sessions Beer (Black Lager). The beers always stand out to me because of the unique bottle they come in, a stubby bottle. The bottle style is really called stubby, by the way.

When I saw this recipe, I thought of a friend I know who enjoys Full Sail as a regular beer to enjoy while watching TV, and who as of yesterday, just flew off to do a Bruseels to Amsterdam tour, 9 days of touring with cycling and drinking beer on a tour with Beercycling. We first found out about Beercycling a few years ago during Zwickelmania, and it has been on our wishlist- but our friends are actually doing it this year. Good for them, and Bon voyage, and bring back some beer (I will also accept gouda cheese)!

Mole Poblano from Cha Cha Cha (makes about 4 cups of mole)

  • 3 Chiles Mulatos
  • 2 Chiles Pasillas
  • 2 Chiles Anchos
  • 1/2 Chipotle peppers (optional if you want it a little spicy)
  • 6 clove of garlic (finely chopped)
  • 1/4 cup almonds
  • 1/4 cup peanuts
  • 2 tablespoons sesame seeds
  • 1 onion (chopped fine)
  • 1/4 cup ground coriander
  • 1/8 cup ground cloves
  • 1/2 stick Mexican Cinnamon (ground)
  • 1 ounce bittersweet Mexican Chocolate chopped coarsely
  • 2 cups of chicken broth
  • 1/4 cup raisins
  • Brown sugar or salt to taste
  1. Place oven rack in middle position and preheat to 350 degrees F. Then take all the chile peppers and garlic on an aluminum sheet and toast for 6 minutes until fragrant. Remove chiles and let them cool before then removing the seeds and stems and chopped them into 1/4 inch pieces. Make sure to wash your hands, and DO NOT TOUCH YOUR EYE. Ouch.
  2. Meanwhile in the oven before turning it off, toast the almonds and peanuts by putting them on on ungreased sheet in a single flat layer for 10-15 minutes, and then ground them in a food processor.
  3. In a large skillet, heat without any oil on the pan the sesame seeds at medium heat until they are toasted and fragrant. Remove.
  4. Now add oil on medium heat, add garlic and onions until soft. Then add all the toasted pepper pieces, coriander, cloves, cinnamon and chocolate. (Make sure you stir constantly until chocolate melts).
  5. Add to skillet chicken broth, raisins, and your toasted almonds, peanuts and sesame seeds. Stir for about 15 minutes until sauce is thick.
  6. Place everything from skillet in a blender or food processor and blend well.
  7. Place sauce back in the skillet and stir for another 8 minutes, season with brown sugar or salt.

Now, the question is as you open up that beer what to pour this mole on. Enchiladas? Burritos? Maybe. You can continue to poach a protein (chicken, pork, tofu) in the sauce in the skillet. Or take the easy way out instead if you want and pour this on some store bought rotisserie chicken and eat it on Mexican rice.

And maybe you’ll have some beer left after dinner, and you’ll decide to follow suit from the menu at the Full Sail Pub and Tasting Room at Hood River and throw some vanilla ice cream in it and call the beer float your dessert! Don’t forget to check into the beer on Untappd – if you check in 2 different Oregon beers and you’ll get a special badge for this month. So go out and get a sampler tray from your local Oregon brewery!

Can you identify my sampler trays?
all the beers at Bridgeport Brewery in a sampler tray McMenamin's Ale Sampler tray for beer Laurelwood Beer Flight Deschutes Brewing, make your own beer sampler with 6 options possible from their menu which changes seasonally (though it has a few constant ones) Sampler tray from Upright Brewing Walk the Dog sampler, plus a glass of another beer, at the Hair of the Dog tasting room Tasting tray of beer at Coalition Brewing A sampler tray of beer at Breakside Brewery Tasters at Cascade Brewing, specializing in sour beers <Sampler at Fort George Brewing in Astoria. Back left to right: 1811 Lager, Quick Wit, Sunrise Oatmeal Pale Ale, Vortex IPA; Working Girl Porter, Cavatica Stout, Quiet Rye-It, Red Tide; OmegaTex, North 5, and Firkin Nut Red dry-hopped with Cascade Hops

Signature