Spinach or Squash Cheese Pinwheels

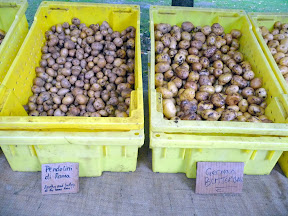
I always find ads for food products that include a recipe a strong marketing tactic. I am not sure how long I’ve had the Spinach Cheese Swirls from Pepperidge Farms in my recipe binder. When I had 2 guests over one evening, I decided to use that as a reason to finally try this out to offer as a snack.

Supposedly this serves 6-10 as appetizers, but the four of us finished this off accompanied by some cheese, bread, and wine. The recipe calls for using Pepperidge Farms Puff Pastry Sheets, but you can also use Pillsbury Crescent Roll dough which you pinch the perforations into a solid sheet.

Spinach Pinwheels

Ingredients:

  • 1 egg
  • 1 tablespoon of water
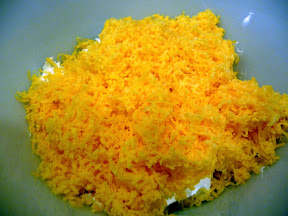
  • 1/2 cup shredded Muenster cheese or Mozzarella cheese or whatever tasty cheese you’d like: I went with sharp cheddar that I grated fresh and I doubled the amount because I love cheese
  • 1/4 cup grated Parmesan cheese- but I had run out, so used a shredded mix of mozzarella, asiago and provolone
  • 2 tablespoons of green onion, chopped
  • 1/8 teaspoon of garlic powder- though I admit I used twice as much at least as I did it to taste
  • All-purpose flour
  • 1/2 of a 17.3-ounce package Pepperidge Farm® Puff Pastry Sheets (1 sheet), thawed
  • 1 pkg. (about 10 ounces) frozen chopped spinach, thawed and well drained

Directions:

  1. Make sure your chopped spinach is dry. I wrapped my frozen chopped spinach with paper towels and then under a big pan to press some water out of it, and then heated it in the microwave to steam it to ensure there was as little liquid as possible so it would not make the dough soggy.
  2. Beat the egg and water in a small bowl with a fork. Sprinkle the flour on your work surface. Unfold the pastry sheet on the floured surface and brush the pastry sheet with the egg mixture.
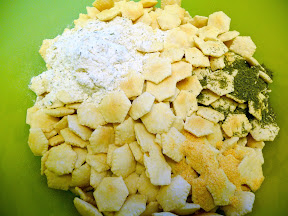
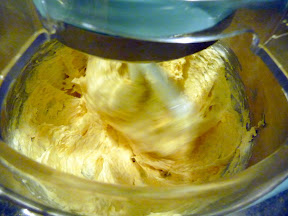
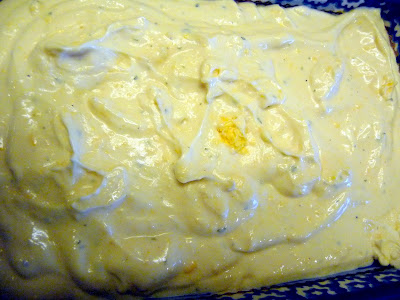
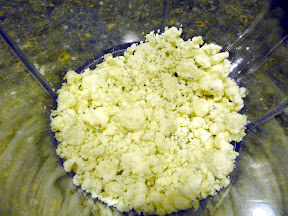
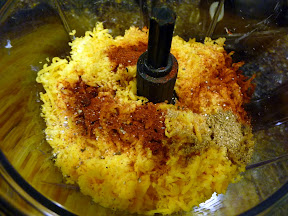
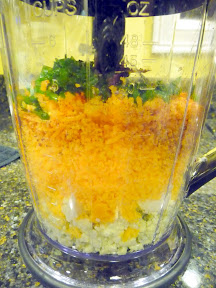
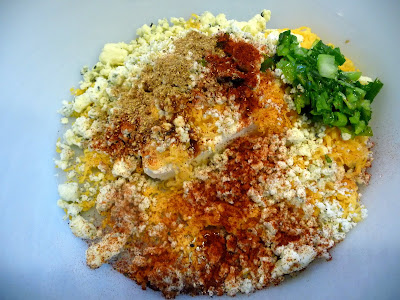
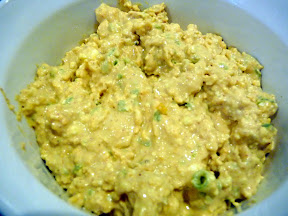
  3. Stir the your cheeses, green onion and garlic powder in a medium bowl to taste. The original recipe tasted a bit bland to me, so make sure you season and taste until the filling is appealing to you.
    Spinach or Squash Cheese Pinwheels
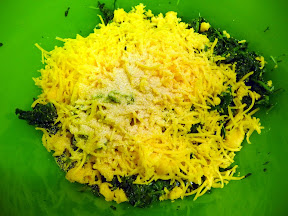
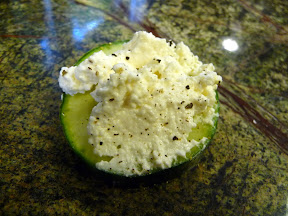
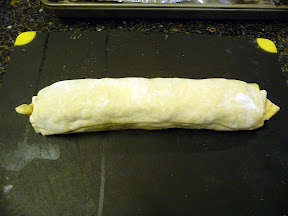
  4. Carefully top the pastry sheet with the spinach cheese mixture. Don’t make it thick or it will not roll smoothly, and leave a little bit on the end farthest away from you, about 1/2″ of room at that end, that you will roll to (on the short side) so you can seal it. I happened to have left a little on the sides too, but now I know it isn’t necessary because as you see from my final roll, there was too much extra dough on the sides.
    Spinach or Squash Cheese Pinwheels
  5. Starting on the short side, roll it all up. Next, I recommend wrapping it in saran wrap and put in the fridge overnight, or in the freezer for enough time for it to all harden just a bit to make it hold together better when you cut the roll.
    Spinach or Squash Cheese Pinwheels
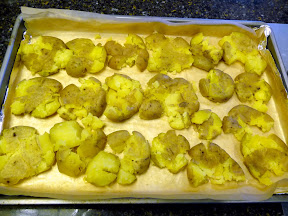
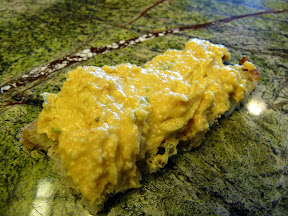
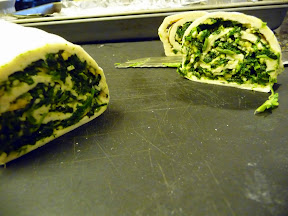
  6. Heat the oven to 400°F. As it is heating, cut the roll into 1/2 inch slices. Place the slices, cut-side down, onto your baking sheet. Brush the slices with the egg mixture.
    Spinach or Squash Cheese Pinwheels Spinach or Squash Cheese Pinwheels
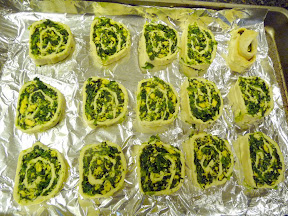
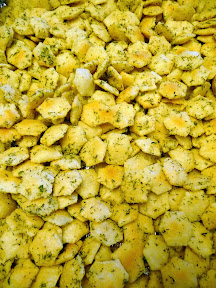
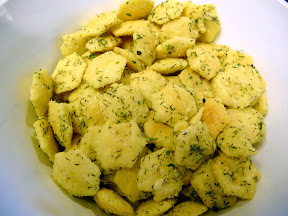
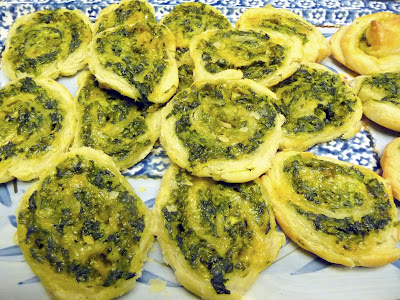
  7. Bake for 15 minutes or until the pastries are golden brown. Remove the pastries from the baking sheets and let cool for 10 minutes.
    Spinach or Squash Cheese Pinwheels Spinach or Squash Cheese Pinwheels

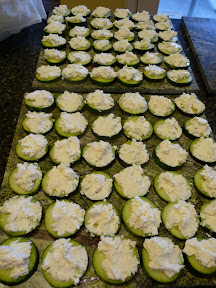
I also made a variant version of this, but instead using Pillsbury Crescent Roll dough, chive cream cheese, and also pureed squash to make Squash and Cheese Pinwheels. I saw on TV a few times recently a Pillsbury cresent dough commercial where a man “impressed” his wife by making bacon cheese pinwheels, and because of that he delegates the cable being out for her to fix instead. The look on the woman’s face cracks me up even though I know that’s what my face looks like when F asks me stuff about the house sometimes.

Squash Pinwheels

Ingredients:

  • 1 8 ounce package Pillsbury Crescent Dough. If you see it, get the no-seam dough version called Recipe Creations
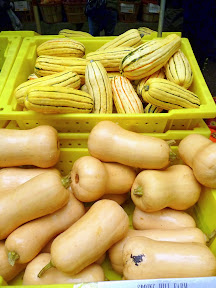
  • 1 pkg. (about 10 ounces) frozen pureed squash, or you can use roasted squash that you have let cool down to room temperature and pureed. You can use any type of squash you’d like. I like pureed squash because then you don’t have to worry about cutting squash into pieces- just throw it into the oven at 400 degrees F until fork tender, and then pull out and scoop the squash and into your blender to puree and use. Or, use frozen squash that you microwave.
  • 6 ounces of chive cream cheese, or you can use other flavors or plain
  • 1/4 cup chopped walnuts

Directions:

  1. Take the cream cheese out so it can soften.
  2. Add walnuts in a single layer to a baking sheet and then toast in the oven at 350 degrees F for about 5 minutes and then stair, and wait another 5 minutes (so total toasting ~10 minutes) until they smell fragrant and are golden in color, then remove from heat. Otherwise, give them another minute or two to finish toasting, checking frequently and watching so they don’t burn! You can also do this on the stovetop, which will toast it faster, but I already had to use a baking sheet for the swirls and didn’t want to wash a pan too. Let the walnuts cool.
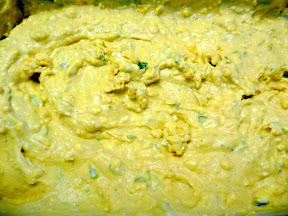
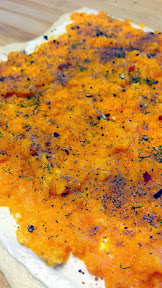
  3. Sprinkle the flour on your work surface. Unfold the crescent dough and pinch the perforations to join all the triangles together – if you use the Recipe Creations package there will be no seams so it will save you a step. Spread the cream cheese onto the dough within 1/2 inch of the edge.
    Spinach or Squash Cheese Pinwheels
  4. Now top with the squash. Follow that with any seasoning if you’d like (for instance I used nutmeg and a bit of paprika and rosemary, but it’s up to you. Also sprinkle on top the 1/4 cup finely chopped walnuts – I admit I put mine on top because I forgot to add them when I was rolling it, but it would be better probably inside the roll rather then on top! Put the roll in the freezer for a bit so it will harden a bit, making it easier to cut and it will stay together more.
    Topping of cream cheese and squash for a Squash Pinwheel, further sprinkled by various spices and seasonings to taste Topping of cream cheese and squash for a Squash Pinwheel, further sprinkled by various spices and seasonings to taste
  5. When you’re ready to bake, heat the oven to 375 degrees F.  Cut the roll into 1/2-inch slices. Place the slices, cut-side down, onto a sprayed baking sheet.
    Squash Cheese Pinwheels
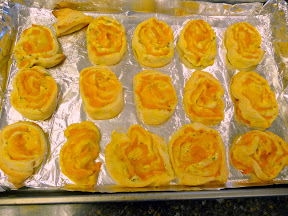
  6. Bake for about 15 or so minutes until the crescent dough is golden brown.
    Squash Cheese Pinwheels Squash Cheese Pinwheels Squash Cheese Pinwheels

These crescent roll pinwheels are going to be softer than the ones using pastry sheet, so using the walnuts or other kind of nut gives it more texture than mush. If you’d like you can also sprinkle brown sugar on the squash, or use other seasonings if you are not using chive cream cheese like I did. I neglected to use the chopped walnuts when I actually made these, but added them here because after testing this out, this is what the recipe needs and I wish I had.

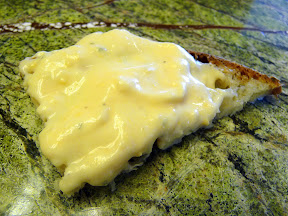
I also wish I had a nicer camera because these photos do not do it justice. Unfortunately both days were dark so the lighting was terrible, leaving me only my kitchen lights and Picasa fill light brightening software tricks. It’s days like this that make me wish I had a better camera than my point and shoot. I use my trusty Panasonic Lumix that fits in my purse so is always available where my Android cameraphone will fail (any eating situation that isn’t in great daylight). The pictures just do not do justice to how wonderful both of these smelled baking, and how warm and comforting they were to eat and that you just kept picking up the next one to eat!

Both would make great holiday appetizers that you can prep before hand, roll and have in the fridge, and can be done baking in 15 minutes and are a savory option instead of cookies.

Signature

Buttery Ranch Oyster Cracker Mix

When I made the beer cheese, the recipe had called for Hidden Valley Ranch dressing mix. The package I purchased had 3 packets, so I started looking for other way to use the mix and found this.

Buttery Ranch Oyster Cracker Mix

Ingredients:

  • 1 (9 ounce) package of regular oyster crackers
  •  1/4 cup buttery oil
  •  3/4 teaspoon of dill weed
  • 1 teaspoon of garlic powder
  • 1 packet of dry Hidden Valley Ranch  dip mix

Directions:

    1. Preheat oven to 250 degrees F.
    2. In a mixing bowl, combine all the oyster crackers with the seasonings of Ranch, dill, and onion powder.
      Buttery Ranch Oyster Cracker Mix
    3. Next, mix in the buttery oil until they coat all the crackers. Buttery oil can be found near the popcorn, or in my case, I used buttery flavored oil from a Oil and Vinegar store, Benessere Oils and Vinegars. The store is awesome because you sample any of their oils and vinegars before purchasing, so you know exactly what you are getting, and they have a range of sizes so you can even get a mix of different flavored oils. Because the buttery oil I had was high quality, I did not want to use a whole 3/4 cup per the original recipe, and the flavors were so strong after tasting adding half that amount I was fine.
      Buttery Ranch Oyster Cracker MixButtery Ranch Oyster Cracker Mix
    4. Bake in oven for 15-20 min, stirring halfway through baking time.
      Buttery Ranch Oyster Cracker Mix
    5. Cool, and then store in an airtight container or cracker tin or serve at a party!

Buttery Ranch Oyster Cracker Mix Buttery Ranch Oyster Cracker Mix

What makes this mix delicious is the goodness of the buttery oil to softly counter the saltiness from the ranch seasoning, with a bit of grassiniess from the dill. It doesn’t hurt to also top this with a bit of parmesan. Or, you can punch it up by adding cajun or spicy seasoning to your version.

Signature

Crispy Smashed Potatoes

At the Saturday PSU Portland Farmers Market, this month there has been lots of beautiful displays of autumn bounty. And, the crowds have thinned quite a bit now that the rainy weather is back in Portland, leaving more room to enjoy the market since you can chat with the vendors now that it isn’t bustling, and for that same reason is why you should brave the sprinkles and go visit the market and support them as they stand for hours under their tents for you after coming in and setting up while it’s still dark outside! Be a rainy day friend.
Portland Farmers market Portland Farmers market Portland Farmers market Portland Farmers market

When I saw all these little potatoes, I knew exactly what I wanted to make: smashed potatoes. Little potatoes are perfect for smashing! I bought half and half of both kinds you see here, the Pendolini di Roma and the German Butterball. The recipe below yields enough for two people comfortably as a meal, or 4 people as side dishes.
Crispy Smashed Potatoes

Ingredients:

  • 1 1/2 pounds of little potatoes, each should be only a few inches in diameter, or if you use slightly larger try cutting them to this size
  • 1/2 teaspoon and another pinch later of sea salt
  • 1/4 cup olive oil
  • 1/2 teaspoon chopped rosemary
  • 1/2 teaspoon chopped thyme
  • 1/2 teaspoon chopped parsley
  • 1/2 teaspoon rubbed sage
  • 1/2 teaspoon freshly ground pepper

Directions:

  1. Step 1: Boiling Potatoes, first round of cooking the potatoes. Put the potatoes in a large pot and add water to cover by ~1 inch of water. Season the water with salt. Bring to a boil over high heat, and then reduce the heat to medium-low and simmer until the potatoes are tender when pierced with a fork. Make sure they are cooked but not overcooked, around 30 minutes for me, but keep checking.
  2. Step 2: Drain and Cool. Drain the water from the potatoes in a colander. Transfer the potatoes to a towel-lined baking sheet and let cool to room temperature. If you wish, you can do the prep work to here and do the rest of the cooking later (such as say, working on other dishes for your holiday dinner…)
    Crispy Smashed Potatoes Crispy Smashed Potatoes
  3. Step 3: Smashing! Begin heating the oven to 450 degrees F. Remove the towels from under the potatoes and switch out the baking pan lining with a sheet of aluminum foil and put a sheet of parchment on top of the foil, spritz with olive oil if you have it, gently tilting the pan to spread the oil. Now using another baking pan, press down on your potato on a cutting board/workspace using the baking pan on one potato to smash it flat to a thickness of about 1/2 inch. Using a spatula, replace the potatoes back on the newly lined baking sheet. Repeat with all the potatoes.
    Crispy Smashed Potatoes
  4. Step 4: Seasoning. Pour the olive oil over them. Lift the potatoes gently with the spatula to make sure some of the oil goes underneath them so both sides have been coated if you didn’t spritz the parchment paper earlier. Sprinkle in the herbs, pinch of salt and ground pepper.
    Crispy Smashed Potatoes
  5. Step 5: Final cooking. Roast the potatoes until they’re crispy and deep brown around the edges. This should take about 30 minutes, turning once gently with the spatula halfway through cooking.

Final Step: Eating! If you’d like, garnish and enjoy with a dollop of sour cream. In addition, I took the opportunity to also oven roast broccoli with red pepper flakes with the potatoes.
Crispy Smashed Potatoes Crispy Smashed Potatoes

I’ve made these many times with leftover potatoes from a bag after making mashed potatoes or some other dish. They are always good – you can season them with anything you’d like – even though I have that combination I shared above, I have also just sprinkled in whatever leftover fresh herbs I may have and dry herbs and it’s never gone wrong in terms of combinations. Make sure you are patient enough to wait for them to get crispy, and you can have them for breakfast, lunch or dinner!
Crispy smashed potatoes, season with whatever you have on hand, I don't think you can do any wrong Crispy smashed potatoes, good with anything, breakfast lunch or dinner!

Signature

Saison Beer Ricotta on Cucumber

Inspired by the Beeroness’ Homemade Beer Ricotta, for a beer potluck get together I decided to make this the third offering of beer cheese. I decided to make three times the amount in her version since I was feeding more and hers yielded ~1 1/4 cups of ricotta at the end. My usual ricotta recipe is with a half gallon of whole milk and pint of buttermilk, and I have never had to throw any away, so I figure more is better (so you’ll see a lot more yield in my photos). In the end, I only needed double of the original recipe to make about 45 slices from 2 cucumbers worth.
Saison Beer Ricotta on Cucumber

I then put the beer ricotta on sliced cucumbers as appetizers. For the beer, I used Portland U-Brew Saison, which was a citrusy addition to the creamy ricotta.

It is important that you don’t use Ultra-Pasteurized milk, because it does not have the important calcium chloride which is needed for coagulation and curds (the pasteurization process removes calcium). Whole milk is better because it will also taste richer, as the flavor of the cheese is related to the amount of butterfat in the milk.

Saison Beer Ricotta on Cucumber Slices

Ingredients:

  • 3 cups whole milk- use the best and freshest milk you can find
  • 1 cup heavy cream
  • 1/2 tsp salt
  • 1/3 cup Saison beer and also 2 tablespoons of Saison Beer separated for later
  • 3 tablespoons Lemon Juice, or you can use Apple Cider Vinegar or a combination of the two
  • 1 English cucumber
  • ground pepper to taste

Directions:

  1. Cheesemaking is 4 main ingredients: milk, heat, acid, and then extras (any additions like herbs or mold, or aging, or handling and atmosphere like pulling it, smoking, etc). So first, the milk and heat. Combine the 3 cups whole milk and the 1 cup cream and 1/3 cup of beer in a non-reactive pot and heat on your stovetop on medium.
    The Beeroness’s version puts the salt in now, but I held off until later to put it directly on the ricotta- your choice. I am accustomed to adding in the extras after the acid step because that’s when it is done with the steps to make a goat cheese chevre.
    making homemade ricotta
  2. Use a thermometer to track when the contents of your pot reaches 190 degrees F, stirring as you watch so avoid scorching, and scrape the bottom as you stir.
  3. As soon as you reach 190 degrees F with your milk/cream, immediately remove the pot from heat and add your acid, which is the apple cider vinegar/lemon juice. This is the acid to start the curdling process. Stir just a little to get the acid throughout your milk/cream, and then let the heat and coagulation process work.
    You will start to see the white chunks (curds) rise to the surface away from the yellowish part (whey). The Beeroness put in the 2 tablespoons of beer at this point, but I held off as I didn’t want to lose the beer in the whey.making homemade ricotta
  4. Next, time to separate the curds and whey. use a cheesecloth over a strainer such as a large sieve or colander over a larger mixing bowl. I happen to have both a large and smaller sieve so I lined the larger one with the cheesecloth folded in half, and used the smaller one to ladle the curd and whey mixture through the sieve as an initial drain of whey. Place the curds into the cheesecloth so that the curds will stick with the cheesecloth and the whey flow below to the bowl.
    This is the part where I added the salt and drizzled the saison, adding a small little bit with every layer as I ladled. Run your wooden spoon along the bottom of your pot to free up any stuck curds partway through the pour, and they may need to be scraped from your smaller sieve ladle.making homemade ricotta making homemade ricotta
  5. You can pull up on the sides of the cheesecloth to drain off any extra liquid, but don’t press on the curds. Gather the edges of the cloth and fasten them into a knot and over the bowl so the whey can continue to drain for at least another 15-20 minutes. The longer you let it drain, the more firm it will be instead of creamy.
  6. You can move to an airtight container and put in the refrigerator if you aren’t going to use immediately, and you should eat it within a few days while it is nice and fresh. Meanwhile, what I did was take my English cucumbers and slice them to about 1/3 inch thick. Remember your yield will be less than pictured because I upped the recipe for more yield.
    Saison Beer Ricotta on Cucumber Saison Beer Ricotta on Cucumber
  7. When the whey had finished draining from the cheese, I just spooned a smear onto each cucumber, and finished with a pinch everywhere of salt and ground pepper
    Saison Beer Ricotta on Cucumber Saison Beer Ricotta on Cucumber

I kept mine simple because I wanted the subtle taste of the saison to still be detected, but this cucumber and ricotta idea can certainly be further elevated by more additions on top, such as herbs or half a cherry tomato, etc! Meanwhile, since I had tripled this recipe, I still had a good leftover portion that I have been eating with pasta for dinner.

Signature

Beer Cheese Faceoff

In preparation for a beer potluck, I decided to try some of the recipes I've been saving that incorporate beer as an ingredient. The first of these is the simple beer cheese. You can use beer in your fridge that has been sitting around, leftover from not finishing the bottle, or just any beer you feel like trying flavor-wise. The orange-ness of the beer dip (thanks to the cheddar) also makes it an appropriate one for this Halloween time period.

Hidden Valley Beer Cheese Dip

This first one is courtesy of Hidden Valley, and is a recipe easily found on the internet but which I will repeat here. It normally will yield 24 ounces of dip total, enough for 6 people, but I increased and altered the recipe because I wanted higher yield for more people. I also used sour cream when increasing the recipe to give it more of a softer smoother consistency for actual dipping of soft pretzels and potato chips than cream cheese alone would have given. But, I did not increase the amount of mix in the recipe, trusting the beer to add enough flavor along with the original lower yield amount of Ranch mix.

Ingredients:

  • 2 8 ounce packages of softened cream cheese (I picked specifically Neufchatel Cream Cheese both because it is softer and less fat)
  • 1 16 ounce container of light sour cream or tofu “sour cream"
  • 3 cups freshly finely shredded sharp cheddar cheese
  • 1 package of Hidden Valley Original Ranch mix
  • 1/2-3/4 bottle of 12 ounce beer, based on desired taste/consistency
  • Optional: chopped green onions and bacon bits for garnish. I only used green onions, about 1/8 cup full.

 The steps are easy enough:

Directions:

  1. Combine cheddar cheese and cream cheese and sour cream and dip mix in a large bowl. Mix.
  2. beer cheese recipe

  3. Gradually stir in beer to desired consistency and taste. I happened to go with Kona Brewing Longboard Lager
  4. beer cheese recipe beer cheese recipe

  5. Chill in fridge at least overnight- the flavors improve with time, so can even wait 24 hours…
  6. beer cheese recipe

  7. Garnish optionally with the chopped green onions, bacon bits, a bit more sprinkle of cheese as desired. Serve with pretzels, crackers or vegetables. You can serve this hot or chilled.

Wynkoop Brewing's Beer Cheese Spread

In the other corner is a Beer Cheese Spread courtesy of Wynkoop Brewing Company of Denver, Colorado but which I got the recipe thanks to a Cooking with Homebrew article by Daria Labinsky at Brew Your Own, a homebrew magazine. The yield here of this recipe is 24 ounces.

Ingredients:

  • 6 ounces softened cream cheese
  • 6 ounces blue cheese, crumbled
  • 12 ounces sharp white cheddar cheese, grated finely and fresh (I used X-sharp cheddar, not white)
  • 1/4 cup minced green onions
  • 1 teaspoon paprika
  • 1/2 teaspoon celery seed – but I didn't have any and instead used ground coriander
  • 1/2 teaspoon ground black pepper
  • 1/2 teaspoon Tabasco sauce
  • 1/2 cup any full-bodied ale can be used. Its strong flavor can enough to stand up to the biggest, hoppiest beers, even a barley wine

Directions:

  1. Combine all ingredients except beer in the bowl of a food processor or electric mixer. Mix or blend until everything is well incorporated.
  2. beer cheese recipe beer cheese recipe beer cheese recipe beer cheese recipe

  3. Slowly add beer while processor or mixer is running. I used some Longboard Lager… but I had also drank from the bottle a bit, so then I switched it out to a beer that had come in a Sam Adams Seasonal Sampler pack that I didn't think was special enough to need to savor on its own, the Sam Adams Boston Lager.
  4. Place mixture into a crock or serving bowl, and chill for at least 2 hours. You can serve this heated or cold, but if served cold I recommend letting it sit for a little bit to soften. This is a spread so is really chunky and thick (at least the way I had it, room temperature/chilled), and great for spreading on bread- not for dipping- as long as it's not so hard that you are tearing your soft fresh bread.
  5. beer cheese recipe beer cheese recipe

So how did these two do? Well first of all, I have to say this was a ridiculous night of making these. My cheap blender couldn't handle the thickness of the cream cheese. Meanwhile, my Ninja Mixer blades didn't turn anymore when I put the motor on top because the plastic parts had worn down too much. And my Kitchenaid mixer only works for a certain amount of time before the motor burns out and it has to take a nap for 30 min.

That explains a bit why in some of the pictures, you see everything being moved from container to container. After working out with weights earlier in the day, and then shredding all that cheese, my arm was not loving all the hand mixing. It was frustrating but in retrospect comedic how all the mixing mechanisms I had in the kitchen failed all in one night.

As mentioned, the beer dip is a softer consistency, so is great for literal dipping of chips, pretzels, etc as it will not break the "vehicle for cheese" so seems more versatile than the spread. However, the beer spread definitely has much more depth in flavor thanks to the 3 cheeses and hint of heat, even if you need to use a utensil to spread it on the baguette slices.
beer cheese recipe beer cheese recipe

In terms of highlighting the beer ingredient, the beer spread has a flavor that overpowers a light beer- if I make it again I would definitely use a much darker, stronger tasting beer than a lager. The beer dip though worked perfectly with the Longboard Lager, and I can definitely taste the beer woven in the flavor, I think partially because of the reduced ratio of the Hidden Ranch in the recipe (which I found a bit salty at the original recipe's ratio for my taste), and because the (tofu) sour cream adds just a bit of light flavor that would have been too heavy if I had only used cream cheese.

The cheesiness of the beer spread is very high, if you are a cheese lover, and it has a nice tang from the mix of cheeses. Though, dipping is an easier party gathering option than spreading (which requires a utenstil, rather than a carb vehicle for dipping). The beer dip list of ingredients is definitely a better value pricewise as part of your grocery bill, as well as a value in making more for a crowd. Also keep in mind if not everyone likes blue cheese, the beer dip may be a safer bet.

Signature