Dill Shrimp Salad Sandwich with Cucumber

This Dill Shrimp Salad Sandwich with Cucumber is delicious with a glass of pinot gris. It feels like a sandwich that so represents summer.
Recipe for a shrimp sandwich with shrimp, cucumber, dill, and a mayo dill lemon sauce Recipe for a shrimp sandwich with shrimp, cucumber, dill, and a mayo dill lemon sauce

This would probably taste just as good if you used crab instead – it reminds me a lot of sandwiches you could enjoy at a rental house on the beach. I can almost hear the waves and smell the ocean and feel the sun and heat radiating back from the sand now from my shaded deck now.

I tend to see these type of sandwiches more on South of the US. I do hear that shrimp sandwiches like these are also popular in Scandinavia, though I think they simply steam the shrimp and may omit the Mayo. The Scandinavians are with me though on feeling this same perfect pairing of shrimp with cucumber.

Recipe for a shrimp sandwich with shrimp, cucumber, dill, and a mayo dill lemon sauce

Ingredients:

  • 4 hoagie buns (I used Franz Bakery Stadium Rolls. They are doughy delicious and sometimes you can find a Spicy Chipotle flavor one with peppers, though the ones you see here are the Franz Bakery Outdoor Rolls!)
    Franz Bakery is local to Portland and makes these delicious Outdoor Stadium Style rolls which are better than any hot dog roll because they are soft and doughy, which means you can also use them for sandwiches, which I do! Franz Bakery is local to Portland and makes these delicious Outdoor Stadium Style rolls which are better than any hot dog roll because they are soft and doughy, which means you can also use them for sandwiches, which I do!
  • 1 tablespoon butter
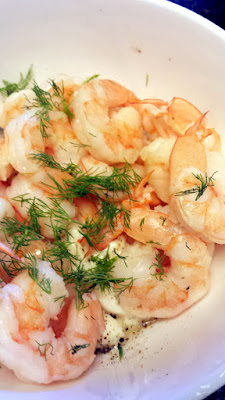
  • 1 pound uncooked shrimp, peeled and deveined
    Shrimp, raw
  • 1/2 cup – 3/4 cup mayonnaise (adjust based on your preference of how much sauce you want with your shrimp)
  • 2 tablespoons fresh lemon juice (perhaps more in case your guests want to squeeze a wedge worth more upon serving the sandwiches)
  • 1/2 teaspoon salt
  • 1/4 teaspoon pepper
  • 4-6 teaspoons fresh dill (I like adding dill at the end when serving so the sandwich looks nice too)
  • 1 cup chopped cucumber
  • Butter Lettuce

Directions:

  1. In a large skillet, heat butter over medium heat. Add shrimp once the butter is hot and stir for a few minutes until shrimp turn pink. Remove from heat and then let cool so you can remove the tails. My trick for removing shrimp tails so you don’t lose that little bit of shrimp meat encased inside the tail shell portion is to press a bit til you hear a snap before pulling the tail off.
  2. In a small bowl, mix mayonnaise, lemon juice, dill, salt and pepper with the shrimp and the chopped cucumber and toss until everything is coated with the sauce.
    Toss shrimp sauteed in a little bit of butter just until cooked with a mixture of mayo, lemon juice, salt, pepper, and dill Toss shrimp sauteed in a little bit of butter just until cooked with a mixture of mayo, lemon juice, salt, pepper, and dill
  3. In the hoagie buns, first place a couple pieces of butter lettuce (I admit I also spread the leftover butter from cooking the shrimp on the buns before placing the butter lettuce). Then, spoon the shrimp and cucumber mixture into your buns
    Recipe for a shrimp sandwich with shrimp, cucumber, dill, and a mayo dill lemon sauce Recipe for a shrimp sandwich with shrimp, cucumber, dill, and a mayo dill lemon sauce

Make sure you provide a lot of napkins! And maybe, a pinot gris!
Recipe for a shrimp sandwich with shrimp, cucumber, dill, and a mayo dill lemon sauce Recipe for a shrimp sandwich with shrimp, cucumber, dill, and a mayo dill lemon sauce

Have you had shrimp salad sandwiches before? What’s your favorite type of eats on a beach getaway or trip to the coast?

Signature

Chinese Tomato and Eggs Recipe

Looking for something new to do with fresh summer tomatoes besides sauces and salads? Have you ever had Chinese Tomato and Eggs?

In 1997, there was a summer where I spent a summer in China as part of the UCCEC program with Columbia University. It was a couple weeks in Beijing, and then a couple weeks in Kunming. We had classes every day, but we were learning Chinese while in China so the immersion forced us to learn faster and broader, and the weekends included trips such as what you see below to Beihai, Temple of Heaven, Forbidden City, and the Great Wall and more.

Beijing Sightseeing:
Temple of Heaven, Beijing Our UCCEC group at  Temple of Heaven, Beijing in summer of 1997
Me in the Forbidden City, China in 1997 The steps at the Great Wall of China in summer of 1997

Beihai Park, an Imperial Garden:
Lily pads in Beihai

During that first week or so in China, as my stomach and my new friends adjusted to the new sights, sounds, smells, and foreign language, we discovered this simple dish of Chinese Tomato and Eggs. Every restaurant in Beijing had it, it was easy to recognize in Chinese on the menu and say without people being confused, and it was a safe bet for eating as our stomachs became used to the new bacteria in this part of the world.
'Easy 'Easy

This recipe for Chinese Tomato and Eggs is not a dish seen often in Chinese restaurants United States, maybe because it’s too simple.  But it’s so delicious. It only takes 20 minutes or so, so it’s very fast. And, it can feed 2-4 for dinner when served with rice (2 as the only dish with the rice, 4 with another dish).

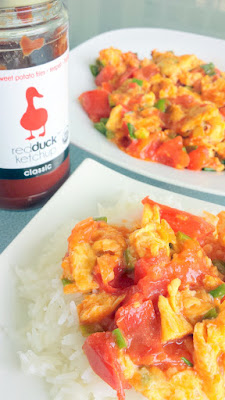
The key to this dish, which sounds plain but is not, is that the eggs get a touch of sesame oil, and the tomatoes get a touch of sugar. My version uses the secret ingredient of one tablespoon of Red Duck Ketchup, which adds just that little extra depth of flavor.
My secret ingredient to my Chinese Tomato and Eggs recipe is a tablespoon of Red Duck Ketchup

Ingredients:

  • Some chopped green onions, with the white and green parts separated, I used about 4 green onions but I really like green onions!
  • 3 tablespoons of olive oil, separated (you will use 2 and then 1 tablespoon)
  • 4 eggs
  • 1 teaspoon of salt
  • 1/2 teaspoon of white pepper
  • 1 teaspoon of sesame oil
  • 2 tablespoons water
  • 1 teaspoon corn starch
  • 1 teaspoon sugar
  • 2 medium sized tomatoes, roughly chopped
  • 1 tablespoon ketchup

Directions:

  1. Beat eggs together; season with salt and pepper, and add the sesame oil. Whisk so it’s airy.
  2. Add two tablespoons of olive oil to a large pan (or wok if you have one, but it’s not absolutely necessary), turning up the heat to high. You should see the oil start to be steamy so you know it’s hot. Now add the white parts of the green onions (approximately – I still had some green-white parts and it was fine for me!) and sauté for about 30 seconds or so until fragrant.
  3. Next, add the egg mixture and let sit for 30 seconds. Stir and then carefully fold the eggs for another minute or less, just until the eggs are about to set (wherever it is shiny and still liquidy just fold down so it can cook for a few seconds until there are no more liquid parts), then immediately remove from heat and set aside on a plate.
    Setting aside eggs with green onions for the Chinese Tomato and Eggs recipe
  4. In a small bowl, combine together  2 tablespoons of water  with the 1 tablespoon of cornstarch and 1 teaspoon of sugar. Mix until it all is incorporated into the liquid.
  5. Add 1 more tablespoon of olive oil to the pan. When the oil is steaming again, add the roughly chopped tomatoes and the cornstarch sugar water and my secret ingredient, the tablespoon of Red Duck ketchup. Let the tomatoes cook, stirring only a bit, until you can see the tomato meat firm up slightly and you can smell the tomatoes. This should only take about 5 minutes.
    You only need to roughly chop the tomatoes for the Chinese Tomato and Eggs recipe Cook the tomatoes until it is fragrant and the flesh is more firm for the Chinese Tomato and Eggs recipe, just a few minutes
  6. Pour the eggs you set aside earlier back into the pan and stir to mix the eggs and tomatoes. Add the green part of the green onion and after another good stir, pour into your serving dish.
    Easy comfort food of my Chinese Tomato and Eggs recipe, enjoy with rice and is only 20 minutes from prep start to finish! Easy comfort food of my Chinese Tomato and Eggs recipe, enjoy with rice and is only 20 minutes from prep start to finish!
  7. Serve with rice.
    Easy comfort food of my Chinese Tomato and Eggs recipe, enjoy with rice and is only 20 minutes from prep start to finish!

You can fancify this dish with more vegetables like spinach, a bit of ginger, putting it on fried rice instead of regular rice. It can be breakfast, lunch or dinner – and I promise you, although it sounds simple, so does pasta with cheese (aka classic mac and cheese), and no one can deny the comfort of that dish. That’s what this Chinese Tomato and Eggs is.
My secret ingredient to my Chinese Tomato and Eggs recipe is a tablespoon of Red Duck Ketchup

I am a huge fan of Red Duck Ketchup. It’s made from organic ingredients and no high fructose corn syrup (it’s 100% corn free), and is supporting a local business. The name of the ketchup comes from the fact the three founders are from University of Oregon and thus are fans of the Oregon Ducks. And ketchup is red… aka Red Duck.
 Coalition Brewing Spicy Ketchup Beer and Curry Red Ale were brewed with Red Duck Ketchup

Although I’m not specifically an Oregon Ducks fan, on the day I was born as my mom was sitting on the front steps as my dad prepared the car, she saw a mother duck and her ducklings under a bush (our backyard had a lake) walk out and she almost, almost nicknamed me Duck. Thank goodness I got Pech instead.

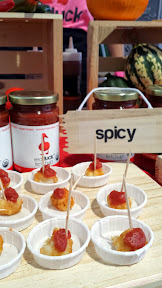
Not to mention, this is just the most delicious ketchup I have ever had. They make a few flavors (I also love their spicy ketchup and curry ketchup, and they sometimes make other seasonal flavors like Pumpkin Spice!). The Red Duck Original Ketchup flavor isn’t too sweet but has a little depth of flavor thanks to a bit of balsamic vinegar.

Red Duck Ketchup was a discovery for me at Feast Portland‘s Oregon Bounty Grand Tasting. This event, which takes place on Friday and Saturday on September 18 and 19, is a great value in that so many amazing local vendors are all gathered in one place, ALL are offering samples so you can try everything and know what you are buying!

Feast Portland 2014, Oregon Bounty Grand Tasting Feast Portland 2014, Oregon Bounty Grand Tasting Feast Portland 2014, Oregon Bounty Grand Tasting

That’s how I discovered and got to try Red Duck Ketchup, which I’m not sure I would have noticed normally since I’m not usually a big ketchup fan. But, Red Duck totally changed my tune.

This ketchup is amazing with anything and everything… and I loved it even when Coalition Brewing brewed a one keg special edition Spicy Ketchup Beer and a keg of Curry Red Ale with Red Duck Ketchup as part of National Ketchup Day. That’s right, this ketchup can even hold its own when used in beer!
Coalition Brewing Spicy Ketchup Beer and Curry Red Ale were brewed with Red Duck Ketchup Coalition Brewing Spicy Ketchup Beer and Curry Red Ale were brewed with Red Duck Ketchup

So of course it’s going to be awesome in your basic uses like paired on an Olympia Provisions hot dog, on your burgers… or as a secret ingredient of my Chinese Tomato and Eggs recipe.
Coalition Brewing Spicy Ketchup Beer and Curry Red Ale were brewed with Red Duck Ketchup as part of National Ketchup Day. So of course the ketchup is awesome paired on an Olympia Provisions hot dog.

Have you had Red Duck Ketchup, or Chinese Tomato and Eggs before? Have you studied abroad and learned of a new local dish during your visit that has special memories for you?

Signature

Berry Recipes from The Oregon Berry Festival and New Seasons: Berry Popsicles, Summer Berry and Farro Salad

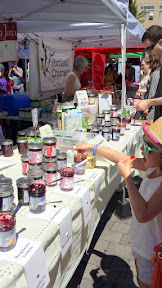
I mentioned a couple weeks ago how I attended the annual Oregon Berry Festival and swooned at the Oregon Berry Festival Gala Berry Dinner. Earlier during the day, as they have done for the past 5 years, they had a free festival in which they offered various booths promoting berries both in fresh and product form.
A look at the Oregon Berry Festival 2015 at EcoTrust building Berries galore to sample and purchase fresh from the farmers and from local fruit product producers at the free annual Oregon Berry Festival in July

If you’ve been to any Oregon Farmer’s Market or local grocery store, it probably doesn’t surprise you if I tell you that Oregon recognized worldwide as the “Berry State”, growing just about every major berry that grows in the United States. You can find strawberries, blueberries, cranberries, blackberries, marionberries, loganberries, boysenberries, red raspberries, black raspberries, gooseberries, huckleberry, mulberry, even berries you and I probably have never heard of like sumac waldo berry and more. Many (including myself) particularly adore Oregon berries of the particular climate we have here, in which the days are warm the evenings in the spring and summer always cool off unlike many other places where it doesn’t drop as comfortably as we enjoy here.
Which Berry Are you? Marionberry: A native oregonian, complex, rich and earthy Cranberry: Zingy and versatile, loves holidays blueberry: well rounded easy going and popular Strawberry: sweet, traditional and well loved Waldo berry: Mysterious, original and easy going

Two stages hosted live music and berry demonstrations – including an hour berry cooking demo and samples from one of the sponsors, New Seasons Market who also had a booth. In the cloudless windless 90 something degrees weather, they cheerfully made Salmon with Blackberry Pinot Noir sauce and had samples.
New Seasons Market doing a demonstration of Salmon with Blackberry Pinot Noir Sauce at the Oregon Berry Festival 2015 New Seasons Market doing a demonstration of Salmon with Blackberry Pinot Noir Sauce at the Oregon Berry Festival 2015

I’m going share two of my favorite recipes I learned from New Seasons at Oregon Berry Festival 2015: Raspberry Peppercorn Popsicles, and Summer Berry and Farro Salad. Keep in mind that although I am publishing this in berry season, you don’t have to only buy berries fresh in order to support your local Oregon berries. Check out the freezer section for frozen fresh berries from Stahlbush Island Farms, Scenic Fruit, Palmer Creek Fruit Company, etc.

Berry Popsicles

I love how dramatic these look, and they only use berries, sparkling water and local honey. There were two types that New Seasons shared: a Raspberry Peppercorn Popsicle version, and a Blackberry Basil Popsicle version you can see below.

New Seasons Market did a demonstration of Blackberry Basil Popsicles at the Oregon Berry Festival 2015

Blackberry Basil Ingredients:

  • 2 pints of ripe blackberries (if fresh blackberries are not available, use fresh frozen local Oregon berries – this allows you to still support local and they are quick frozen while they are fresh so they will taste great. Buying frozen in the off season is great because you can just pour out the amount you need and reseal too!).
  • 1 bunch of basil: set aside one leaf for each popsicle mold, and the rest you should slice into thin ribbons aka chiffonade
  • 1 quart of sparkling water (4 pints)
  • 1/4 cup of local honey

Blackberry Basil Popsicle Directions:

  1. Gently rinse blackberries. Take one pint of the blackberries and place loosely on a sheet tray and put in freezer until the berries are firmed up and set.
  2. Take the other pint and place in a sauce pan with the honey on medium heat. Add the basil chiffonade and 1 pint of sparkling water. Heat until the berries dissolve and the honey is incorporated. Remove from heat and let cool before straining through a fine mesh sieve.
  3. Add the remaining 3 pints of sparkling water to your strained berry honey basil mixture.
  4. Meanwhile, in your popsicle molds (this should be enough for 6, but it depends on the size and shape of your molds), add some of the individual frozen berries from Step 1. Next, place a whole basil leaf inside each mold as well. Fill the rest of the popsicle mold with your berry mixture.
  5. Place your popsicle molds in the freezer until set.
  6. Pop out and enjoy!

A look at what these BlackBerry Popsicles look like as they are being popped out… and I am totally coveting that strawberries apron in the background.
New Seasons Market did a demonstration of Blackberry Basil Popsicles at the Oregon Berry Festival 2015 New Seasons Market did a demonstration of Blackberry Basil Popsicles at the Oregon Berry Festival 2015
Both of these Popsicles recipes are crazy easy and samples were disappearing in seconds at the Oregon Berry Festival and pleasing adults and kids alike.
New Seasons Market did a demonstration of Blackberry Basil Popsicles at the Oregon Berry Festival 2015 New Seasons Market did a demonstration of Blackberry Basil Popsicles at the Oregon Berry Festival 2015

Raspberry Peppercorn Ingredients:

  • 3 pints of ripe raspberries (if fresh raspberries are not available, use fresh frozen local Oregon berries – this allows you to still support local and they are quick frozen while they are fresh so they will taste great. Buying frozen in the off season is great because you can just pour out the amount you need and reseal too!).
  • 20 pink peppercorns, crushed
  • 18 pink peppercorns, whole
  • 1 quart of sparkling water (4 pints)
  • 1/4 cup of local honey

Raspberry Peppercorn Popsicle Directions:

  1. Gently rinse raspberries. Take one pint of the raspberries and place loosely on a sheet tray and put in freezer until the raspberries are firmed up and set.
  2. Take the other 2 pints and place in a sauce pan with the honey on medium heat. Add the crushed peppercorns and 1 pint of sparkling water. Heat until the berries dissolve and the honey is incorporated. Remove from heat and let cool before straining through a fine mesh sieve.
  3. Add the remaining 3 pints of sparkling water to your strained berry honey crushed peppercorn mixture.
  4. Meanwhile, in your popsicle molds (this should be enough for 6, but it depends on the size and shape of your molds), add some of the individual frozen berries from Step 1. Then place 3 whole peppercorns on top of them. Fill the rest of the popsicle mold with your berry mixture.
  5. Place your popsicle molds in the freezer until set.
  6. Pop out and enjoy

Summer Berry and Farro Salad

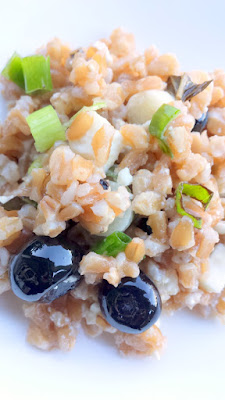
Oregon Blueberries are the star of this recipe for Summer Berry and Farro Salad, perfect to make ahead of time for a lunch or picnic

The Summer Berry and Farro Salad takes a little bit of time to prepare the farro first, but the recipe makes enough for 10. This fed us for several days of meals afterwards. The dish is great cold or room temperature, making it a great make ahead lunch to take to work or to take on a picnic or road trip to the Oregon Coast to cool off during a summer heat wave. I also love that it’s a savory way to enjoy blueberries.
Oregon blueberries Oregon blueberries

Ingredients:

  • 1 16 ounce package of whole farro
  • 3 tablespoons of raspberry vinegar
  • 1/2 teaspoon of local honey
  • 1/2 teaspoon of dijon mustard
  • 1/2 cup olive oil
  • 1/2 cup chopped green onions (or you can use chives)
  • 1/2 cup roughly chopped basil (or mint)
  • Roughly 2 cups of blueberries (I know there will be some “loss” as you quality test the blueberries…)
  • 1/2 cup feta cheese (you can make this optional – I served the feta on the side as F didn’t want it, but I did)
  • Salt and pepper to taste

Directions:

  1. First prepare the farro according to package instructions and set aside to cool. This may vary in time – for instance the whole wheat farro I purchased I soaked for 30 minutes first, then after the water boiled I had to let it cook for 30 minutes.
  2. To make vinaigrette while the farro is cooking, whisk together the vinegar, honey, mustard, and then the olive oil until it is all incorporated. Add salt and pepper to taste – depending on how much raspberry vinegar taste you want you can play a bit with the vinegar, honey, and mustard with a bit more.
  3. Pour the raspberry vinaigrette you have just made into the farro when it is done and mix. Now let the farro cool – I stuck mine in the freezer for 15 minutes to make it cool faster!
  4. As the farro is cooling, you can chop your green onions/chives and basil/mint and gently wash your blueberries. When the farro is only slightly warm or room temperature, mix in carefully the green onions, basil, blueberries and feta. If you’d like, hold back a few small leaves of basil and feta to garnish on top when you serve!

Oregon Blueberries are the star of this recipe for Summer Berry and Farro Salad, perfect to make ahead of time for a lunch or picnic Oregon Blueberries are the star of this recipe for Summer Berry and Farro Salad, perfect to make ahead of time for a lunch or picnic
I have one more berry recipe coming – and don’t forget about my Blackberry Grilled Cheese I shared with you a few weeks back.

Keep an eye out for the Oregon Berry Festival next year. As I mentioned, it’s a FREE festival celebrating Oregon (which did you know is the “Berry State”, home to just about every major berry that grows in the US?) and you too, can pick up great recipes like these! Here are a few more photos from the Oregon Berry Festival so you can see some examples of the great berries and berry products you can be introduced to at the festival. Of course, nothing is holding you back from seeking these delicious berry products right now either! Besides fresh, you can find Oregon berries in fresh form, pies and tarts, in

  • Hot Lips Sodas which you can get with your Hot Lips pizza but also at the store featuring half a dozen flavors (I like the Marionberry Soda, and also their Hawaiian Ginger Ale)
  • Beer (No Li Brewhouse in Spokane produced the Tart Cherry Ale with 1.5 lbs per gallon of Oregon Specialty Fruit cherries and cranberries, many of the beers at the Portland Fruit Beer Festival and from many other breweries also use Oregon Specialty Fruit purees)
  • Liquors like East Side Distilling‘s Cherry Bomb and Marionberry Whiskeys
  • Drinking Vinegars and Fruit Shrubs (like Lola’s Fruit Shrubs, hand made in Eugene OR and in flavors like Strawberry Balsamic, Raspberry Lemon, Blackberry Basil, Blueberry Ginger, and Straight Lime)
  • combined with goat cheese like with Portland Creamery
  • Your Northwest (with stores conventionally at the PDX airport to tuck into your carry on bag post security to take to your destination as a gift or for yourself) boasts berry products varying from jellies, syrups, vinaigrettes, pie and cobbler filling to grill sauces and glazes for your bbq
  • And more!

Berries galore to sample and purchase fresh from the farmers and from local fruit product producers at the free annual Oregon Berry Festival in July Berries galore to sample and purchase fresh from the farmers and from local fruit product producers at the free annual Oregon Berry Festival in July, for example these delicious Hot Lips sodas Berries galore to sample and purchase fresh from the farmers and from local fruit product producers at the free annual Oregon Berry Festival in July Oregon Specialty Fruit had a booth at the free annual Oregon Berry Festival in July No Li Brewhouse in Spokane produced the Tart Cherry Ale with 1.5 lbs per gallon of Oregon Specialty Fruit cherries and cranberries Berries galore to sample and purchase fresh from the farmers and from local fruit product producers at the free annual Oregon Berry Festival in July You can find Oregon Berries in East Side Distilling's Cherry Bomb and Marionberry Whiskeys You can find Oregon Berries in East Side Distilling's Cherry Bomb and Marionberry Whiskeys Berries galore to sample and purchase fresh from the farmers and from local fruit product producers at the free annual Oregon Berry Festival in July. One example is Lola's Fruit Shrubs, hand made in Eugene OR and in flavors like Strawberry Balsamic, Raspberry Lemon, Blackberry Basil, Blueberry Ginger, and Straight Lime Berries galore to sample and purchase fresh from the farmers and from local fruit product producers at the free annual Oregon Berry Festival in July, including Portland Creamery goat cheese Representing berries as a healthy habit to have and promoting to end type 2 diabetes in children was the Blueberry Family Health Foundation at the Oregon Berry Festival At Oregon Berry Festival 2015 we learned how to incorporate berries into Indian cuisine with Minal Rajan at the Healthy Berry Pavilion Your Northwest boasts berry products varying from jellies, syrups, vinaigrettes, pie and cobbler filling to grill sauces and glazes for your bbq Your Northwest boasts berry products varying from jellies, syrups, vinaigrettes, pie and cobbler filling to grill sauces and glazes for your bbq

Which Berry Are you?

  • Marionberry: A native Oregonian, complex, rich and earthy
  • Cranberry: Zingy and versatile, loves holidays blueberry: well rounded easy going and popular
  • Strawberry: sweet, traditional and well loved
  • Waldo berry: Mysterious, original and easy going

Disclosure: I attended the Oregon Berry Festival Gala dinner as part of a media pass of the Oregon Berry Festival courtesy of the Oregon Raspberry and Blackberry Commission, but I will always provide my honest opinion and assessment of all products and experiences I may be given. The views and opinions expressed in this blog are entirely my own. 

Signature

Radish, Edamame, Ricotta and Greens Sandwich

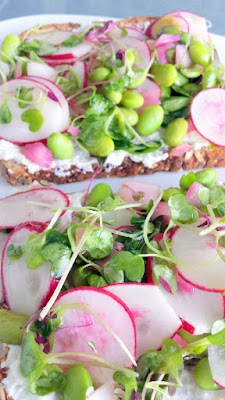
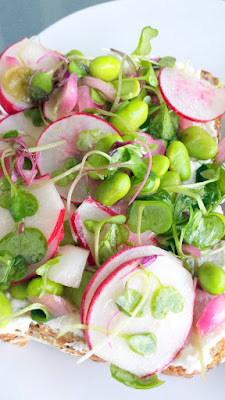
Last week, I walked you through making your own fresh ricotta. Today, I’m going to share another recipe on how to enjoy that fresh ricotta. This Radish, Edamame, Ricotta and Greens Sandwich is vegetarian and a mix of flavors textures like the soft creamy ricotta and firm edamame and grassy microgreens, crunchy slighly spicy radish and acid of quick pickled red onions. This is my take when I saw the recipe of Summer Pea and Radish Pita in the Vegetarian Times and was inspired to make a version that’s more me and less pea.
My recipe for a summer sandwich of fun textures, a Radish, Edamame, Ricotta and Greens Sandwich My recipe for a summer sandwich of fun textures, a Radish, Edamame, Ricotta and Greens Sandwich

The original recipe made 6 sandwiches, and there was not an easy way to reduce the amount for quick pickling the onions (and you use the leftover liquid to help make vinaigrette), so I followed that portion exactly. So, you will have a bunch of leftover quick pickled onion to enjoy as you will. I only needed to make 2 sandwiches for my household of 2, so you’ll notice I give instructions in the ingredients and directions below for what is needed per each sandwich.
My recipe for a summer sandwich of fun textures, a Radish, Edamame, Ricotta and Greens Sandwich My recipe for a summer sandwich of fun textures, a Radish, Edamame, Ricotta and Greens Sandwich

Rather than making a sandwich, you can totally eat this as a salad as well and ignore the bread (I used regular sandwich bread here and not pita). My version also uses microgreens and edamame, which I used instead of pea shoots and peas as called by the original recipe, though the idea of pea shoots and peas in a sandwich is pretty lovely too.

Ingredients:

  • 1/2 cup apple cider vinegar
  • 1 1/2 teaspoons of sugar
  • 3/4 cup of diced onions
  • 1 cup shelled edamame (you can also use peas instead)
  • 3 tablespoons of olive oil
  • 6 cups microgreens or pea shoots or you can use torn butter lettuce, your call (you will use about a cup of greens per sandwich)
  • About 2 cups of thinly sliced radishes (you will use 1/3 cup per sandwich)
    Slicing radishes thinly thanks to my new mandoline
  • Your choice of sandwich bread – I used multigrain
  • 1 cup of fresh ricotta (especially if you make it yourself, like in my recipe here for homemade ricotta)
  • Directions:
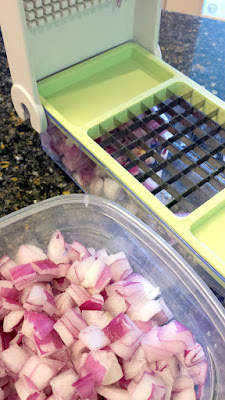
  1. First, place the diced onions in a heat proof bowl. Let me interrupt this step for a second to plug one of my favorite kitchen tools besides my silicon spatulas for scraping every bit of food in containers, KitchenArt ButterMate for measuring and cutting butter with no mess, and my rice cooker. My #4 fave kitchen tool is the Vidalia Onion Chop Wizard. I bought it a couple years ago when after (wearing glasses, not contacts) chopping a large beautiful onion I had procured from the Portland Farmers Market, I noticed at work the next day that the misty morning was continuing in that it was looking a little misty inside my work cubicle looking at my monitor. An emergency appointment that evening at the eye doctor yielded that I had somehow burned my eye with possibly onion vapors and needed steroid eye drops for the rest of the week. Shortly after that I bought this Chop Wizard and now I can get onions diced in less than a minute and there are never any tears. It even measures how many cups of onions I have so I only need to chop what I need. Some people like the repetitive ritual of chopping, but not me – and this chopper helps me get if over faster with all sorts of vegetables, not just onions. It’s awesome.
    <One of my favorite kitchen tools, the Vidalia Chop Wizard makes dicing onions so easy One of my favorite kitchen tools, the Vidalia Chop Wizard makes dicing onions so easy
    Anyway, in a small saucepan bring to a boil a combination of the 1/4 cup water, the 1/2 cup apple cider vinegar, and 1 1/2 teaspoon of sugar to a boil.  Once it is boiling, remove the liquid from heat and pour over your diced onions. Let the onions pickle for about 15 minutes before separating the onions out. Don’t toss the onion vinegar liquid – you’ll be using that as a vinaigrette later! This is a great trick for quick pickling onions for any of your sandwich needs.
    Quick pickling the diced red onions is easy, just onions, and then boiled water with apple cider vinegar and some sugar Quick pickling the diced red onions is easy, just onions, and then boiled water with apple cider vinegar and some sugar Quick pickling the diced red onions is easy, just onions, and then boiled water with apple cider vinegar and some sugar
  2. If you use frozen edamame like I did, you should defrost them by steaming, boiling, or because of the summer heatwave I just used the microwave. They only need to be heated for a few minutes, and then blanched for the same number of minutes (I refreshed mine in water with ice). Drain the edamame from the water and set aside.
  3. Whisk 3 tablespoons of the leftover onion vinegar liquid that was left in a mixing bowl with the olive 3 tablespoons of olive oil. That’s enough dressing for 6 sandwiches, but I only needed to make 2 sandwiches so I eyed only a small amount to keep in the bowl and refrigerated the rest for future sandwiches and salads.
  4. In a mixing bowl I combined that small amount of onion vinaigrette (approximately two tablespoons) with a small amount of the quick pickled onions (probably two tablespoons, one for each sandwich again) as well as 2 cups of microgreens, a tablespon of the shelled edamame, and 1/3 cup of sliced radishes and tossed them all together so everything was coated with the vinaigrette.
    For the greens portion of the Radish, Edamame, Ricotta and Greens Sandwich, toss the onion vinaigrette with microgreens, radishes, edamame, and the quick pickled red onions For the greens portion of the Radish, Edamame, Ricotta and Greens Sandwich, toss the onion vinaigrette with microgreens, radishes, edamame, and the quick pickled red onions
  5. For each sandwich, I first spread the fresh ricotta (about 1 tablespoon for each sandwich half), and then topped each half with 1/2 a cup of the greens edamame radish mixture.
    My recipe for a summer sandwich of fun textures, a Radish, Edamame, Ricotta and Greens Sandwich My recipe for a summer sandwich of fun textures, a Radish, Edamame, Ricotta and Greens Sandwich

I left my sandwiches open-faced because that’s my thing right now, to let the insides of a sandwich be visually enjoyed. I also am a bit greedy and may overstuff my sandwich.
My recipe for a summer sandwich of fun textures, a Radish, Edamame, Ricotta and Greens Sandwich My recipe for a summer sandwich of fun textures, a Radish, Edamame, Ricotta and Greens Sandwich

The next day, instead of sandwiches I added more torn butter lettuce to fill it out (I added a bit more of the leftover vinaigrette to compensate) and had this whole thing in salad form instead of sandwich (and my homemade ricotta had gotten more firm, so was perfect for adding in little 1/4 teaspoon fulls instead of spreading on bread).
Radish, Edamame, Ricotta and Greens salad Radish, Edamame, Ricotta and Greens salad

What’s one of your favorite go to summer sandwiches during the hot summer? What are your favorite kitchen tools/tricks?

Signature

Cucumber and Ricotta Sandwich with a recipe for Homemade Ricotta

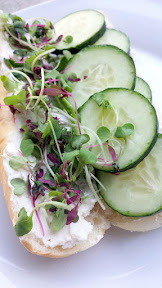
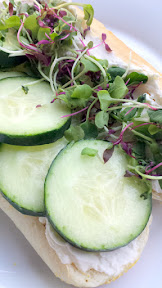
Just a simple Cucumber and Ricotta Sandwich that is great for a picnic or dinner on the porch with a glass of white wine on a super hot day, like the heat wave that Portland just went through.

Homemade ricotta on Franz Bakery Stadium Rolls with sliced cucumber and microgreens. Simple sandwich and great for a summer heatwave meal

I make my own ricotta because once I learned how to during a HipCooks Portland class several years back, I haven’t been able to go back. Plastic from the store leaches into the flavor of the mass market Ricotta. You can avoid this for the cost of a a little whole milk, heavy cream and a lemon juice or vinegar (which you probably already have at home anyway). Or instead of the cream and lemon juice/vinegar as your acid ,just use buttermilk instead like when I made ricotta for Pasta Shells with squash and zucchini. Either way it yields a better value if I make it myself than buy it from the store, on top of the superior flavor quality. It really is just those 3 (or 2!) ingredients!

You can never have too much ricotta, which is why I always go for the gallon or half gallon of milk plus pint of heavy cream amounts. If you need more ideas of how to use ricotta besides the obvious smearing it on bread, putting it in pastas, in desserts… check out this Huffington Post roundup of some beautiful Ricotta Recipe Ideas.

Ingredients:

  • 1/2 gallon of whole milk (aka 2 quarts)
  • 1 pint of heavy cream (aka 2 cups)
  • 3 tablespoons white wine vinegar (or another acid like lemon juice also works)

Directions:

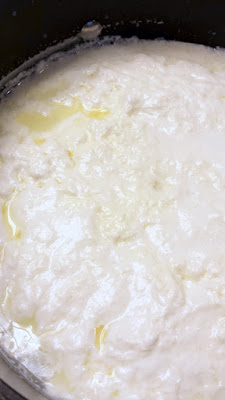
  1. In a large pot, add the milk and cream and slowly heat it, stirring to make sure you don’t burn the milk at the bottom, until you start to see lots of little bubbles around the corner but it hasn’t reached a full rolling boil. If you have a thermometer, you are shooting for around 180 degrees F. Make sure you keep stirring so you don’t scorch any milk at the bottom of the pot.
    Making homemade ricotta- so easy, just whole milk, heavy cream, and a little acid via lemon juice or vinegar combined with heat Making homemade ricotta- so easy, just whole milk, heavy cream, and a little acid via lemon juice or vinegar combined with heat. You want it to reach around 140 degrees F - it will not be boiling yet, but be starting to bubbles at the pop sides like this
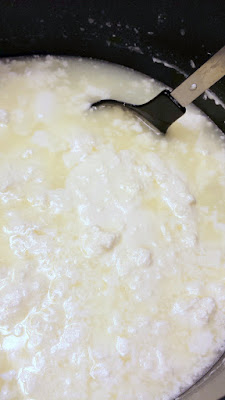
  2. Once you reach that heat level, turn off the heat and remove the pot of milks from the stove. Add in the vinegar and stir in. Now let it stand for a few minutes while the cheese curdles – you should see the whey (the yellowish part) start to separate from the clumps of ricotta, like below.
    Making homemade ricotta- so easy, just whole milk, heavy cream, and a little acid via lemon juice or vinegar combined with heat. Here you can see the curds starting to separate <Making homemade ricotta- so easy, just whole milk, heavy cream, and a little acid via lemon juice or vinegar combined with heat. Here you can see the curds starting to separate
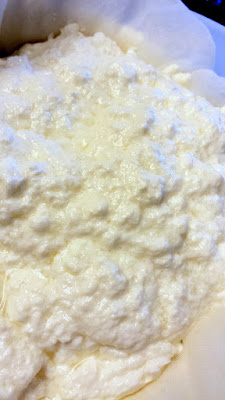
  3. Using a sieved spoon, I then spoon the ricotta into a sieve that has a cheesecloth folded in half over it. Let the cheese drain – the less time you give it, the softer and moister it will be, while draining it overnight makes it thicker. As you are spooning in the ricotta, if you’d like you can sprinkle in a little salt now and then for flavor. Depending on the size of the curds, I might use the strainer itself instead of a sieved spoon to get all the tiny curds. Here in this batch the curds were chunkier but it’s OK if the curds are smaller,  it all comes together as it drains don’t worry.
    Making homemade ricotta- so easy, just whole milk, heavy cream, and a little acid via lemon juice or vinegar combined with heat. Here you can see the curds have separated, so now strain the cheese from the whey with cheesecloth over a mesh strainer Making homemade ricotta- so easy, just whole milk, heavy cream, and a little acid via lemon juice or vinegar combined with heat. Here you can see the curds have separated, so now strain the cheese from the whey with cheesecloth over a mesh strainer Making homemade ricotta- so easy, just whole milk, heavy cream, and a little acid via lemon juice or vinegar combined with heat. Here you can see the curds have separated, so now strain the cheese from the whey with cheesecloth over a mesh strainer
  4. Let the whey drain further – depending on how soft or firm you want the ricotta. I think it’s best within the first 24 hours, when it’s still really soft and drained for a few hours. As you drain it further such as overnight or place it in the refrigerator, it will get firmer. The ricotta should keep refrigerated for 4 to 5 days, though mine never lasts than 3 days at most and I think it’s best in those first few days unless you are making a pasta dish/cooking with it as it isn’t as fresh tasting as the first days.
    Making homemade ricotta. Now in the cheesecloth, let it drain for a couple hours. The longer you wait, the most more firm it will become, especially if you drain it in the fridge overnight Homemade Ricotta after draining the whey and a little ground pepper

I use it on bread and top it with fruit and veggies as an open sandwich, or on grilled bread with just a drizzle of nice olive oil and balsamic vinegar if I’m fancy. It could be simply in a bowl with fruit, part of breakfast in pancakes or an accompaniment with eggs, or just the start of a big dinner such as stuffed pasta shells (like a Fresh Ricotta, butternut squash, baby zucchini in Pasta Shells recipe I shared in the past), lasagna, and so much more! In fact, next week, I will share one of the other things I made with this ricotta, a Radish, Edamame, Ricotta and Greens Sandwich.
Simple Scrambled eggs with ricotta and microgreens

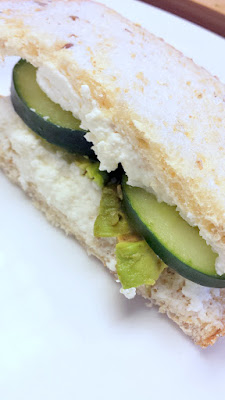
In the summer, especially during a heat wave when it’s almost 100 degrees and I’m super hot and tired and lazy or combination of all of those, and I want a refreshing sandwich, I just cut up cucumbers and put it in a sandwich with ricotta – maybe even an additional smear of avocado.
California Avocados Homemade ricotta in a cucumber avocado ricotta sandwich, recipe is easy and refreshing in the summer

On a Stadium Roll (my latest favorite bread from Franz Bakery) with microgreens or whatever greens I have.
<Homemade ricotta on Franz Bakery Stadium Rolls with sliced cucumber and microgreens. Simple sandwich and great for a summer heatwave meal Homemade ricotta on Franz Bakery Stadium Rolls with sliced cucumber and microgreens. Simple sandwich and great for a summer heatwave meal Homemade ricotta on Franz Bakery Stadium Rolls with sliced cucumber and microgreens. Simple sandwich and great for a summer heatwave meal

Or, no bread at all and just cucumber and ricotta with a few grinds of freshly ground pepper.
Homemade Ricotta after draining the whey and a little ground pepper plus cucumbers for a vegetarian sandwich that is nice and cool for the summer heat

I definitely enjoyed ricotta sandwiches as meals during the Portland heat wave. Have you ever made homemade ricotta? Do you use ricotta in sandwiches? What’s your favorite food during a heat wave?

Homemade ricotta on Franz Bakery Stadium Rolls with sliced cucumber and microgreens. Simple sandwich and great for a summer heatwave meal

Signature