Mini Cream Cheese Puffs

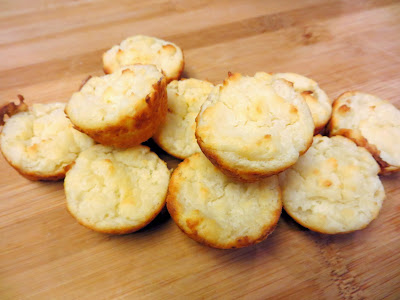
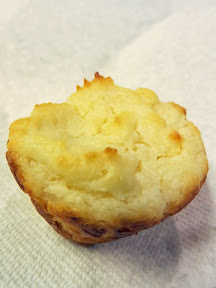
Whenever I have about 1/2 a cup of cream cheese/neufchatel left, I don’t quite know what to do with it. I might buy a bagel or two, or I might use it in a sauce in a skillet that I will mix up. Recently though, I saw an adorable other option, that of Soft Baked Mini Cream Cheese puffs by Averie Cooks. They are extremely easy, and don’t require eggs, just butter, cream cheese, flour, baking powder, salt and milk! Mine don’t look as pretty as hers, but they were tasty and so easy for a lazy Sunday!

Recipe for Mini Cream Cheese Puffs, just 6 ingredients and 15 minutes Recipe for Mini Cream Cheese Puffs, just 6 ingredients and 15 minutes

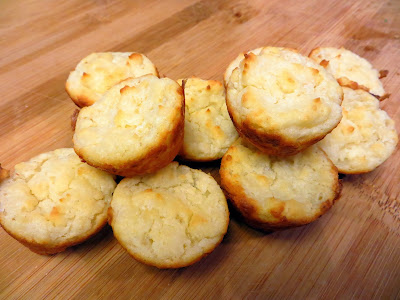
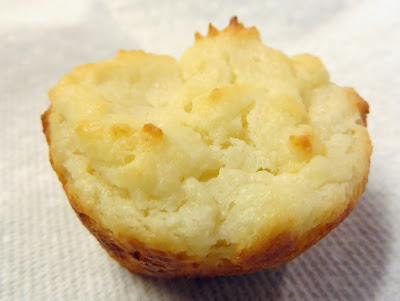
They are very light and fluffy. My little muffin pan makes 12, and with this recipe I got 30 little cream cheese puffs! They don’t taste cheesy, just like little buttery soft puffs. I only have one mini muffin pan, so I had to reuse them so it took a little longer, but if you had 2 pans you would be out and eating these in just 15 minutes!

Ingredients:

  • 1/2 cup unsalted butter, softened to room temp
  • 1/2 cup cream cheese (reduced fat or light cream cheese or Neufchatel)
  • 1 cup all-purpose flour
  • 1 1/2 teaspoons baking powder
  • 1/2 teaspoon salt, or to taste
  • about 3/4 cup milk

Directions:

  1. Preheat oven to 425 degrees F. Grease your mini muffin pan.
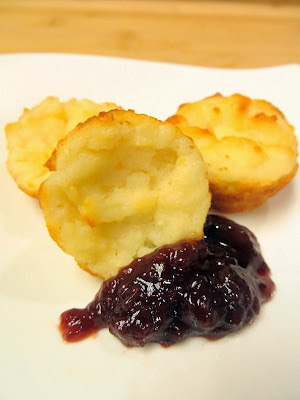
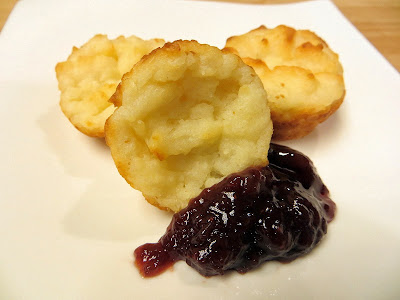
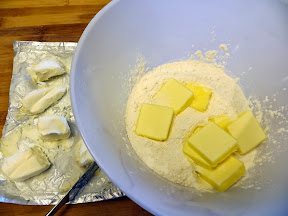
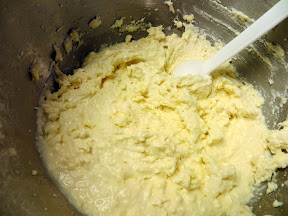
  2. In a large mixing bowl, combine the butter, cream cheese, flour, baking powder, and salt. She also notes that this puff recipe makes a great base, so you could throw in additional flavorings varying from cinnamon and nutmeg to pumpkin pie spice, or you can go savory with garlic, chili, caramelized onions, etc. Or leave it plain and just pop them into your mouth warm from the oven, or eat with jam! Anyway, beat the contents of your mixing bowl with an electric mixer to combine, about 2 minutes on medium high speed. Mixture will be very crumbly, with pebbles and sandy bits.
    Recipe for Mini Cream Cheese Puffs, just 6 ingredients and 15 minutes Recipe for Mini Cream Cheese Puffs, just 6 ingredients and 15 minutes
  3. Slowly drizzle in up to 3/4 cup milk; just enough so that batter will combine and come together. The batter should be very thick and paste-like. If the batter is for any reason too thick to stir, add a little bit more milk, as necessary to thin it.
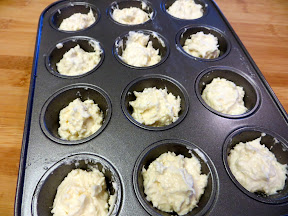
  4. Using a greased tablespoon or small cookie scoop (helps batter slide off), form rounded 1 tablespoon mounds in your mini muffin pan. Each mini muffin well should not be full, and don’t worry about filling them exactly uniformly. As these puffs bake, batter that was placed in the pan in a very rounded fashion like a perfect scoop of ice cream will bake up more domed and puffed. They rise very well; be careful not to overfill.
    Recipe for Mini Cream Cheese Puffs, just 6 ingredients and 15 minutes Recipe for Mini Cream Cheese Puffs, just 6 ingredients and 15 minutes
  5. Bake for about 11 to 12 minutes, or until puffs are springy to the touch, and a toothpick inserted in the center comes out clean. Be careful of the time as they easily over-bake (which happened to my second pan) because the bases will turn darker but you won’t see this until you release them from the pans.
    Recipe for Mini Cream Cheese Puffs, just 6 ingredients and 15 minutes
  6. Allow puffs to cool in pans for about 10 minutes, or until they’ve firmed up and are cool enough to handle.

Puffs are best fresh of course, but Averie noted they should keep airtight at room temperature for up to 3 days, or in the freezer for up to 4 months. Serve plain for simple buttery goodness, or with jam/jelly, honey, chutney, dips, soup, chili, etc.!

Recipe for Mini Cream Cheese Puffs, just 6 ingredients and 15 minutes Recipe for Mini Cream Cheese Puffs, just 6 ingredients and 15 minutes

Signature

Counting down to my Ebelskiver

With my 5 year service anniversary present from work, I recently ordered this. This has been on my wishlist for a couple years, I have been wishing for ever since I had some of those Poffertjes  at my visit to the Wooden Shoe Tulip Farm.

Poffertjes at the Wooden Shoe Tulip Farm- Tulip Festival Poffertjes at the Wooden Shoe Tulip Farm- Tulip Festival

I know Poffertjes and Ebelskivers (pronounced “able-skeevers”, also written Æbleskiver, but I am not typing that over and over) are not the same…

For one thing Poffertjes are Dutch (thus, the presence at the tulip farm) vs Ebelskivers which are Danish. They are snacks or desserts traditionally served during winter holidays and celebrations, and don’t require much besides milk, eggs, flour (yes gluten free flours are fine to substitute in as well!) and fillings of your choice as well as some sort of welled pan. Ebelskiver pans are sold at Amazon, Walmart, Target and Sur La Table, etc. Getting the temperature right in the pan is difficult, which is why I’ve had this electric version on my wishlist.

Also, IMHO Ebelskivers are better because they are a little bigger so you can fill them with more goodness… say sweet fruits, chocolates, or cheese!!! I plan to test all of these fillings. Example recipes I have bookmarked include

  • Maple-nut ebelskivers (serve on the side with sausage and pork for breakfast! Or as dessert with bourbon whipped cream)
  • Spiced apple filled ebelskivers
  • Banana rum (reminiscent of bananas Foster)
  • Salted caramel-pecan ebelskivers
  • Molten chocolate ebelskivers
  • Walnut, pear, and blue cheese
  • Marionberry jam and brie
  • Spicy corn ebelskivers
  • Potato and green onion (can be topped with caviar, ketchup, or sour cream)

Anxiously awaiting a package!!! Denmark is often ranked the happiest country in the world- do you think these ebelskivers contribute to that? Which of these ebelskiver combinations do you think sound good!?? Have you had ebelskivers or poffertjes before?


Signature

Cauliflower with Brown Butter, Pears, Hazelnuts

This recipe for Cauliflower with Brown Butter, Pears, Hazelnuts is a but the pear portion ahead of time (the pears will brown so can’t be done in advance). I have been specifically avoiding vegetarian side dishes that bury the vegetable side in cream and cheese- I think I already used my Thanksgiving side allotment of that all on the Butternut Squash Lasagna in Béchamel sauce recipe I covered previously.

Vegetarian Recipe: Cauliflower with Brown Butter, Pears, Hazelnuts Vegetarian Recipe: Cauliflower with Brown Butter, Pears, Hazelnuts

So gratins and casseroles were out. I love roasting cauliflower (well, really roasting any vegetable), and I’ve also made cauliflower into a mash – you can make faux mashed potatoes that way. But I was still looking for something different… and then I found this. This recipe is another preparation of cauliflower which is done on the stovetop  in just 10-15 minutes, and really seems to embody autumn! Bosc pears work well, but you could really use any pear you’d like.

Vegetarian Recipe: Cauliflower with Brown Butter, Pears, Hazelnuts Vegetarian Recipe: Cauliflower with Brown Butter, Pears, Hazelnuts

The original Fine Cooking recipe calls for 8 fresh sage leaves, but since I already used sage in the  Butternut Squash Lasagna and in the Harvest Quinoa with Apples and Walnuts recipe, I decided to season this with  a different herb and used a mix of rosemary and tarragon. Rather than parsley, I had these spicy radish sprouts from Nightlight Farm instead, which I like better than parsley. Yum, microgreens beats parsley any day.

This dish serves 8-10 as a side along with your main protein- be it turkey or whatever you are having for dinner!

Ingredients:
Vegetarian Recipe: Cauliflower with Brown Butter, Pears, Hazelnuts Vegetarian Recipe: Cauliflower with Brown Butter, Pears, Hazelnuts

  • 6 tablespoons butter
  • 1 large head cauliflower, cut into small florets about 3/4 inch wide – about 4 cups worth of florets
  • 1/2 cup toasted and chopped hazelnuts – you can use other nuts also, such as almonds or walnuts
  • 8 fresh sage leaves, thinly sliced crosswise, or I used about 4 springs of tarragon and a teaspoon of rosemary
  • 1 teaspoon salt + to taste
  • 1 teaspoon freshly ground black pepper + to taste
  • 2 large ripe pears, cored and thinly sliced (I know I show 3 pears- but I only used 2, the third was for a few slices for garnish)
  • 2 tablespoons of chopped fresh flat-leaf parsley, or I used about a cup of spicy radish sprouts

Vegetarian Recipe: Cauliflower with Brown Butter, Pears, Hazelnuts

Directions:

    1. In a 12-inch skillet over medium-high heat, melt the butter until light brown and bubbly. Add the cauliflower, hazelnuts, and sage. Cook for 2 minutes, stirring occasionally. Season with 1 teaspoon each of the salt and freshly ground pepper and continue cooking, stirring occasionally, until the cauliflower is browned and crisp-tender, 6 to 7 minutes more.
      Vegetarian Recipe: Cauliflower with Brown Butter, Pears, Hazelnuts
    2. Remove the pan from the heat. Add the pear slices and parsley. Gently toss to combine and warm the pears. Season to taste with more salt. Serve hot or at room temperature.
      Vegetarian Recipe: Cauliflower with Brown Butter, Pears, Hazelnuts Vegetarian Recipe: Cauliflower with Brown Butter, Pears, Hazelnuts Vegetarian Recipe: Cauliflower with Brown Butter, Pears, Hazelnuts

Vegetarian Recipe: Cauliflower with Brown Butter, Pears, Hazelnuts Vegetarian Recipe: Cauliflower with Brown Butter, Pears, Hazelnuts
This is the fourth of a series of posts of recipes covering dishes to consider for Thanksgiving. All the recipes in this series will be vegetarian, so you might consider it for a side dish or if you have a vegetarian at your table like I do, be a way to provide something more hearty than the usual sides of rolls, cranberry sauce, mashed potatoes, and green beans. Check out my Recipes Index page for other dishes that I have covered in the past.

Summary of the Vegetarian Thanksgiving Sides Series 2013:

Vegetarian Recipe: Cauliflower with Brown Butter, Pears, Hazelnuts

As a side note check out that star plate that I first bought after college,  mostly because it was on sale and seemed pretty fancy. It also is not dishwasher safe but it would still be several years before I rented my first apartment with a dishwasher. Also not microwave safe but since everything I nuked came in a package from the freezer or in a restaurant leftovers container that wasn’t an issue.  Amazingly I still have the whole set including teacups and saucers,  which is more than I can say about my everyday dining set of stoneware that actually came from Facebook.  When we got married we looked at half a dozen places but could not agree on china so we continue to use a mish mash of dishware.

Do you have fine china or a full set of dishes or are you eclectic like me?

Signature

Classic Cocktails with the Rookery

The Rookery at Raven & Rose recently has launched a monthly cocktail classes with the men of the Rookery bar, bar director David Shenaut and barman Alan Akwai. This past September, October, November, and for one more class in December, the title of the class is “Essential Classic Cocktails You Can Serve at Home”. I recently attended the November class, which apparently had the largest attendance yet of the series, and David says that next year they plan to change up the theme so that even if you took the classic cocktail class you will want to follow up with another class for further continuing education!

Essential Classic Cocktails, a cocktail class with David Shenault and Alan Akwai at Raven and Rose's the Rookery Essential Classic Cocktails, a cocktail class with David Shenault and Alan Akwai at Raven and Rose's the Rookery

The Essential Classic Cocktails class I attended covered the history, construction and recipes for four vintage cocktails, included samples of the four cocktails, as well as some “fancy snacks” for the $50 class price. Afterward, by showing the recipe notebook after class, you can enjoy a complimentary dessert with an entree purchase at the Raven and Rose restaurant downstairs.

I’m a big fan of the Rookery and David and Alan- I’ve been to the Rookery a couple times for beverages, and also events like Beer with the Bird or one of their several whiskey events (the one I attended was Raven and Rye). I’m not going to repeat my crush on their ability to articulate details of flavors in ingredients and craft combinations that are unique and perfect just for you. Instead, I’m going to recap the Classic Cocktails with the Rookery class for you!

Essential Classic Cocktails, a cocktail class with David Shenault and Alan Akwai - Dave Essential Classic Cocktails, a cocktail class with David Shenault and Alan Akwai - Alan

Upon checking in, we were led to our seats which were marked by placecards and there was a punchbowl of an autumnal punch they had whipped up (and as we found out later, just “winged it” with Jameson, apple cider, and spices) to welcome us. We were soon double-fisting it however as the samples of the first drink we would be learning, the Margarita were passed out. I’ve made margaritas before, but Dave and Alan immediately educated everyone on their philosophy of building cocktails Dry – that is, with no ice. By waiting on the ice the drink does not diluted and you can still make changes when you take a stirring straw taste, or wait so you can prep for all your dinner party guests.

Essential Classic Cocktails, a cocktail class with David Shenault and Alan Akwai - the starter sample of an autumn punch Essential Classic Cocktails, a cocktail class with David Shenault and Alan Akwai - the next cocktail sample and first recipe we learn is a Margarita

Dave and Alan have a great friendly rapport as they answered questions varying from how long to shake or how they explain how to know whether to shake or stir a drink (answer: citrus, egg, and creme are shaken, drinks that are more boozy are stirred.) Furthermore, they illuminated that the shaking is about aeration, not just a way to mix ingredients. Also, how does Alan make it look so fun to shake? There was also a difference in opinion as Dave would never make more than one serving in a shaker, while Alan realistically says he would.

Essential Classic Cocktails, a cocktail class with David Shenault and Alan Akwai - Alan shakes it Essential Classic Cocktails, a cocktail class with David Shenault and Alan Akwai at Raven and Rose's the Rookery Essential Classic Cocktails, a cocktail class with David Shenault and Alan Akwai - Dave rims a margarita glass Essential Classic Cocktails, a cocktail class with David Shenault and Alan Akwai - answering questions

The next classic vintage cocktail was the Old Fashioned. After Alan showed us the right glassware, Dave tagged in to talk about making simple syrup and how to not heat the mixture as it loses flavor. Then Alan was back showing us techniques in dashing bitters in different amounts with various flicks, and Dave went on to wax poetic about bitters as well as where he sources his ice (he sources from PDX Ice – I also recognize that ice from Imperial!). Alan brought us back to how stirring is about binding, and how important it is to stir on the edge of the glass and create a whirlpool with no lifting of the spoon to add air. After a good stir the drink should look viscous and feel round.

Essential Classic Cocktails, a cocktail class with David Shenault and Alan Akwai - the glass for the Old Fashioned Essential Classic Cocktails, a cocktail class with David Shenault and Alan Akwai- Alan is dashing some bitters Essential Classic Cocktails, a cocktail class with David Shenault and Alan Akwai- without a special bottle, bitters pour out quickly Essential Classic Cocktails, a cocktail class with David Shenault and Alan Akwai - Dave loves pdxice Essential Classic Cocktails, a cocktail class with David Shenault and Alan Akwai- teaching us about stirring right Essential Classic Cocktails, a cocktail class with David Shenault and Alan Akwai- teaching us about stirring right

We tasted the Old Fashioned 3 ways. After we each had a chance to practice trying to pour a perfect jigger of the cocktail for ourselves, we took a sip of it plain. Next, we broke a lemon peel over it in order to infuse lemon oils. Finally, we added the lemon peel into the drink (our tables’ favorite).

Essential Classic Cocktails, a cocktail class with David Shenault and Alan Akwai - the next cocktail sample and second recipe we learn is the Old Fashioned Essential Classic Cocktails, a cocktail class with David Shenault and Alan Akwai - the next cocktail sample and second recipe we learn is the Old Fashioned, this time with lemon peel

Next up was Punch. After being schooled on Oleo Saccharum (“oily sugar”), we were then taught the magic ratio. Although it sounds like a lot of work in making Oleo Saccharum which includes peeling 4 lemons and making hot tea concentrate, it opened up my eyes to how much layering and complexity of flavor you can add just with your selection of the type of tea. Since the base spirit and dilution (juice, wine, soda, water, or sparkling cider or champagne as we sampled in class- the second punch we would soon be sampling used champagne) can also vary, the possibilities are endless, and Dave sagely promised that the Magic Ratio has never failed him.

Also, making punch seems fun since in order to get the right amount of liquid, you will end up having a glass of base spirit and glass of dilution (champagne below!) leftover that Dave encouraged us to have ourselves to loosen us up for our dinner party!

Essential Classic Cocktails, a cocktail class with David Shenault and Alan Akwai - Dave takes a glass of bubbly out before pouring the rest in for punch Essential Classic Cocktails, a cocktail class with David Shenault and Alan Akwai - the punchbowl visits us temporarily as Dave tells us we should probably eat Essential Classic Cocktails, a cocktail class with David Shenault and Alan Akwai at Raven and Rose's the Rookery, Champagne Punch

After the punch lesson, it was time punch, and for the Fancy Snacks.
Essential Classic Cocktails, a cocktail class with David Shenault and Alan Akwai at Raven and Rose's the Rookery, the fancy snacks portion of class Essential Classic Cocktails, a cocktail class with David Shenault and Alan Akwai at Raven and Rose's the Rookery, the fancy snacks portion of class Essential Classic Cocktails, a cocktail class with David Shenault and Alan Akwai at Raven and Rose's the Rookery, the fancy snacks portion of class Essential Classic Cocktails, a cocktail class with David Shenault and Alan Akwai at Raven and Rose's the Rookery, the fancy snacks portion of class Essential Classic Cocktails, a cocktail class with David Shenault and Alan Akwai at Raven and Rose's the Rookery, the fancy snacks portion of class Essential Classic Cocktails, a cocktail class with David Shenault and Alan Akwai at Raven and Rose's the Rookery, the fancy snacks portion of class

The final cocktail was the famous Rookery Irish Coffee, which was a warm, wonderful end to the class before going back out into the night and the rain. If you haven’t had the Irish Coffee here (which uses Spella coffee), you must try it- it’s the best I think in Portland.

Essential Classic Cocktails, a cocktail class with David Shenault and Alan Akwai - the next final cocktail and my favorite, the Irish Coffee Essential Classic Cocktails, a cocktail class with David Shenault and Alan Akwai of Raven and Rose the Rookery

If you want to find out more about or sign up for upcoming classes, be sure to contact event manager Natalia Toral, at natalia at ravenandrosepdx.com.

Signature

Recipe: Four Greens with Garlic Saute

Next on the Thanksgiving sides/vegetarian options list is this Four Greens Saute. I love that it layers four different kinds of greens for flavor and texture. This recipe originally was inspired from Neelys for Food Network Magazine, and I’ve adapted it based on the fact I didn’t have turnip greens and yields 6-8 servings. Other than the slicing of the greens though, this is so easy to make. Greens with garlic is classic, and I think is a welcome, simple break from the vegetable dishes with cream and cheese.

Four Greens with Garlic Saute with mustard greens, kale, turnip or dandelion greens, and swiss chard. Have it with rice, as a side dish to a protein, top it with nuts or with a poached egg Four Greens with Garlic Saute with mustard greens, kale, turnip or dandelion greens, and swiss chard. Have it with rice, as a side dish to a protein, top it with nuts or with a poached egg

You cook the greens at different times because the chard cooks faster- if you substitute other greens, like collard, you will want to do the collard greens as the first greens because they take a longer to get out the bitterness. Tender, young green leaves fresh from your garden will cook faster. I don’t like gritty greens and maybe I’m a bit anal about cleaning, so I soak mine in cold water for a few minutes and do this a few times until there is no dirt at the bottom of the bowl to clean them before cutting, and then maybe again before cooking. F was glad to see I was getting a lot of use of my salad spinner.

There are a few ways to eat this- plain, you can chop up some nuts of your choice for some crunch and add on top, F likes this with hot sauce. I also like this with a poached egg on top.

Now, don’t laugh too much at my photos. I am starting to try to learn and experiment with my camera and in the process, I have these portrait photos of greens… Though I admit, it cracks me up too.

Mustard Greens. Recipe for Four Greens with Garlic Saute with mustard greens, kale, turnip or dandelion greens, and swiss chard. Kale. Recipe for Four Greens with Garlic Saute with mustard greens, kale, turnip or dandelion greens, and swiss chard. Recipe for Four Greens with Garlic Saute with mustard greens, kale, turnip or dandelion greens, and swiss chard. Here is the chard Dandelion Greens for a Recipe for Four Greens with Garlic Saute with mustard greens, kale, turnip or dandelion greens, and swiss chard. Have it with rice, as a side dish to a protein, top it with nuts or with a poached egg

Ingredients:

  • 1 bunch mustard greens, cleaned
  • 1 bunch dandelion greens, cleaned
  • 1 bunch kale, cleaned
  • 1 bunch Swiss chard, cleaned
  • 2 tablespoons extra-virgin olive oil
  • 1 large yellow onion, thinly sliced
  • 4 cloves garlic, thinly sliced
  • Kosher salt and freshly ground pepper
  • 1 1/2 cups broth – I used vegetable broth

Directions:

  1. Remove the center stems from all the greens and slice the leaves into 1/2-inch ribbons. Ok, I admit I did not do this with the dandelion greens, but I think if you were using the original turnip greens that makes sense. If you do this while the radio is playing and maybe dance a little, or you talk to your cat, that would be just like what I do, but optional of course.
    Recipe for Four Greens with Garlic Saute with mustard greens, kale, turnip or dandelion greens, and swiss chard. Have it with rice, as a side dish to a protein, top it with nuts or with a poached egg Recipe for Four Greens with Garlic Saute with mustard greens, kale, turnip or dandelion greens, and swiss chard. Have it with rice, as a side dish to a protein, top it with nuts or with a poached egg
  2. Pour the olive oil into a large saute pan and set over medium-high heat. Once hot, add the onion and garlic and saute until tender and fragrant. As usual, I like to see some char on mine, but you can just wait for them to be translucent. Season with salt and pepper  liberally.
  3. Stir in the ribbons of mustard greens, dandelion greens and kale in batches, adding the next batch as the one prior wilts down. Once those three greens are added to the pot, pour in the broth and cook 15 minutes. Then add the ribbons of Swiss chard and cover with a lid. Let simmer 5 more minutes. Taste for seasoning and adjust accordingly- obviously this varies based on the flavor of the broth you use. Spoon the greens into a large serving dish.
    Recipe for Four Greens with Garlic Saute with mustard greens, kale, turnip or dandelion greens, and swiss chard. Have it with rice, as a side dish to a protein, top it with nuts or with a poached egg Recipe for Four Greens with Garlic Saute with mustard greens, kale, turnip or dandelion greens, and swiss chard. Have it with rice, as a side dish to a protein, top it with nuts or with a poached egg

How would you eat these greens? Plain as a side accompaniment? With hot sauce? With chopped nuts? Or with the poached egg? Ooo, or instead of hot sauce you could throw in some sliced hot cherry peppers for heat! No, I still like the poached egg… why not both?
Recipe for Four Greens with Garlic Saute with mustard greens, kale, turnip or dandelion greens, and swiss chard. Have it with rice, as a side dish to a protein, top it with nuts or with a poached egg Recipe for Four Greens with Garlic Saute with mustard greens, kale, turnip or dandelion greens, and swiss chard. Have it with rice, as a side dish to a protein, top it with nuts or with a poached egg Recipe for Four Greens with Garlic Saute with mustard greens, kale, turnip or dandelion greens, and swiss chard. Have it with rice, as a side dish to a protein, top it with nuts or with a poached egg

This is the third of a series of posts of recipes I am going to cover on dishes to consider for Thanksgiving- the other two were the Harvest Quinoa with Apple and Walnuts and the Butternut Squash Lasagna in Béchamel. All the recipes in this series will be vegetarian, so you might consider it for a side dish or if you have a vegetarian at your table like I do, be a way to provide something more hearty than the usual sides of rolls, cranberry sauce, mashed potatoes, and green beans. Check out my Recipes Index page for other dishes that I have covered in the past.

Summary of the Vegetarian Thanksgiving Sides Series 2013:

Thanks for reading!

Signature