Maple Roasted Brussels Sprouts

I didn’t know how much I liked brussels sprouts until I had these at a elegant dinner at a restaurant, and a few days later I was looking up how to make these myself. And, it turns out it is incredibly simple.

Ingredients (serves six as a side dish):

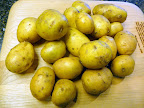
  • 1 1/2 pounds of brussels sprouts
  • 1/4 cup olive oil
  • 3/4 teaspoon sea salt
  • 1/2 teaspoon freshly ground black pepper
  • 3 tablespoons of maple syrup
  • Optional: 1/2 cup of hazelnuts

Directions:

  1. Preheat the oven to 375 degrees F.
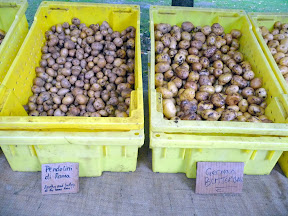
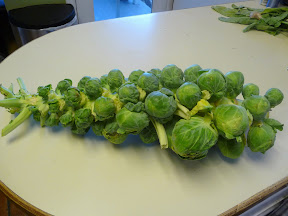
  2. Cut all the brussels sprouts in half. If you can, buy them on the stalk as shown as they stay fresher and I think taste better than when they are purchased removed. Cut the stems off and remove any yellow or brown outer leaves. When I bring these home from the farmers market boy were they a heavy “bouquet” to carry across my arm as I walked up the hill like I was crowned a pageant winner…
    brussel sprout stalk
  3. Toss the brussels sprouts with the olive oil, maple syrup, salt, and black pepper- the best way to mix this is honestly by (clean obviously) hand to make sure it is all distributed to all your sprouts.
    Maple Roasted Brussels Sprouts
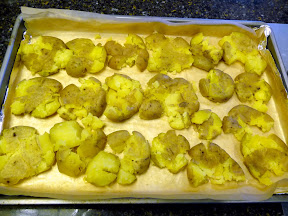
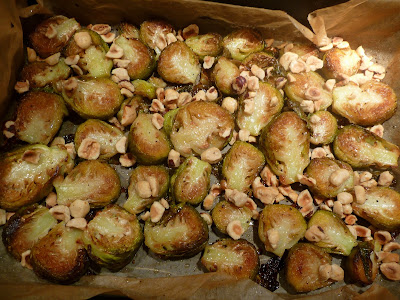
  4. On a baking sheet tray that is lined with foil or parchment paper (the tray will get messy from the caramelization process), spread all the brussels sprouts so they are all even and flat.
    Maple Roasted Brussels Sprouts Maple Roasted Brussels Sprouts
  5. Put in the oven and after every 15 minutes, turn over the brussels sprouts to even out the browning. After 45 minutes or so, they should be fork tender. Optionally, you can add hazelnuts in the last 10 minutes to toast them to add some crunch to your brussels  sprouts dish
    Maple Roasted Brussels Sprouts Maple Roasted Brussels Sprouts

I know I said these could serve six as a side dish, but I have also totally made these as a lazy weekend lunch and eaten these just by themselves too!

Signature

Crispy Smashed Potatoes

At the Saturday PSU Portland Farmers Market, this month there has been lots of beautiful displays of autumn bounty. And, the crowds have thinned quite a bit now that the rainy weather is back in Portland, leaving more room to enjoy the market since you can chat with the vendors now that it isn’t bustling, and for that same reason is why you should brave the sprinkles and go visit the market and support them as they stand for hours under their tents for you after coming in and setting up while it’s still dark outside! Be a rainy day friend.
Portland Farmers market Portland Farmers market Portland Farmers market Portland Farmers market

When I saw all these little potatoes, I knew exactly what I wanted to make: smashed potatoes. Little potatoes are perfect for smashing! I bought half and half of both kinds you see here, the Pendolini di Roma and the German Butterball. The recipe below yields enough for two people comfortably as a meal, or 4 people as side dishes.
Crispy Smashed Potatoes

Ingredients:

  • 1 1/2 pounds of little potatoes, each should be only a few inches in diameter, or if you use slightly larger try cutting them to this size
  • 1/2 teaspoon and another pinch later of sea salt
  • 1/4 cup olive oil
  • 1/2 teaspoon chopped rosemary
  • 1/2 teaspoon chopped thyme
  • 1/2 teaspoon chopped parsley
  • 1/2 teaspoon rubbed sage
  • 1/2 teaspoon freshly ground pepper

Directions:

  1. Step 1: Boiling Potatoes, first round of cooking the potatoes. Put the potatoes in a large pot and add water to cover by ~1 inch of water. Season the water with salt. Bring to a boil over high heat, and then reduce the heat to medium-low and simmer until the potatoes are tender when pierced with a fork. Make sure they are cooked but not overcooked, around 30 minutes for me, but keep checking.
  2. Step 2: Drain and Cool. Drain the water from the potatoes in a colander. Transfer the potatoes to a towel-lined baking sheet and let cool to room temperature. If you wish, you can do the prep work to here and do the rest of the cooking later (such as say, working on other dishes for your holiday dinner…)
    Crispy Smashed Potatoes Crispy Smashed Potatoes
  3. Step 3: Smashing! Begin heating the oven to 450 degrees F. Remove the towels from under the potatoes and switch out the baking pan lining with a sheet of aluminum foil and put a sheet of parchment on top of the foil, spritz with olive oil if you have it, gently tilting the pan to spread the oil. Now using another baking pan, press down on your potato on a cutting board/workspace using the baking pan on one potato to smash it flat to a thickness of about 1/2 inch. Using a spatula, replace the potatoes back on the newly lined baking sheet. Repeat with all the potatoes.
    Crispy Smashed Potatoes
  4. Step 4: Seasoning. Pour the olive oil over them. Lift the potatoes gently with the spatula to make sure some of the oil goes underneath them so both sides have been coated if you didn’t spritz the parchment paper earlier. Sprinkle in the herbs, pinch of salt and ground pepper.
    Crispy Smashed Potatoes
  5. Step 5: Final cooking. Roast the potatoes until they’re crispy and deep brown around the edges. This should take about 30 minutes, turning once gently with the spatula halfway through cooking.

Final Step: Eating! If you’d like, garnish and enjoy with a dollop of sour cream. In addition, I took the opportunity to also oven roast broccoli with red pepper flakes with the potatoes.
Crispy Smashed Potatoes Crispy Smashed Potatoes

I’ve made these many times with leftover potatoes from a bag after making mashed potatoes or some other dish. They are always good – you can season them with anything you’d like – even though I have that combination I shared above, I have also just sprinkled in whatever leftover fresh herbs I may have and dry herbs and it’s never gone wrong in terms of combinations. Make sure you are patient enough to wait for them to get crispy, and you can have them for breakfast, lunch or dinner!
Crispy smashed potatoes, season with whatever you have on hand, I don't think you can do any wrong Crispy smashed potatoes, good with anything, breakfast lunch or dinner!

Signature

Peppers at the Portland Farmers Market

Aren’t they gorgeous? I was tempted with visions of roasted peppers, and stuffed peppers with various rice or quinoa, and creamy pepper soups and gazpachos with peppers, all utilizing all the colors of these brightly colored bell peppers from the Portland Farmers Market. However, I already had lots of ears of corn to roast, and chicken salad, and tomatoes, and taco shells, and I am off to Seattle this weekend. There was no meal open to use with these beautiful peppers, sigh. But I still wanted to remember them.

Signature

Broccolo romanesco: The Fractal Veggie

This vegetable caught my eye at the Portland Farmers Market at PSU for its fractal looking florets of spikes in logarithmic spirals. It is basically a relative of the cauliflower (in fact it is sold as one of the "colored cauliflower" at the farmer market stand of DeNoble's Farm), though its greenness might make you think of broccoli. Why not both?

In fact, this is Broccolo romanesco, also known as Roman Cauliflower or broccoflower, a typically Italian vegetable that goes sublimely with fresh pasta with good olive oil and some Italian cheese. And so that's exactly how I decided to have it.

First, I separated the florets and chopped the stalks.

I did a quick blanch and shock of the broccolo romanesco after the chop- my kitchen is still in a state of remodel, so I have an oven but no sink, and I couldn't really wash these in the bathroom sink or tub, so this was my way to get around that (filling a pot with water from a sink is do-able. I saved the water from the blanching to also briefly cook the fresh pasta later (I got fresh pasta from the Farmers Market stand Pasta Del Sol, he always has an interesting quote on a whiteboard at the market too). Also, I admit I did sneak in several bites of strands of the raw pasta. Quality checking.

Next, I used a few tablespoons of extra virgin olive oil and heated up some smashed fresh cloves of garlic in a pan, and then added some (but not all) of the florets and chopped stalk for a saute. Pepper and salt to taste. After the saute I also smashed all the chopped stalk portions in a  food processer to get them to a creamy consistency so that they could coat the pasta.

I left some of the florets to keep a cool texture and look to the dish  by taking those and after a spray of misty butter-flavored cooking spray, then roasted them in the oven at 400 for about 15 minutes for a bit of char.

Then, the al dente pasta and the smashed garlic/broccolo romanesco mixture were then mixed together in a big serving dish. It was all finished with the roasted florets of broccolo romanesco and a generous sprinkling of fresh grated parmesan romano and a few red pepper flakes for heat. The photo below is pre-mix- I had put all of the broccolo romanesco in, but in hindsight, wait for the roasted florets after the mix.

Signature

Chicken Adobo from Verde Cucina

Adobo Chicken at Verde Cucina– the smell of the chicken cooking in the open market air of the Saturday Portland Farmers Market at PSU was irresistable.

What, I said IRRESISTIBLE. I made a mess of my fingers and face eating every last bite of chicken from the bone. Although my mom never made chicken adobo, it also brought me back fond memories of bbqs in the back where we would grill the marinated drumsticks of Gai Yang to this similar look and crispy skin, and eat them still warm right away outside in our backyard with all 10 child fingers and it would get on my cheeks as I bit into the meat rather than cutting because I was so hungry after smelling it being prepared and waiting, teased by the scents, and just scooping rice with my fingers rather than getting a silverware involved. Similarly lhere, local meats and produce (anything from the market that's fresh that morning), homemade corn tortillas and fresh salsa make this traditional Mexican classic taste as good as it looks and worth any messy fingers.

Signature