Tomato Pie Recipe with Fresh Cheeses and Uncooked Cherry Tomatoes

I’ve always wanted to make a tomato pie or tart. Particularly, one with the farm fresh cherry tomatoes during the peak of their season. But, I have a unique problem in using tomatoes at my home: F loves them. Loves them so much that he always makes sure he knows which bag they are in and that they are at the top, and then as soon as the groceries are in the car he grabs the cherry tomato container and eats them on the way home. He can finish a Costco size container of cherry tomatoes before we’re even in front of our house as he eats them like an addict, popping them in his mouth one after another.
Tomato Pie Recipe with Fresh Cheeses and Uncooked Cherry Tomatoes Tomato Pie Recipe with Fresh Cheeses and Uncooked Cherry Tomatoes

One time we bought them right at the farm and as we were stuck in the traffic leaving Sauvie Island, he complained his mouth felt a bit muddy. But he still finished all the tomatoes before we even crossed the bridge. Clearly he has a serious problem… Cherry tomatoes never last long in our home.

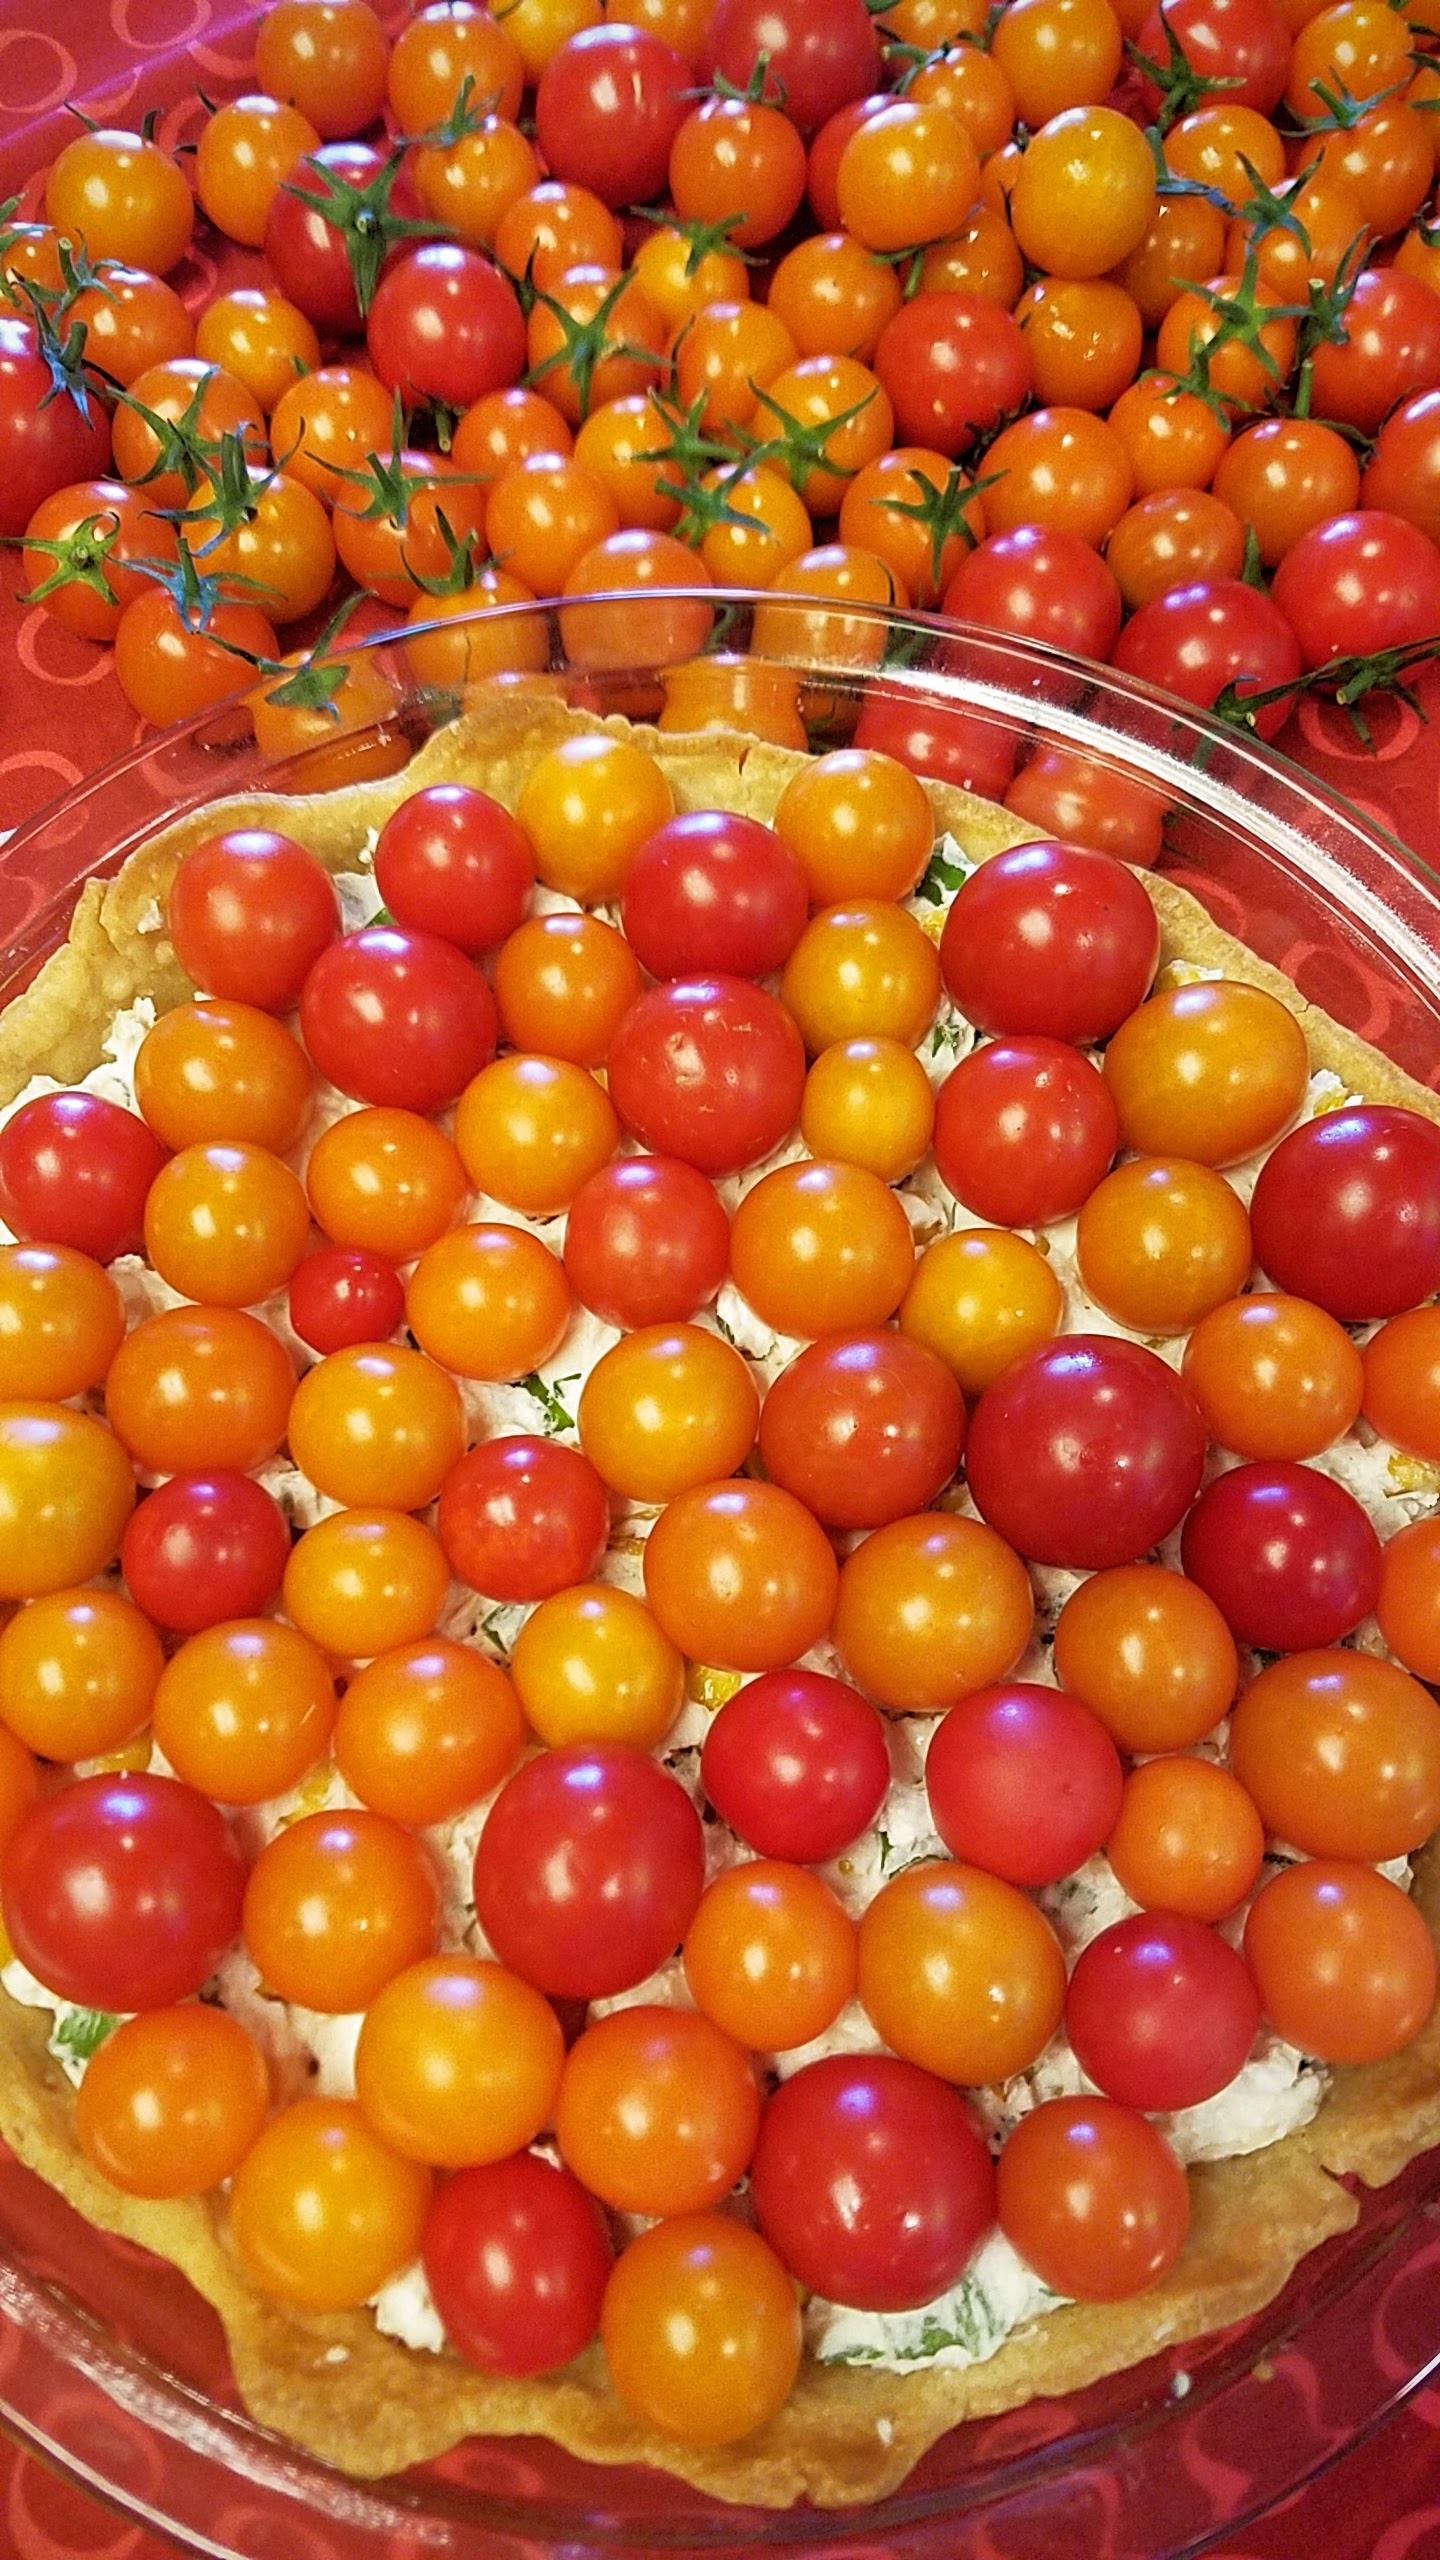
For this recipe, I purchased 4 pints of tomatoes the night before. Since they were gone by morning, I forced him to go get replacement ones, and finally I was able to make the tomato pie I’ve been waiting for. The 4 pints of cherry tomatoes that he brought back and you see partially in these photos, both on the Pie I made for lunch and the “extras”, were gone before dinner.

I used cherry tomatoes here because I love how they burst with a bit of pop of flavor. And, I particularly love this recipe because you only have to cook the pie crust- the tomatoes are NOT cooked (although they can be) so that you can taste them at their most juicy.
Tomato Pie Recipe with Fresh Cheeses and Uncooked Cherry Tomatoes

This recipe was inspired by a few things. Southern Tomato pie is a concoction with tomatoes in pastry with cheese and mayo – and I wanted one less rich, aka without the mayo (though there’s nothing wrong with mayo!). I saw a version of Southern Tomato pie that included along with those requisite ingredient also adding in summer corn kernels and I loved the idea of that extra texture. I additionally seared mine ok the pan for extra smokiness.
Tomato Pie Recipe with Fresh Cheeses and Uncooked Cherry Tomatoes and (optionally) seared corn to really celebrate the flavors of freshness

Also, similar to tomato tarts, I picked a cheese combo other than the regular cheddar and mozzarella because I wanted different flavors than essentially a variation of pizza or bruschetta – instead here we’ll be using goat cheese and ricotta mixed with scallions (as inspired by O&O Eats’ Tomato Tart with a Scallion Goat Cheese Filling) and the previously mentioned corn. The best ricotta is one you make yourself – it’s super easy, and you can find my version here for homemade ricotta on this blog post. Using fresh cheeses like goat cheese and ricotta adds creamy texture but still tastes light.
Tomato Pie Recipe with Fresh Cheeses and Uncooked Cherry Tomatoes and (optionally) seared corn to really celebrate the flavors of freshness

You can make your own pie crust if you’d like (or make this a tart), but I used premade pie dough. Because of that this entire process took about 35 minutes for me as I did the prep for the filling while the Pie Crust baked.

Ingredients:

  • 1 9″ Pie Crust (your own recipe or purchased)
  • 4 ounces of plain chevre / goat cheese
  • 4 ounces (about half cup)  fresh Ricotta
  • 2-3 chopped scallions (about half cup)
  • 1/2 cup of Cooked corn kernels (approximately one ear of corn)

Directions:

  1. Pre-bake the pie crust according to your recipe or instructions on the package. Make sure you use pie weights or other weights like beans, rice, etc. to weigh down the Pie (placed atop parchment paper) after using a fork to make an even amount of holes.
    Tomato Pie Recipe with Fresh Cheeses and Uncooked Cherry Tomatoes starts with a pie crust that you prebake before adding the cheeses and tomatoes
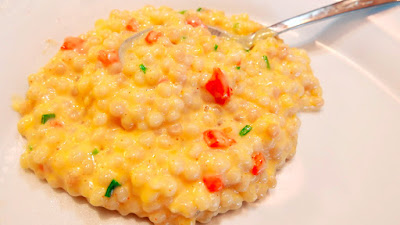
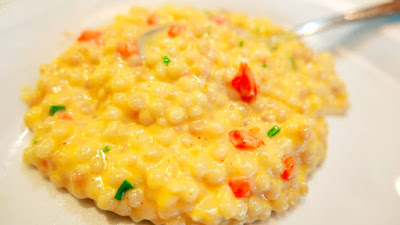
  2. Meanwhile, while chopping the scallions, you can additionally sear the corn kernels like I did –  a teaspoon of butter melted in a pan on high heat, add in blanched corn kernels and let sit there untouched for at least 7 minutes before stirring to sear. Alternatively steam or grill the corn per your preference because they should already be cooked.
    Tomato Pie Recipe with Fresh Cheeses and Uncooked Cherry Tomatoes uses optionally some summer corn, I like to sear mine for an additional little bit of smoky flavor
  3. In a bowl, mix together the goat cheese, ricotta, scallions and if you choose to add it, corn (let it cool a little, don’t add it to the cheese fresh from cooking so it doesn’t melt the cheese mixture too much). For other flavor variations you might try flavored chevre instead of plain.
    Tomato Pie Recipe with Fresh Cheeses and Uncooked Cherry Tomatoes uses a mix of chevre, ricotta, and scallion or green onion
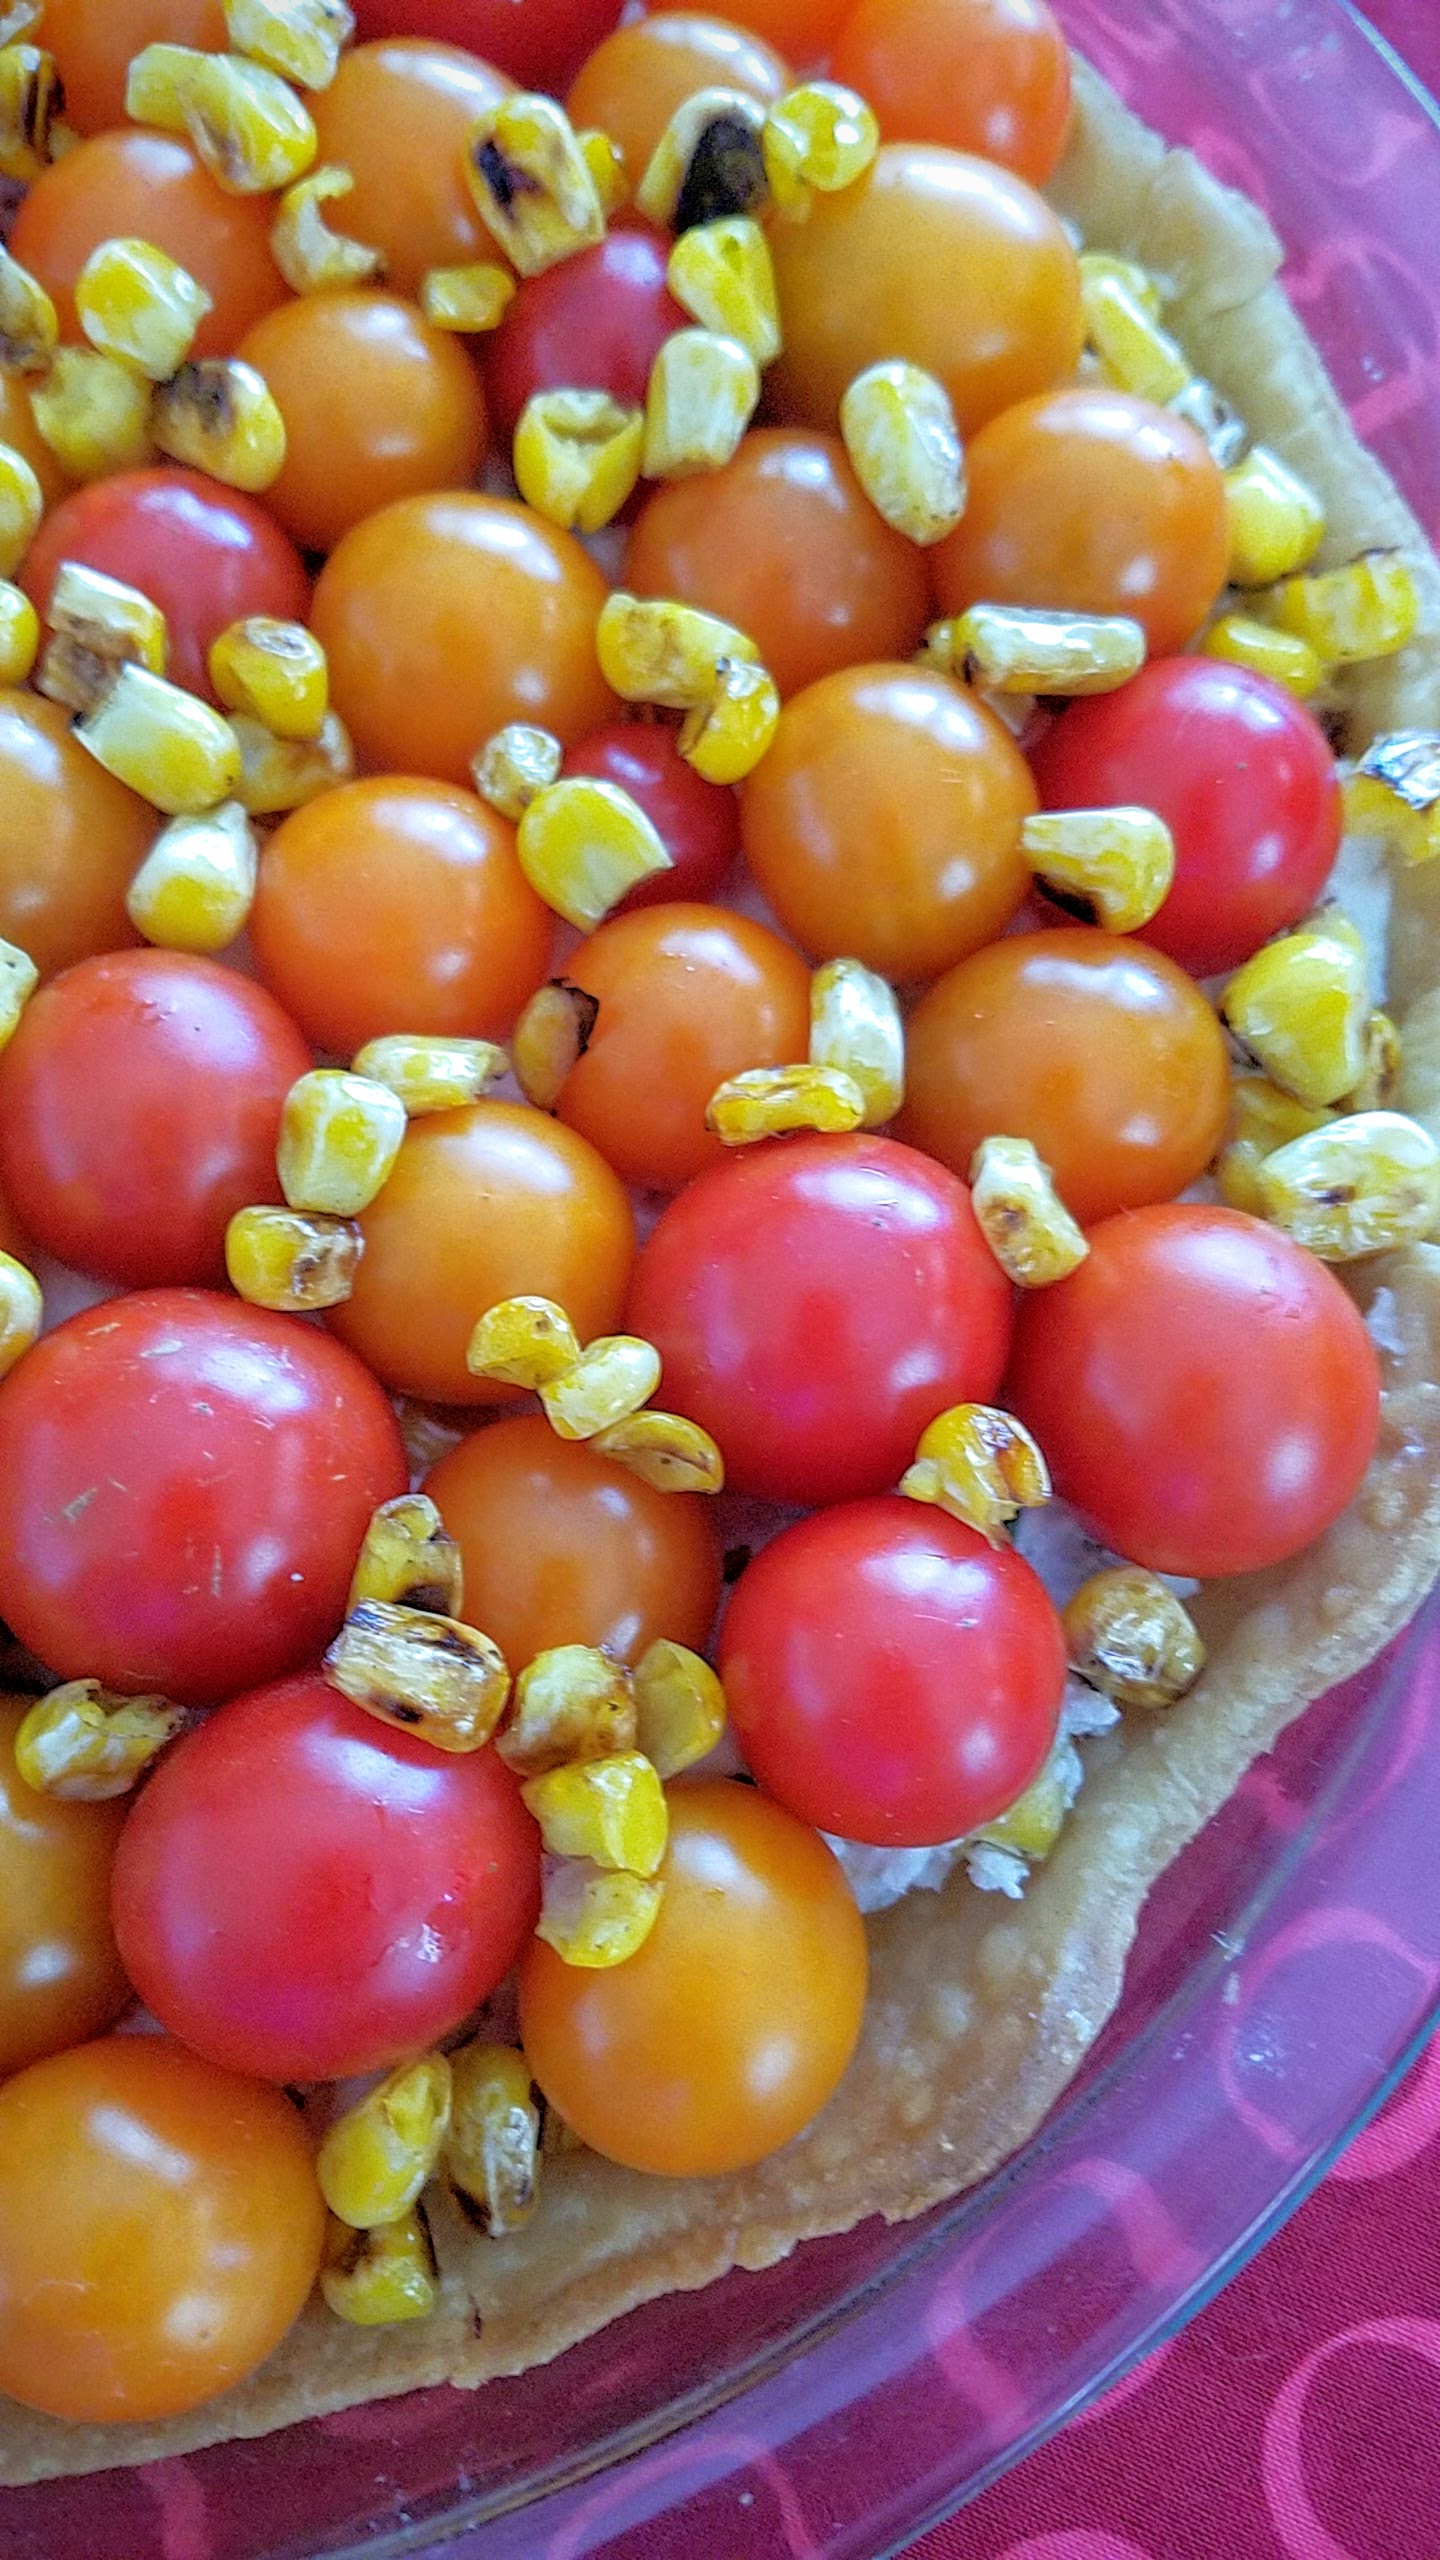
  4. Spread it carefully in the pie than top with the cherry tomatoes- I placed them in whole to get the burst with every spoonful, or you can choose to halve them. You may also want to consider already cutting the Pie into six pieces before topping with the tomatoes so each piece has nice whole grape tomatoes.
    Tomato Pie Recipe with Fresh Cheeses and Uncooked Cherry Tomatoes Tomato Pie Recipe with Fresh Cheeses and Uncooked Cherry Tomatoes
  5. Sprinkle a little corn on top to fill in gaps between tomatoes.
    Tomato Pie Recipe with Fresh Cheeses and Uncooked Cherry Tomatoes and (optionally) seared corn to really celebrate the flavors of freshness

Pair this with a glass of white and eat this al fresco to fully celebrate all the bounty of this late summer and early fall season!

Have you had tomato pie before? What is your favorite recipe using cherry tomatoes?

Signature

Brunch Better Tips from Jackie Ellis

There are many opportunities/excuses to throw an incredible brunch – for your family during a family reunion trip, an easy way to get together with your friends on a leisurely weekend morning where people can drop in/out based on their schedule, or a wedding shower or baby shower.  In the spring, I was fortunate enough to be invited to a Whole Foods Blogger Brunch Boot with Jackie Kai Ellis of Beaucoup Bakery.  The intent was to get Brunch Better Tips from Jackie Ellis, and now I’m passing on the learnings I gleaned from her to you.
Jackie Kai Ellis during a Whole Foods Bloggers Brunch Bootcamp providing tips on how to brunch better Jackie Kai Ellis during a Whole Foods Bloggers Brunch Bootcamp providing tips on how to brunch better

I’m a big fan of Jackie because she has an impeccable sense of style (before studying French baking she ran a design firm), clearly loves food,  and also adores travel (she does the kind of travel I wish I could do – a combination of food travel but also absorbing the uniqueness of each travel destination).

She is also is wonderfully evocative and articulate but also so down to earth and personable as she shares her love of food and the destinations she visits around the world on her blog Jackie Kai Ellis. I enjoy her travel posts mosts, but she also writes about cooking and sharing elegant recipes and tips on entertaining. So how I jumped at the chance to hear about this firsthand from her, and totally sat in the front row only a couple feet from her and tried not to fangirl too much how much I wish I could be like her.

Anyway, let’s go on to the wonderful information about how you and I and everyone can brunch better! She gave us three main areas, decoration, beverages, and food.

Flower Arranging Tips

Jackie Kai Ellis giving tips on flower arranging during a Whole Foods Bloggers Brunch Bootcamp providing tips on how to brunch better
Jackie admits that flowers are a luxury, but they can bring a lot of joy to a home with their infusion of beauty and life, even if only temporarily. I know I personally make special trips all during peony season to buy flowers – but keep it at $5 and 3 stems at a time from the Portland Farmers Market. You can decorate your brunch very simply just by having a fresh bouquet of flowers.

I agree with her that I’m not a fan of greens unless they are done with a lot of interesting types of leaves and not just the normal generic leaves, so I don’t buy bouquets that have this filler. She recommends making your arrangement based on color themes, and just doing it in your hand, one stem at a time.
"Jackie

Then, she cuts all the stems so the flowers are just above the top of the vase. You can see I followed her advice here:
Jackie Kai Ellis tip on Flower Arrangement: she cuts all the stems so the flowers are just above the top of the vase Jackie Kai Ellis tip on Flower Arrangement: she cuts all the stems so the flowers are just above the top of the vase

Finally, she reminds everyone to change their water often as that is how she thinks flowers stay fresh the longest.

As an alternative to a flower bouquet, she also likes bowls of citrus!

Confit Orange

Jackie Kai Ellis during a Whole Foods Bloggers Brunch Bootcamp providing tips on how to brunch better
This is what Jackie calls a “cheaters orange confit” because it is not as time consuming as a traditional orange confit which takes days of reducing at low heat in order to replace everything in the orange (including the orange skin!) with sugar so it is candied and delicious and yes, all completely edible. It’s very simple, and then she showed us two ways to use the confit orange – in a beverage called the Mimosa 75, and then in a sweet French dessert dish called Pain Perdu with Confit Orange. Another way to enjoy the orange confit is with chocolate – Jackie for instance topped a chocolate tart with the orange confit.

Ingredients:

  • 4 navel oranges
  • Juice of 2 lemons
  • 2.5 pounds of granulated sugar
  • 1 vanilla bean husk

Directions:

  1. Boil water in a large pot. Blanch the whole oranges in for about a minute. Remove the oranges, and drain the water. Repeat again, with a fresh pot of water being brought to a boil and another round of blanching for 1 minute. Remove again and pour out the water. The intent here is remove the bitterness of the skin and drain it from the water, which is why you need to do a fresh pot.
  2. Quarter the oranges along the stem, and place in a large empty pot (probably the same pot as before…). Add the juice of 2 lemons, and the 2.5 pounds of granulated sugar, and if you have one, a vanilla bean husk (the insides of the vanilla bean are used for the Pain Perdue recipe below). Might as well not waste it that husk!
  3. Add enough water into the pot until the oranges are covered. Slowly bring the pot to a very low simmer, and continue to simmer, uncovered, until the skins begin to become translucent looking and the oranges are tender but still hold together. You may need to add more water during this simmering process, which could take 6-8 hours. So, start this in the morning and then do the rest of your chores like cleaning or other cooking as needed. If you can’t keep it simmering the whole 6-8 hours, turn off the burner, cover the pot, and then resume the low simmer when you can until you get to this same point.

To store, you can place the orange segments and syrup into a jar. You can process it to fully can it, or just keep it in the refrigerator for use for a few weeks.
Jackie Kai Ellis shares her recipe for Confit Orange, which you can use both for Mimosa 75 drinks and a food dish of Pain Perdu with Confit Orange, learned during a Whole Foods Bloggers Brunch Bootcamp providing tips on how to brunch better

Mimosa 75

Jackie Kai Ellis showing us how to make a Mimosa 75, a mashup between a mimosa and French 75, during a Whole Foods Bloggers Brunch Bootcamp providing tips on how to brunch better
This is a mashup between a mimosa and a French 75. Jackie’s tip on making this drink is to use high quality ice, and when shaking listen for the change in sound to show you are ready.
Jackie Kai Ellis showing us how to make a Mimosa 75, a mashup between a mimosa and French 75, during a Whole Foods Bloggers Brunch Bootcamp providing tips on how to brunch better
Ingredients:

  • 1 ounce of gin
  • 1/2 ounce of orange confit syrup
  • 1/2 ounce of fresh lemon juice
  • 1 1/2 ounce of fresh orange juice
  • Dry sparkling wine to top
  • Good ice

Directions:

  1. Combine the 1 ounce of gin, 1/2 ounce of orange confit syrup, 1/2 ounce of fresh lemon juice, and 1 1/2 ounce of fresh orange juice in a cocktail shaker with your good ice. Shake until well chilled and strain into a glass. Jackie recommends considering whether you want to serve it in a traditional champagne glass, or you can also use juice glasses for smaller portions like for mom and grandma.
  2. Top your drink with sparkling wine. If you’d like, garnish with a slice of orange confit, or just get right down to drinking…

Pain Perdu with Confit Orange

Jackie's recipe for Pain Perdu with Confit Orange
Pain Perdu translates to “lost bread”, and this recipe does use stale bread that would otherwise be lost, but thankfully can be repurposed and enjoyed in this traditional French dessert dish. Jackie recommends using thick slices of dry brioche to soak up as much egg as possible and give the dish a custard like texture. This version uses confit orange, but you can also consider her Lavender Cherry version of Pain Perdu, perhaps along with her recipe for Ice Cream with Lavender Black Kettle Corn and Ripe Plums. This recipe serves 4.

Ingredients:

  • 4 large eggs
  • 1 vanilla bean, scraped of its seeds
  • 1/2 teaspoon of fine sea salt
  • 2 teaspoons granulated sugar
  • 1/3 cup whipping cream (plus more for topping, optionally)
  • 4 thick slices of brioche or Challah
  • 4 tablespoons of butter
  • 2 oranges, segmented
  • Confit Orange

Directions:

  1. In a shallow baking dish, mix together the 4 eggs eggs, vanilla seeds, 1/2 teaspoon salt, 2 teaspoons sugar and 1/3 cup of whipping cream.
  2. Add the brioche in one layer to soak up the egg, this will take about 5 minutes on each side depending on the dryness of the bread, the drier the bread, the longer it will need to soak.
  3. In a nonstick pan on medium-high heat, melt 1 tablespoon of butter per slice and place in the dipped brioche. Fry on both sides until golden and remove from the pan onto a sheet tray or plate.
  4. You can choose to remove the crusts for a more elegant look or leave them for a rustic appearance. Plate the pain perdu warm, top with a slice of confit orange, fresh orange segments, and the whipped cream to serve. For this version, we also used a little sprinkle of edible flower petals for an additional layer of prettiness.

Although I enjoyed the bread pudding since it’s beautiful, I preferred the strong sweetness of the orange confit with a super chocolatey chocolate cake myself. Maybe it doesn’t go completely with the brunch theme, but I did mention sometimes you may want to throw a brunchy wedding shower or baby shower, and that involves cake – this is an easy way to serve cake without having to deal with frosting. And you can just use your favorite chocolate cake recipe!
Pair your favorite chocolate cake with Jackie Kai Ellis' recipe for Confit Orange Pair your favorite chocolate cake with Jackie Kai Ellis' recipe for Confit Orange Pair your favorite chocolate cake with Jackie Kai Ellis' recipe for Confit Orange Pair your favorite chocolate cake with Jackie Kai Ellis' recipe for Confit Orange Pair your favorite chocolate cake with Jackie Kai Ellis' recipe for Confit Orange
What is your favorite brunch dish to make?

Disclosure: I attended a complimentary Whole Foods Bloggers Brunch Bootcamp where I was able to get a demonstration of the tips and recipes by Jackie Kai Ellis as a Whole Foods Market Culinary Council Member. I was not required to write this post, and I was not otherwise compensated. I will always provide my honest opinion and assessment of all products and experiences I may be given. The views and opinions expressed in this blog are entirely my own.

Signature

Green Beans with Walnut and Feta and Mint Vinaigrette

When I realized that I had way too much feta from my Costco order which I had delivered via Instacart (which I’ve raved about before for bringing me needed items at the last minute right to my door – and I don’t need a Costco membership), I immediately thought of this recipe for Green Beans with Walnut and Feta and Mint Vinaigrette for the next potluck at work in order to help use it up.
Recipe for Green Beans with Walnut and Feta and Mint Vinaigrette, an easy salad to serve cold or at room temperature for a potluck or get together that is vegetarian

I had the recipe idea pinned from The Kitchen is My Playground for a while, with it’s intriguing promise of fun textures of the firm green beans, walnuts, and feta while highlighting a fresh mint vinaigrette.
Recipe for Green Beans with Walnut and Feta and Mint Vinaigrette, an easy salad to serve cold or at room temperature for a potluck or get together that is vegetarian
Ingredients:

  • 1 1/2 pounds fresh green beans, trimmed and cut into 1-2 inch or so pieces
  • 3/4 cup of diced red onion
  • 1 cup of chopped walnuts
  • 1 cup of crumbled feta cheese
  • 3/4 cup of olive oil
  • 1/4 cup of white wine vinegar
  • 1/4 cup of minced fresh mint leaves
  • 3 cloves garlic, minced
  • 1/2 teaspoon of salt or to taste
  • 1/2  teaspoon of  black pepper or to taste

Directions:

  1. Bring a large pot of water to a rolling boil. Add the cut 1 1/2 pounds of green beans and cook for only 3 minutes –  we want it to turn bright green only. Drain the hot water and immediately plunge the green beans into ice water to stop the cooking process. Drain again and pat dry with paper towels.
    Trimmed green beans to length of 1-2 inches, which is enough to be a forkful without having to figure out how to fold it into your mouth!
  2. In a mixing bowl set the dried blanched green beans. Add the 1 cup walnuts, 3/4 cup diced red onion, and 1 cup crumbled feta; toss to combine.
    1 cup walnuts, 3/4 cup diced red onion
  3. In a food processor combine the 3/4 cup olive oil, 1/4 cup white wine vinegar, 1/4 minced fresh mint, 3 cloves worth of minced garlic, salt, and pepper for 30 seconds or so.
    To make the Fresh Mint Vinaigrette, In a food processor combine the 3/4 cup olive oil, 1/4 cup white wine vinegar, 1/4 minced fresh mint, 3 cloves worth of minced garlic, salt, and pepper To make the Fresh Mint Vinaigrette, In a food processor combine the 3/4 cup olive oil, 1/4 cup white wine vinegar, 1/4 minced fresh mint, 3 cloves worth of minced garlic, salt, and pepper
  4. Add the dressing to the mixing bowl and toss everything. Chill for about an hour before serving.
    Easy vegetarian recipe for a potluck or group meal, healthy Green Bean Salad with Red Onion, Feta, Walnuts in a Fresh Mint Vinaigrette

So this salad was definitely great for lunch for a couple days… great for the potluck for a group as it was easy to transport to work and leave out. For later lunches it was a nice crispy side of veggies and nuts with a bit of acid to balance out a grilled cheese sandwich.
Easy vegetarian recipe for a potluck or group meal, healthy Green Bean Salad with Red Onion, Feta, Walnuts in a Fresh Mint Vinaigrette

Signature

Chocolate Matzo Recipe

On Friday, Passover started. If you don’t know the holiday, it celebrates when the Hebrew people escaped slavery from Egypt and traveled to the Promised Land – as famously depicted by movies like The 10 Commandments and Exodus: Gods and Kings. I made this Chocolate Matzo Crackers because Matzo came up as in a conference call while some Israeli work teammates explained why this week is a holiday. Matzo is associated with Passover because of the travel, the Hebrews didn’t have time for the bread to rise, thus they ate the unleavened bread. Matzo represents the simplicity of what is needed for food.

Last year, I had a savory version of matzo when I made a Recipe for Matzo Brei with Parmesan (though depending on your topping, it could also be a mix of sweet and savory). This year, I went with sweet. My version of this Chocolate Matzo recipe is inspired by Food 52’s Chocolate Covered Matzo Recipe by Sarah Jampel. However, I dialed back the amount of butter, sugar, and chocolate – I suppose it depends on how sweet and how much chocolate thickness you want on your matzo. I made 5 crackers worth using the ratios below.
Chocolate Matzo Recipe - 4 Ingredients and 30 minutes, most of which is spent spreading the chocolate

It’s super easy – the Chocolate Matzo Recipe only takes 4 ingredients and 30 minutes max, most of which is spent spreading chocolate before you then can choose to eat it when the chocolate is still warm and messy, or freeze so it hardens and then enjoy.

Chocolate Matzo Crackers

Ingredients:

  • 5 sheets of matzo
  • 1 stick butter
  • 1/2 cup sugar
  • 12 ounces good chocolate chips- she uses much more chocolate and mixes semi-sweet and milk chocolate, but I used just good semi-sweet. You an use more chocolate depending on how thick a layer you’d like over your matzo.

Directions:

  1. Preheat the oven to 400 degrees F. Meanwhile, cover a large baking sheet with foil to help keep the mess down – honestly my baking sheets are normal sized (11×16 I think) and I used two because I couldn’t fit the last 1 1/3 matzo crackers on the first sheet. You are going to lay all the matzo crackers in as big as pieces as possible, breaking what is necessary into half or 1/3 sizes or whatever to cover the sheet.
    Chocolate Matzo Recipe - lay out your matzo crackers to cover your baking sheet, breaking pieces as needed to fill the whole tray
  2. In a small saucepan, melt the 1 stick of butter (it melts faster if you cut it into 1″ pieces) with the 1/2 cup sugar until it begins to boil. Spoon the caramelized butter evenly over all the matzo crackers.
    Chocolate Matzo Recipe - Melt the butter and sugar in a saucepan until it boils, and then spoon onto all the matzo evenly
  3. Put the baking sheet(s) in the oven just for 3 minutes or so, just so it gets hot. Now, pull the pans out of the oven and begin distributing all the chocolate chips. Then, after a few moments, use the back of a spoon to start spreading the chocolate evenly. This is an act of patience as the chocolate melts, and you can think about how quickly but faithfully the Hebrews crossed the parted seas.
    Chocolate Matzo Recipe - Scatter the chocolate chips and wtih a back of a spoon, as it melts patiently smear the chocolate across the matzo
  4. You could eat now, but it’ll be messy with the chocolate still soft. Or, freeze the chocolate overnight so it hardens, and then eat!
    Chocolate Matzo Recipe - Scatter the chocolate chips and wtih a back of a spoon, as it melts patiently smear the chocolate across the matzo Chocolate Matzo Recipe - Freeze the matzo overnight so the chocolate will harden

Break up the matzo into smaller pieces when serving – some do it in perfect squares, but I like the mix of shapes. There are many variations out there – some mix white and dark chocolate, some add caramel, or toffee, or top with salt, various nuts or even sprinkles?!
Chocolate Matzo Recipe - 4 Ingredients and 30 minutes, most of which is spent spreading the chocolate
Have you ever had matzo before? Have you ever had chocolate covered matzo? What do you like to have chocolate covered?

Signature

Israeli Couscous and Cheese

This recipe was something I had bookmarked from the blog Food Wishes Israeli Couscous and Cheese for quite a while. I have to admit it does take balls (a lot of little balls, hee hee) to combine Israeli Couscous, with it’s lovely texture, with cheese in a version that combines risotto and macaroni and cheese and a little pimento surprise! It’s wonderful as a new twist for a side dish for a rainy day or as a fun addition to a vegetarian holiday spread.
Israeli Couscous and Cheese Recipe - enjoy this ballsy (ha ha) vegetarian take on mac and cheese and risotto

The original recipe is here, on the video he posted: doesn’t Chef John just sound so nice and friendly? I wish he was my neighbor. He’s so humorous but clearly a great lover of food, is very knowledgeable but approachable, and puts together interesting combinations so you should check out Food Wishes, and he’s also a huge contributor to All Recipes. He may not make the most Pinterest worthy photos, but that makes him seem even more homey and a testament that even without the visuals, he delivers on taste.

Ingredients:

  • 2 teaspoons melted butter or olive oil
  • 1 cup Israeli couscous
  • 2 cups vegetable broth
  • 1/4 cup diced pimentos
  • 1/2 cup heavy cream
  • cayenne to taste (I used about a 1/4 teaspoon but I like it spicy)
  • 3 ounces sharp cheddar cheese, shredded
  • 1 tablespoons of freshly sliced chives
  • salt, to taste
  • pepper, to taste

Directions:

  1. Measure 1 cup of Israeli couscous and put in a deep saute pan to toast it with 2 teaspoons of melted butter in a pan. Don’t brown it, it should just become a bit golden.
    Israeli Couscous and Cheese Recipe - toasting the couscous with a little butter before adding the vegetable broth to cook it
  2. Now add your 2 cups of vegetable broth (you can use any stock but I want this to be vegetarian so used that kind of stock – he uses chicken stock). Bring the heat up to high and once the broth and couscous is at simmer, lower the heat. Let it sit for 6 – 7 minutes as the couscous plumps up, stirring occasionally, letting the liquid evaporated while leaving all the flavor behind.
  3. Turn the heat down to medium, and then stir in the 1/4 cup diced pimentos, the 1/2 cup heavy cream, and bit of cayenne pepper. Let it cook for a few more minutes until the couscous is as tender as you want it and at the texture is as thick as you want
  4. Turn off the heat and add the 3 ounces of shredded sharp cheddar cheese, and then the tablespoon of chives for a bit of bite. You may want to add salt and pepper to fit your taste.
    Israeli Couscous and Cheese Recipe - after letting the couscous cook in the broth, add in the diced pimento, cream, and then remove from heat and add cheese and fresh chives Israeli Couscous and Cheese Recipe - after letting the couscous cook in the broth, add in the diced pimento, cream, and then remove from heat and add cheese and fresh chives

It is a fun textural experience – it may not have the crispiness of a baked mac and cheese, but it has the creaminess of a risotto with a little extra cheesiness.

Israeli Couscous and Cheese Recipe - enjoy this ballsy (ha ha) vegetarian take on mac and cheese and risotto

What do you think of this take? What’s your favorite vehicle for mac and cheese – elbow pasta? rotini? shells?

Signature