I’m a sucker for all those cheesy and fried appetizers I’ve been seeing especially with Superbowl Sunday coming up this weekend. I wanted to share an option like these Cucumber Roll Ups that are easy to do that offers a healthy option and can also feed those who are gluten free, vegetarian, even vegan.
Cucumber Roll ups
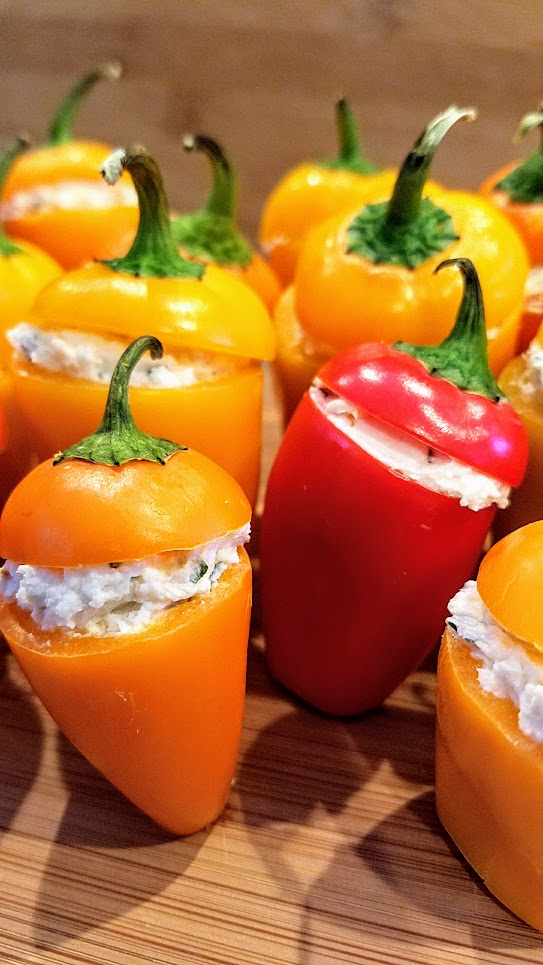
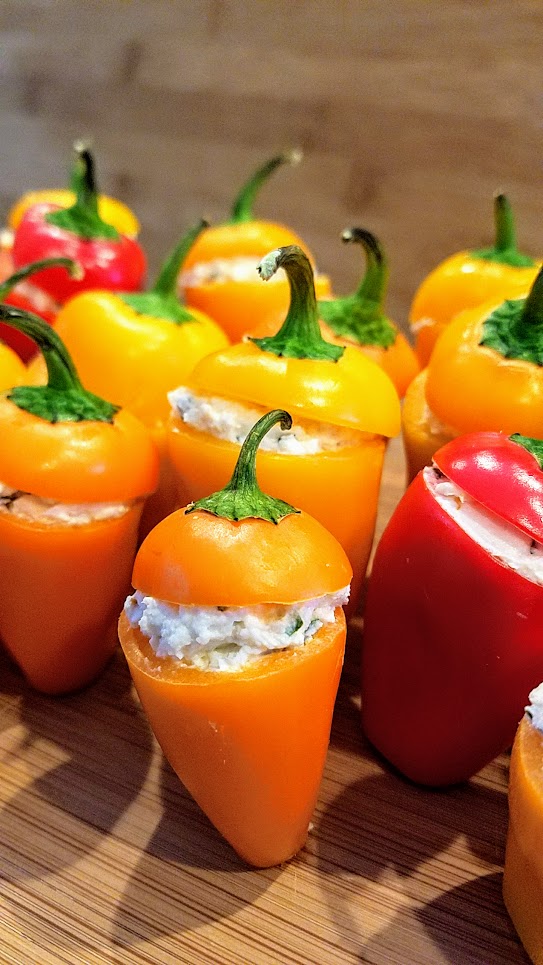
Cheese Stuffed Mini Peppers
I think these appetizers of Cheese Stuffed Mini Peppers are adorable because of the way you can get multiple colors with the orange, yellow and red which are so cheerful, and then presentation wise the way they stand up in little rows or formations so bravely. These are vegetarian but can be made vegan if instead of feta and cream cheese you use Tofutti or some other vegan cream cheese.
It does take a little time to stuff these, but I just did it sitting on the couch while watching Gilmore Girls. You can go faster if you pipe these into the peppers, but pushing them in with a little butter knife like I did will also do the trick.
These are perfect for a holiday gathering or potluck as you can just get a 1-2 pound bag of these and with approximately a pepper person get your lil cheese stuffed mini peppers soldiers in line or in wreath or tree formation or whatever you’d like! A 1 pound bag yields about 15 or so mini peppers, at least it did for me.
Ingredients:
- 1 16 ounce bag of mini sweet peppers
- 5 ounces of fresh, soft feta cheese or alternatively goat cheese
- 8 ounces of cream cheese, softened to room temperature
- 4 tablespoon chives, finely chopped
- 3 cloves worth of minced garlic
- 1 teaspoon red pepper flakes
- 1 tablespoon olive oil
- 1 teaspoon fresh squeezed lemon juice
- salt, to taste
- ground pepper, to taste
Directions:
- Cut off top about 1/2 inch from the stem to make the hat, and also cut at the bottom about about 1/2 an inch so the pepper can stand upright. Remove the seeds from the top and inside the pepper if any (most of the seeds will be at the stem), and rinse and dry the peppers.
- As the peppers are finishing drying, in a mixing bowl combine the 5 ounces of fresh soft feta cheese, the 8 ounces of softened room temperature cream cheese, the finely chopped 4 tablespoons of chives, the 3 cloves worth of minced garlic, teaspoon of red pepper flakes, tablespoon of olive oil, teaspoon of lemon juice. Mix well until everything is a smooth creamy texture
- Now, it’s just a matter of filling the peppers and topping them with its matching hat! After you are done, you can serve now or refrigerate until ready to serve (say the next day!)
An alternative way to serve these cheese stuffed mini peppers is that instead of whole like you see above, to cut the peppers in half length-wise instead. Then you don’t need to deal with the stuffing… but I couldn’t resist this because I just found it so stinkin’ cute!
What’s your favorite holiday appetizer to bring to a party?
Champagne and Sparkling Wine Food Pairings
For a Ladies Night get together with the theme of Bubbles (the beverage – such as champagne or sparkling wine) a couple weeks ago, I came up with a few ideas of what to pair the champagne or sparkling wine with. Here are three ideas, with 2 recipes!
Fried Chicken
I know, it’s shocking that this pairing doesn’t involve cheese!
For a small get together, you might consider fried chicken with the champagne! I had heard it was a hot thing, thanks to a restaurant called Birds & Bubbles in New York that was doing elevated southern comfort food. This high low combination is also endorsed by Lisa Dupar at her Redmond restaurant Pomegranate, Fried Chicken and Champagne is what she named her cookbook a few years ago.
The bubbly combination of carbonation and acidity is a great way to balance the rich heaviness of fried food, and it’s just fun. I went with chicken tenders so that we could be classy and not deal with chicken bones.
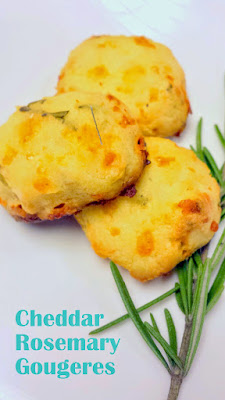
Cheddar Rosemary Gougeres
Then, I went with tried and true pairing with champagne and sparkling wine. A classic with bubbles is gougeres, light cheese puff bread appetizers. For mine, instead of gougeres I decided to use a combination of cheddar and rosemary. But, you could use any cheese, and you could use no herbs at all, or use another herb combination to your tastes.
The best part of the gougeres is that you can prepare it ahead of time and freeze it, and then on party day just pop them straight from the freezer into the oven and serve them warm, which is the best way to eat gougeres. I love party food that I can prep days ahead! And, they seem so fancy!
This recipe makes enough for about 48 of these appetizer sized, which is about an inch each to pop in between sips of champagne or sparkling wine, but you can also make them larger, say slider sized, and make mini sandwiches with them.
Ingredients:
- 1 cup whole milk, at room temperature
- 4 tablespoons unsalted butter
- 1 cup flour
- 1 teaspoon of salt
- 1/4 teaspoon of ground black pepper
- 4 large eggs
- 2 tablespoons of chopped rosemary (or other herb, or none at all)
- 1 cup grated Cheese (Cheddar, Gruyere, a combination of Goat with Blue… your choice)
Directions:
- Line a large baking sheet with parchment paper or a silicone mat or aluminum foil. This recipe makes enough for two baking sheets worth, and I like to do them 1 sheet at a time so that I can bake the second one as we are down to the last warm ones from the first baking sheet! If you are not making them right away though, you can do two baking sheets at the same time since you are freezing the gougeres dough anyway, if both baking sheets fit in your freezer.
- First, we will make the pate a choux dough, which is the starter for any puffy pastries, and is just milk, butter, flour, salt. So let’s start! Heat the milk and the 4 tablespoons of unsalted butter in a medium saucepan over medium-high heat, stirring to keep the bottom from burning. When the butter and milk is simmering, remove from the pot from heat. Now all at once, add the 1 cup flour, teaspoon of salt, and 1/4 teaspoon of ground black pepper all at once. Stir well to combine the mixture – I used my handy silicone spatula, one of my favorite kitchen tools. Return the pan to medium heat and stir hard for 1 to 2 minutes to add as much air bubble as you can, stir until the mixture thickens and becomes stiff.
- Transfer the mixture to stand mixer with the paddle attachment. I mixed the dough at low speed for a few minutes, watching the steam rise from the bowl, in order to cool it and get more bubbles into the mix. Once I didn’t see any more steam, I knew it was time for the eggs. In a separate small bowl, break the 4 eggs into a bowl and whisk with a fork. Now add the egg 1/4 at a time, with the mixer beating the egg and mixture at medium speed each time until the egg you just poured in is fully incorporated into the dough.
- So now that we have the pate a choux dough, it’s now on us to add our creative extras for flavor. For this recipe, add the cheese and rosemary to the dough mixture and stir it all together until the ingredients are well distributed.
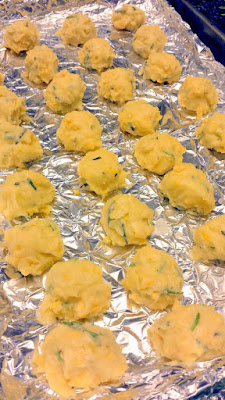
- Some people now transfer the mixture to a pastry bag and pipe the gougeres circles, but I still don’t have a tip (I suppose I could always use a big ziploc with a corner cut though), so I used use two teaspoons that I wetted with water in order to make small little balls from the dough. I made mine very small, about 1 inch in diameter, appetizer size. If you want to make little sliders, make them 4 inches. Make sure you leave at least enough to fit another ball in between each of your dough balls because when they bake, they will spread out and get stuck to each other. In my photo below, I was about to freeze them, otherwise I would have spaced them much farther apart.
- At this point, I just froze the balls to the baking sheets, and once frozen just put them in freezer bags. Or skip to
- To bake them, preheat the oven to 425 F. I put two baking sheets on top of each other in order to insulate the bottoms from the heat of the oven so it wouldn’t brown as much. You don’t need to defrost the dough – I just lined them all up and into the oven they went! Bake the tray for 12 minutes, and then lower the heat to 375 F. Now bake for another 10 to 12 minutes more – make sure you check on them so they don’t brown at the bottom! You want it golden all over.
Before serving, let them cool for a few minutes, and then serve warm!
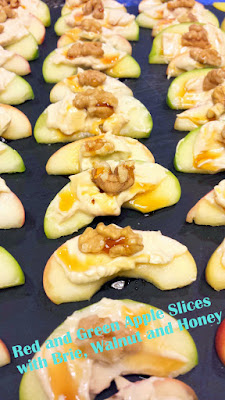
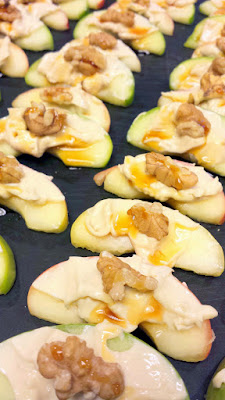
Apple Slices with Brie and Walnut and Honey or Agave Nectar
I happened to use Aloutte Smoked Bourbon Creme de Brie, but you can use any brie you want, it doesn’t need to be flavored. The plus of using Aloutte Creme de Brie is that I didn’t have to deal with any rind, and could go right into spreading the cheese.
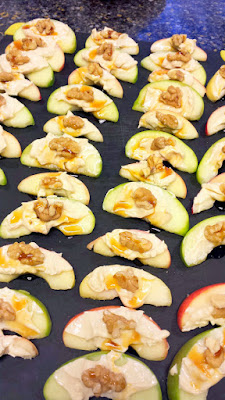
I personally also chose to use Agave Nectar instead of honey. I used red and green apple slices, it’s your choice on what kind of apple exactly you want to use. And, no one will judge you if you happen to buy those pre-sliced apples either.
Ingredients:
- 7 Red and Green Apples, sliced. Or just use one color, or more colors, your choice.
- 5 ounces of Brie – spreadable brie is easiest, but you can also use any brie as long as you do not use the rind
- 1/4 pound of walnuts
- Honey or Agave Nectar
Directions:
It’s ridiculously easy- slice the apples, smear a bit of brie, top with the walnut and agave nectar or honey.
To serve – I alternated the colors of red and green apple for fun.
Which of these pairings with champagne or sparkling wine intrigues you?
And here’s the damage from a dozen ladies that night…