Chinese Tomato and Eggs Recipe

Looking for something new to do with fresh summer tomatoes besides sauces and salads? Have you ever had Chinese Tomato and Eggs?

In 1997, there was a summer where I spent a summer in China as part of the UCCEC program with Columbia University. It was a couple weeks in Beijing, and then a couple weeks in Kunming. We had classes every day, but we were learning Chinese while in China so the immersion forced us to learn faster and broader, and the weekends included trips such as what you see below to Beihai, Temple of Heaven, Forbidden City, and the Great Wall and more.

Beijing Sightseeing:
Temple of Heaven, Beijing Our UCCEC group at  Temple of Heaven, Beijing in summer of 1997
Me in the Forbidden City, China in 1997 The steps at the Great Wall of China in summer of 1997

Beihai Park, an Imperial Garden:
Lily pads in Beihai

During that first week or so in China, as my stomach and my new friends adjusted to the new sights, sounds, smells, and foreign language, we discovered this simple dish of Chinese Tomato and Eggs. Every restaurant in Beijing had it, it was easy to recognize in Chinese on the menu and say without people being confused, and it was a safe bet for eating as our stomachs became used to the new bacteria in this part of the world.
'Easy 'Easy

This recipe for Chinese Tomato and Eggs is not a dish seen often in Chinese restaurants United States, maybe because it’s too simple.  But it’s so delicious. It only takes 20 minutes or so, so it’s very fast. And, it can feed 2-4 for dinner when served with rice (2 as the only dish with the rice, 4 with another dish).

The key to this dish, which sounds plain but is not, is that the eggs get a touch of sesame oil, and the tomatoes get a touch of sugar. My version uses the secret ingredient of one tablespoon of Red Duck Ketchup, which adds just that little extra depth of flavor.
My secret ingredient to my Chinese Tomato and Eggs recipe is a tablespoon of Red Duck Ketchup

Ingredients:

  • Some chopped green onions, with the white and green parts separated, I used about 4 green onions but I really like green onions!
  • 3 tablespoons of olive oil, separated (you will use 2 and then 1 tablespoon)
  • 4 eggs
  • 1 teaspoon of salt
  • 1/2 teaspoon of white pepper
  • 1 teaspoon of sesame oil
  • 2 tablespoons water
  • 1 teaspoon corn starch
  • 1 teaspoon sugar
  • 2 medium sized tomatoes, roughly chopped
  • 1 tablespoon ketchup

Directions:

  1. Beat eggs together; season with salt and pepper, and add the sesame oil. Whisk so it’s airy.
  2. Add two tablespoons of olive oil to a large pan (or wok if you have one, but it’s not absolutely necessary), turning up the heat to high. You should see the oil start to be steamy so you know it’s hot. Now add the white parts of the green onions (approximately – I still had some green-white parts and it was fine for me!) and sauté for about 30 seconds or so until fragrant.
  3. Next, add the egg mixture and let sit for 30 seconds. Stir and then carefully fold the eggs for another minute or less, just until the eggs are about to set (wherever it is shiny and still liquidy just fold down so it can cook for a few seconds until there are no more liquid parts), then immediately remove from heat and set aside on a plate.
    Setting aside eggs with green onions for the Chinese Tomato and Eggs recipe
  4. In a small bowl, combine together  2 tablespoons of water  with the 1 tablespoon of cornstarch and 1 teaspoon of sugar. Mix until it all is incorporated into the liquid.
  5. Add 1 more tablespoon of olive oil to the pan. When the oil is steaming again, add the roughly chopped tomatoes and the cornstarch sugar water and my secret ingredient, the tablespoon of Red Duck ketchup. Let the tomatoes cook, stirring only a bit, until you can see the tomato meat firm up slightly and you can smell the tomatoes. This should only take about 5 minutes.
    You only need to roughly chop the tomatoes for the Chinese Tomato and Eggs recipe Cook the tomatoes until it is fragrant and the flesh is more firm for the Chinese Tomato and Eggs recipe, just a few minutes
  6. Pour the eggs you set aside earlier back into the pan and stir to mix the eggs and tomatoes. Add the green part of the green onion and after another good stir, pour into your serving dish.
    Easy comfort food of my Chinese Tomato and Eggs recipe, enjoy with rice and is only 20 minutes from prep start to finish! Easy comfort food of my Chinese Tomato and Eggs recipe, enjoy with rice and is only 20 minutes from prep start to finish!
  7. Serve with rice.
    Easy comfort food of my Chinese Tomato and Eggs recipe, enjoy with rice and is only 20 minutes from prep start to finish!

You can fancify this dish with more vegetables like spinach, a bit of ginger, putting it on fried rice instead of regular rice. It can be breakfast, lunch or dinner – and I promise you, although it sounds simple, so does pasta with cheese (aka classic mac and cheese), and no one can deny the comfort of that dish. That’s what this Chinese Tomato and Eggs is.
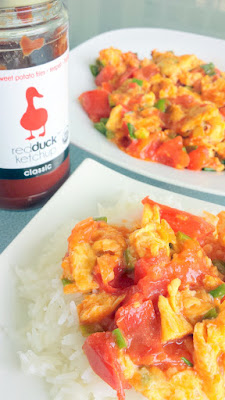
My secret ingredient to my Chinese Tomato and Eggs recipe is a tablespoon of Red Duck Ketchup

I am a huge fan of Red Duck Ketchup. It’s made from organic ingredients and no high fructose corn syrup (it’s 100% corn free), and is supporting a local business. The name of the ketchup comes from the fact the three founders are from University of Oregon and thus are fans of the Oregon Ducks. And ketchup is red… aka Red Duck.
 Coalition Brewing Spicy Ketchup Beer and Curry Red Ale were brewed with Red Duck Ketchup

Although I’m not specifically an Oregon Ducks fan, on the day I was born as my mom was sitting on the front steps as my dad prepared the car, she saw a mother duck and her ducklings under a bush (our backyard had a lake) walk out and she almost, almost nicknamed me Duck. Thank goodness I got Pech instead.

Not to mention, this is just the most delicious ketchup I have ever had. They make a few flavors (I also love their spicy ketchup and curry ketchup, and they sometimes make other seasonal flavors like Pumpkin Spice!). The Red Duck Original Ketchup flavor isn’t too sweet but has a little depth of flavor thanks to a bit of balsamic vinegar.

Red Duck Ketchup was a discovery for me at Feast Portland‘s Oregon Bounty Grand Tasting. This event, which takes place on Friday and Saturday on September 18 and 19, is a great value in that so many amazing local vendors are all gathered in one place, ALL are offering samples so you can try everything and know what you are buying!

Feast Portland 2014, Oregon Bounty Grand Tasting Feast Portland 2014, Oregon Bounty Grand Tasting Feast Portland 2014, Oregon Bounty Grand Tasting

That’s how I discovered and got to try Red Duck Ketchup, which I’m not sure I would have noticed normally since I’m not usually a big ketchup fan. But, Red Duck totally changed my tune.

This ketchup is amazing with anything and everything… and I loved it even when Coalition Brewing brewed a one keg special edition Spicy Ketchup Beer and a keg of Curry Red Ale with Red Duck Ketchup as part of National Ketchup Day. That’s right, this ketchup can even hold its own when used in beer!
Coalition Brewing Spicy Ketchup Beer and Curry Red Ale were brewed with Red Duck Ketchup Coalition Brewing Spicy Ketchup Beer and Curry Red Ale were brewed with Red Duck Ketchup

So of course it’s going to be awesome in your basic uses like paired on an Olympia Provisions hot dog, on your burgers… or as a secret ingredient of my Chinese Tomato and Eggs recipe.
Coalition Brewing Spicy Ketchup Beer and Curry Red Ale were brewed with Red Duck Ketchup as part of National Ketchup Day. So of course the ketchup is awesome paired on an Olympia Provisions hot dog.

Have you had Red Duck Ketchup, or Chinese Tomato and Eggs before? Have you studied abroad and learned of a new local dish during your visit that has special memories for you?

Signature

Cucumber and Ricotta Sandwich with a recipe for Homemade Ricotta

Just a simple Cucumber and Ricotta Sandwich that is great for a picnic or dinner on the porch with a glass of white wine on a super hot day, like the heat wave that Portland just went through.

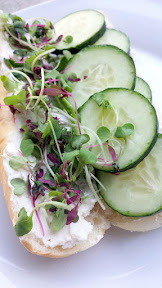
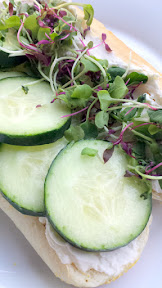
Homemade ricotta on Franz Bakery Stadium Rolls with sliced cucumber and microgreens. Simple sandwich and great for a summer heatwave meal

I make my own ricotta because once I learned how to during a HipCooks Portland class several years back, I haven’t been able to go back. Plastic from the store leaches into the flavor of the mass market Ricotta. You can avoid this for the cost of a a little whole milk, heavy cream and a lemon juice or vinegar (which you probably already have at home anyway). Or instead of the cream and lemon juice/vinegar as your acid ,just use buttermilk instead like when I made ricotta for Pasta Shells with squash and zucchini. Either way it yields a better value if I make it myself than buy it from the store, on top of the superior flavor quality. It really is just those 3 (or 2!) ingredients!

You can never have too much ricotta, which is why I always go for the gallon or half gallon of milk plus pint of heavy cream amounts. If you need more ideas of how to use ricotta besides the obvious smearing it on bread, putting it in pastas, in desserts… check out this Huffington Post roundup of some beautiful Ricotta Recipe Ideas.

Ingredients:

  • 1/2 gallon of whole milk (aka 2 quarts)
  • 1 pint of heavy cream (aka 2 cups)
  • 3 tablespoons white wine vinegar (or another acid like lemon juice also works)

Directions:

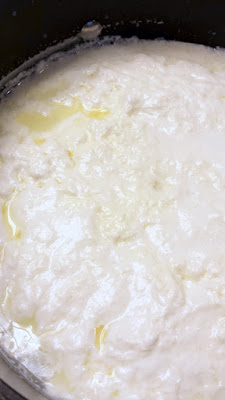
  1. In a large pot, add the milk and cream and slowly heat it, stirring to make sure you don’t burn the milk at the bottom, until you start to see lots of little bubbles around the corner but it hasn’t reached a full rolling boil. If you have a thermometer, you are shooting for around 180 degrees F. Make sure you keep stirring so you don’t scorch any milk at the bottom of the pot.
    Making homemade ricotta- so easy, just whole milk, heavy cream, and a little acid via lemon juice or vinegar combined with heat Making homemade ricotta- so easy, just whole milk, heavy cream, and a little acid via lemon juice or vinegar combined with heat. You want it to reach around 140 degrees F - it will not be boiling yet, but be starting to bubbles at the pop sides like this
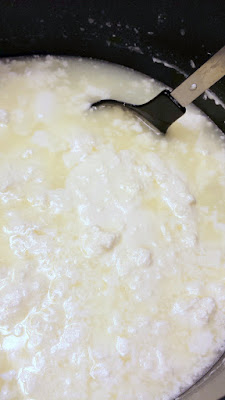
  2. Once you reach that heat level, turn off the heat and remove the pot of milks from the stove. Add in the vinegar and stir in. Now let it stand for a few minutes while the cheese curdles – you should see the whey (the yellowish part) start to separate from the clumps of ricotta, like below.
    Making homemade ricotta- so easy, just whole milk, heavy cream, and a little acid via lemon juice or vinegar combined with heat. Here you can see the curds starting to separate <Making homemade ricotta- so easy, just whole milk, heavy cream, and a little acid via lemon juice or vinegar combined with heat. Here you can see the curds starting to separate
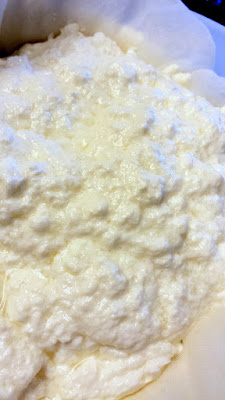
  3. Using a sieved spoon, I then spoon the ricotta into a sieve that has a cheesecloth folded in half over it. Let the cheese drain – the less time you give it, the softer and moister it will be, while draining it overnight makes it thicker. As you are spooning in the ricotta, if you’d like you can sprinkle in a little salt now and then for flavor. Depending on the size of the curds, I might use the strainer itself instead of a sieved spoon to get all the tiny curds. Here in this batch the curds were chunkier but it’s OK if the curds are smaller,  it all comes together as it drains don’t worry.
    Making homemade ricotta- so easy, just whole milk, heavy cream, and a little acid via lemon juice or vinegar combined with heat. Here you can see the curds have separated, so now strain the cheese from the whey with cheesecloth over a mesh strainer Making homemade ricotta- so easy, just whole milk, heavy cream, and a little acid via lemon juice or vinegar combined with heat. Here you can see the curds have separated, so now strain the cheese from the whey with cheesecloth over a mesh strainer Making homemade ricotta- so easy, just whole milk, heavy cream, and a little acid via lemon juice or vinegar combined with heat. Here you can see the curds have separated, so now strain the cheese from the whey with cheesecloth over a mesh strainer
  4. Let the whey drain further – depending on how soft or firm you want the ricotta. I think it’s best within the first 24 hours, when it’s still really soft and drained for a few hours. As you drain it further such as overnight or place it in the refrigerator, it will get firmer. The ricotta should keep refrigerated for 4 to 5 days, though mine never lasts than 3 days at most and I think it’s best in those first few days unless you are making a pasta dish/cooking with it as it isn’t as fresh tasting as the first days.
    Making homemade ricotta. Now in the cheesecloth, let it drain for a couple hours. The longer you wait, the most more firm it will become, especially if you drain it in the fridge overnight Homemade Ricotta after draining the whey and a little ground pepper

I use it on bread and top it with fruit and veggies as an open sandwich, or on grilled bread with just a drizzle of nice olive oil and balsamic vinegar if I’m fancy. It could be simply in a bowl with fruit, part of breakfast in pancakes or an accompaniment with eggs, or just the start of a big dinner such as stuffed pasta shells (like a Fresh Ricotta, butternut squash, baby zucchini in Pasta Shells recipe I shared in the past), lasagna, and so much more! In fact, next week, I will share one of the other things I made with this ricotta, a Radish, Edamame, Ricotta and Greens Sandwich.
Simple Scrambled eggs with ricotta and microgreens

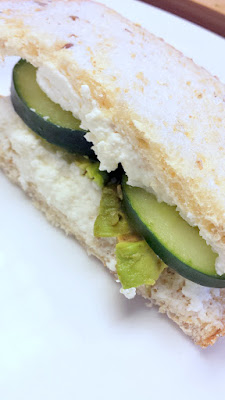
In the summer, especially during a heat wave when it’s almost 100 degrees and I’m super hot and tired and lazy or combination of all of those, and I want a refreshing sandwich, I just cut up cucumbers and put it in a sandwich with ricotta – maybe even an additional smear of avocado.
California Avocados Homemade ricotta in a cucumber avocado ricotta sandwich, recipe is easy and refreshing in the summer

On a Stadium Roll (my latest favorite bread from Franz Bakery) with microgreens or whatever greens I have.
<Homemade ricotta on Franz Bakery Stadium Rolls with sliced cucumber and microgreens. Simple sandwich and great for a summer heatwave meal Homemade ricotta on Franz Bakery Stadium Rolls with sliced cucumber and microgreens. Simple sandwich and great for a summer heatwave meal Homemade ricotta on Franz Bakery Stadium Rolls with sliced cucumber and microgreens. Simple sandwich and great for a summer heatwave meal

Or, no bread at all and just cucumber and ricotta with a few grinds of freshly ground pepper.
Homemade Ricotta after draining the whey and a little ground pepper plus cucumbers for a vegetarian sandwich that is nice and cool for the summer heat

I definitely enjoyed ricotta sandwiches as meals during the Portland heat wave. Have you ever made homemade ricotta? Do you use ricotta in sandwiches? What’s your favorite food during a heat wave?

Homemade ricotta on Franz Bakery Stadium Rolls with sliced cucumber and microgreens. Simple sandwich and great for a summer heatwave meal

Signature

Oregon Berry Festival 2015 and BlackBerry Grilled Cheese

Next weekend on Friday July 17 and Saturday July 18 is the 5th annual Lifewise Oregon Berry Festival 2015. This FREE festival at the Ecotrust building  in the Pearl District showcases everything berry, from

  • Fresh berry vendors booths with their farm fresh berries and berry products
  • A Healthy Berry Pavilion education booth with information to introduce you to berries you may not be aware of or ways to incorporate berries into your diet and explain all the various health benefits of berries. And there’s also a culinary historian to give a brief history of Oregon berries.
  • Berry themed food booths
  • Cooking demonstrations featuring berries
  • An Oregon’s Best Blackberry pie contest and demo by Pacific Pie Company
  • Berry themed crafts at a children’s booth, appearances by blueberry mascot Ima Blueberry with coloring sheets and face painting, as well as family friendly live musical entertainment
  • There’s a chance to win a bike by filling out a Oregon Berry Festival passport by following clues and gathering stamps from vendors
  • On Saturday evening a separate Gala Berry Dinner at OMSI will be held to show how you can use berries for every course, from cocktail hour to savory to sweet dishes (tickets are $105 all inclusive, available at Brown Paper Tickets)

Lifewise Oregon Berry Festival Lifewise Oregon Berry Festival

I’ll be attending the Berry Festival on Saturday at part of a Berry Festival media tour with the Oregon Raspberry & Blackberry Commission (ORBC), including visiting a working berry farm. I’ll be reporting back with what I learn and a NEW recipe. For now though…

What: Oregon Berry Festival 2015
When:

  • Friday, July 17, from 12:00pm to 6:00pm
  • Saturday, July 18, from 11:00am to 5:00pm

Where: Ecotrust Event Space at NW 10th and Johnson, Portland, Oregon
Who: Everybody… and it’s FREE!

Recipe for a Berry Grilled Cheese

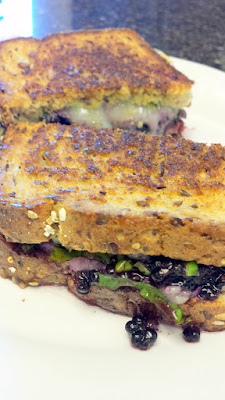
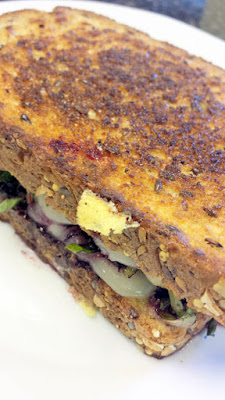
Blackberry Grilled Cheese with blackberries, basil, fontina, a touch of pesto
Usually my berry consumption is raw: right out of the pint, in beverage form via smoothie or juice (or fruit beer!!), sometimes it’s folded into a salad or ice cream or sorbet. I rarely have it cooked, and when I have cooked berries it’s generally because it is part if a dish while I’m dining out. Also, I am a cook that prefers the forgiveness of savory foods, not a baker. What can I say, I guess I’m not a sweet girl who follows precise technical instructions.

In celebration of the upcoming festival though, I decided to seek out a recipe featuring berry and that cooks with it but isn’t a traditional dessert – and when I saw this Fontina + Blackberry Basil Smash Sandwich from the blog how sweet it is (with her upcoming cookbook Seriously Delish coming out soon), I was sold.
Blackberry Grilled Cheese with blackberries, basil, fontina, a touch of pesto Blackberry Grilled Cheese with blackberries, basil, fontina, a touch of pesto

I’m not going to provide the whole recipe here: you should definitely click on over to check out her gorgeous photos and the recipe instructions yourself. But, at a high level you only need a handful of ingredients!
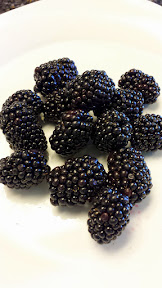
For your Blackbery Basil grilled cheese, you will use Oregon Blackberries, about 4 ounces (about 14 berries) per sandwich Blackberry and Basil, a great combination of flavors

  • Multigrain bread: I used Franz Mt Hood Multigrain and Flax
  • Fresh Oregon Blackberries
  • Chopped fresh basil leaves from my garden
  • Fontina cheese (mine are from one of my local cheese loves, Willamette Valley Cheese Co)
  • And a little olive oil or butter for grilling!

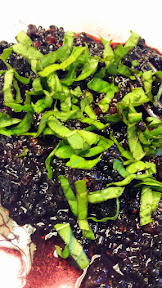
The slight changes I made is that I probably used a lot more basil than she did for my sandwich (I used about 4 ounces of blackberries, which was about 14 berries FYI and almost 7 basil leaves for each individual sandwich) because I love basil. Do not wear a white shirt when making this blackberry basil smash part/get your apron out.
Make sure you carefully smash your blackberries as it does squirt a bit. Don't wear a white shirt For the Blackberry Grilled Cheese, I used about 14 blackberries and chopped 7-8 leaves of basil for each sandwich

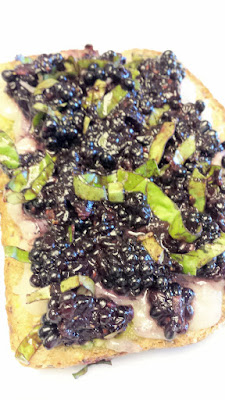
I suggest brushing on the olive oil or melted butter on both sides of the bread before adding your spoonfuls of blackberry basil smash as that makes more logistical sense than her order. I also had a little leftover pesto from the Cashew Cheese on Cucumber recipe I shared earlier this week, so smeared that on also. I was generous with my cheese, probably about 3 ounces per sandwich, which I grated to melt better and spread over every centimeter of my bread.
Franz Mt Hood Multigrain and Flax bread makes for great sandwiches, especially grilled cheese! I used a little pesto inside my Blackberry Basil Grilled cheese Grilling my Blackberry Basil Smash grilled cheese sandwich, adding the grated fontina to the bread and pesto

Since you grill this low and slow to get melty and brown, it shouldn’t heat up your kitchen too much. Maybe you are calling me a cheat because it isn’t so much cooking the berries as slightly warming them up, and the only prep is smashing them essentially into jam… but I don’t care.

Blackberry Grilled Cheese with blackberries, basil, fontina, a touch of pesto

This recipe is ALL win.

Warning: this sandwich needs 2 napkins or a paper towel. I would not fault you for serving this open faced because it really is pretty too!
Blackberry Grilled Cheese with blackberries, basil, fontina, a touch of pesto Blackberry Grilled Cheese with blackberries, basil, fontina, a touch of pesto

For additional variant, you could swap out the fontina for a brie if you can’t find fontina, and feel free to add grilled chicken as a protein to your sandwich.

If you are looking for more berry good recipes, feel free to check out the website Oregon Berries, which not only provides information on various Oregon berries, but has a portion dedicated to berry recipes from food bloggers at Bloggers ♥ Oregon Berries as well as a Recipe Search based on the berry that may intrigue you!

I also have a few more past berry recipes I’ve shared: you can see that strawberries are my favorite berry, and that I could put together a whole dinner with just berries for every course if I wanted to! I wonder what the James Beard Award winning Chef Jim Dodge of the Gala Berry Dinner 2015 for the Oregon Berry Festival will do?!

Have you heard of the Oregon Berry Festival? What is your favorite berry, and how do you like to enjoy it, do you have a favorite recipe with berries and what is it?

Disclosure: I will be attending a media tour of the Oregon Berry Festival, but I will always provide my honest opinion and assessment of all products and experiences I may be given. The views and opinions expressed in this blog are entirely my own. And, this recipe is really delicious, as are all the strawberry recipes I previously shared on the blog. Support Oregon Berries to support local producers and it’s healthy and yummy!

Signature

Recipe: Cashew Cheese on Cucumbers

With the heat wave in the past couple weeks,  I wouldn’t be surprised to hear that you might want to keep things simple when making food. I have been mostly doing quick sautés or dishes that require no cooking at all.

This recipe for Cashew Cheese on Cucumber does require a little forethought to soak the cashews in water for a few hours. Otherwise you only need a processor and a knife plus the ingredients to put together appetizers for a potluck or picnic, or just a healthy snack at home.
Cucumber with cashew ricotta and pesto

I like this combination for the refreshing cool crunch of the cucumber,  creamy but cheesy flavors with hint of garlic of the cashew cheese, and touch of salty herb from the pesto. I eyeballed a lot of these so make sure you taste to see what amounts fit your taste levels. The more nutritional yeast you use, the cheesier the flavor while being dairy free. Nutritional yeast is also a great topper to sprinkle on popcorn to have cheese popcorn with your movie!

Ingredients:

For the Cashew Cheese

  • 1 1/2 cups raw cashews soaked in water for 2 hours
  • 1/4 cup – 1/2 cup water; the more water used, the thinner and creamier the cashew cheese will be, so you want to add to your liking for consistentcy a bit at a time
  • 3 or so tablespoons of freshly squeezed lemon juice, more to taste if you’d like
  • 1-2 tablespoons of nutritional yeast, or more to taste if you’d like
  • 1 clove of minced garlic, or more to taste if you’d like
  • Dash of onion powder
  • 1 teaspoon sea salt or more to taste
  • 1 teaspoon of freshly ground pepper or more to taste

For the Pesto – this is more of a rough guideline as I often just eye it after grabbing handfuls from my plant

  • 2 cups fresh basil
  • 1/4 cup or so of olive oil
  • 1/8 cup or so of pine nuts (for more flavor, toast the pine nuts in a dry skillet for a few moments until aromatic, but be careful it doesn’t burn)
  • 1/2 tablespoon of minced fresh garlic
  • pinch or so of salt
  • a few grounds of freshly ground pepper

Directions:

For the Cashew Cheese

  1. First, you will need to soak the raw, unsalted cashews in water for about 2 hours. The water level should cover the tops of your cashews.
    1 1/2 cups of unsalted cashews Soak 1 1/2 cups of unsalted cashews in water for 2 hours
  2. Then, drain the water. Place the cashews, nutritional yeast, 1/4 cup water, lemon juice, the minced garlic and onion powder and salt in the food processor and pulse until roughly blended.
    After 2 hours of soaking, drain the water from the cashews To make the cashew cheese, place the drained pre-soaked cashews, nutritional yeast, 1/4 cup water, lemon juice, the minced garlic and salt in the food processor and pulse until roughly blended
  3. Now as you continue to taste, add in the remainder of the water to get the consistency you would like. If you’d like, you can choose to add more lemon juice, or more nutritional yeast, or more minced garlic or salt to your preference depending on how garlicky, cheesy (from the nutritional yeast), lemony, etc you enjoy.
    To make the cashew cheese, place the drained pre-soaked cashews, nutritional yeast, 1/4 cup water, lemon juice, the minced garlic and salt in the food processor and pulse until roughly blended. Add more water if you want it to be creamier, or leave it rustic and more dense To make the cashew cheese, place the drained pre-soaked cashews, nutritional yeast, 1/4 cup water, lemon juice, the minced garlic and salt in the food processor and pulse until roughly blended. Add more water if you want it to be creamier, or leave it rustic and more dense
  4. Add a few grounds of freshly ground pepper. You can serve as is immediately, but if you refrigerate it for a couple hours the flavors will develop more and texture get a bit thicker so  it will be even more tasty the next day – put it in a container to be used as a dip for a picnic with veggies, or spread on a sandwich, so many possibilities!

For the Pesto

Blend all the ingredients for pesto together – you may want to add a little bit more olive oil, salt, or pepper to taste. Puree until the mixture is smooth. Make sure you pause once in a while to scrape the sides of the bowl with a rubber spatula as needed to make sure it all gets mixed well, as well as to taste and adjust to your liking.

For the final Cucumber Cashew Cheese appetizers

Slice the cucumbers and slather on a bit of the cashew cheese. With a spoon, add on a bit of the pesto. Serve!

Cucumber with cashew ricotta and pesto Cucumber with cashew ricotta and pesto

I put this combo on cucumbers buy it’s also great in sandwiches and the cashew cheese can be substituted in pasta like Ricotta in pasta shells or lasagna too.

What have you been making in the kitchen during this extended heat wave in Portland (or wherever you may be when it’s hot in the summer!)?

Signature

Brownies topped with Potato Chips

I don’t really know what to say that doesn’t already seem obvious from the recipe title – chocolate and salt are amazing together. I don’t know how many years people have been sprinkling salt on chocolate chip cookies or chocolate bars. I’ve seen recipes and photos of brownies that have a topping of potato chips, but I never made them… until now.
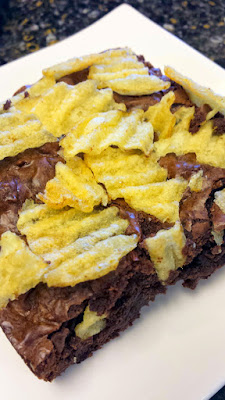
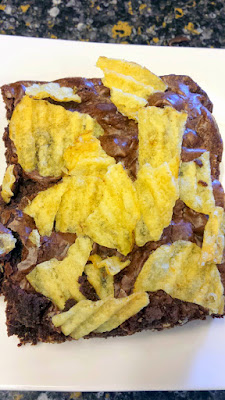
Potato chip topped brownies recipe with rich chocolate brownie and the salty crunch of potato chips

The first time I made these, I did it with chips also in the brownie mix based on this Thrilllist recipe for Potato Chip Brownies– but nope. I didn’t like them because the chips inside the brownie turn out chewy. I suppose you could try it breaking up the chips into really small pieces (versus the “roughly broken up” they use) but unless your chips are pretty salty, I don’t think you’ll get much flavor or texture from them then, so what’s the point?

The other suggestion I can give you is that when you scatter your potato chips on top, think about where you will have your lines for the brownie squares and distribute it accordingly so that you don’t have to break a chip when you are cutting, sacrificing a chip in the process.
Potato chip topped brownies recipe with rich chocolate brownie and the salty crunch of potato chips

Ingredients:

  • One 9 ounce package of Dark Chocolate Chips – I used SunSpire Organic 65% Cacao Bittersweet Chocolate Chips. Because of the high cacao content, these are richly chocolately. How good your brownies are is all about your chocolate, of course.
  • 1 cup granulated sugar
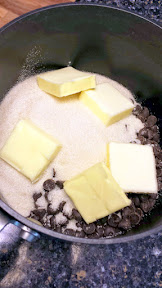
  • 1/3 cup butter, cut into pieces (I put each stick of butter I use in KitchenArt 32000 Gourmet ButterMate, Whitethis Buttermate measure and butter-cutter, so I just added them in 1 tablespoon pieces)
  • 2 tablespoons water
  • 2 large eggs
  • 1 teaspoon vanilla extract
  • 3/4 cup all-purpose flour
  • 1/4 teaspoon salt
  • 1 cups of Kettle Chip or Ruffles potato chips, broken up into 1 inch pieces or smaller. It is totally ok while you are waiting to top your brownies if you also pour yourself a bowl of chips on the side to snack on while you are cooking.
    When setting aside your ingredients after you melt the chocolate, butter, and sugar together in the pot for your potato chip topped brownies, it is totally ok if you also pour yourself a bowl of chips on the side to snack on while you are cooking

Directions:

  1. Preheat the oven to 325 degrees F. Grease 8-inch-square baking pan.
  2. Take 1/3 cup of the chocolate chips and separate it from the rest. With the rest of the chocolate chips, heat it with the sugar, butter, and water in a small saucepan over low heat. Stir while the chocolate and butter melt together until they are well incorporated. Now pour into a large mixing bowl.
    Chocolate chips, butter, sugar, ready for the water and to melt away into chocolatey goodness for my recipe of Potato Chip Brownies (or just Brownies in general)
  3. Into the bowl with melted chocolate, stir in the eggs one at a time with a whisk – add one egg at a time. Add in the vanilla extract, then the flour and salt and stir well. Fold in the remaining 1/3 cup of chocolate chips you had set aside. Yum, so chocolatey.
  4. Pour your brownie potato chip goodness into the baking pan – the mixture should be thick. Add the 1 cup of potato chips on top.
    Potato chip topped brownies recipe with rich chocolate brownie and the salty crunch of potato chips
  5. Now bake for 30 to 40 minutes or until wooden pick inserted in center comes out slightly sticky. Cool in pan and cut into bars when it is cooled – make sure it’s cool! Be patient!
    Potato chip topped brownies recipe with rich chocolate brownie and the salty crunch of potato chips Potato chip topped brownies recipe with rich chocolate brownie and the salty crunch of potato chips

These potato chip brownies are best when they have cooled, and the same day of before the potato chips begin to get stale. I think these would be really fun to make for a picnic or potluck as a fun update on a brownie!
Potato chip topped brownies recipe with rich chocolate brownie and the salty crunch of potato chips Potato chip topped brownies recipe with rich chocolate brownie and the salty crunch of potato chips

Have you seen or used these butter measure and cutters before? They are awesome for cutting teeny slices of butter and when I’m cooking measuring and always cutting perfect pieces!

Which brownie pieces do you like the most? The ones from the center that have all soft gooey chocolate sides, or the ones from the edge that have the crispy side?
Potato chip topped brownies recipe with rich chocolate brownie and the salty crunch of potato chips

Signature