Recipe for Cheddar Garlic Oven Baked Chicken Breast

Ugh well yesterday’s commute sucked. It took 45 minutes on the Max from Work on the way back to the city to go three stops because of ice. 3 stops.

At the Beaverton Transit Center I ran to the 20 Burnside bus and was lucky enough to get a seat before it got packed to the door. It was a better choice probably then being among the hundreds I saw on the news later waiting for shuttle buses to go downtown when management decided to not run Max trains into the city. Sitting down is better than standing, but also means bring hit in the head sometimes by other commuters who are still wearing their backpacks. I definitely wanted some comfort.

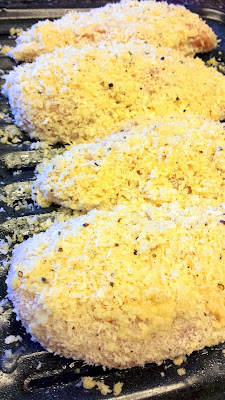
This recipe for Cheddar Garlic Oven Baked Chicken Breast serves four and is a comforting chicken dish that has crispness on the outside, moist on the inside, and can pair with any side dish so easily.

I think it’s been part of my repertoire for a long time, having learned it many years ago from home cook online (specifically Recipezaar). It is a classic by internet home cook celebrity Kittencal before there was ever food TV besides Julia Child (who was too early for me, so I didn’t watch her) but I did watch Yan Can Cook and Frugal Gourmet. Do you remember those shows? I didn’t grow up with a lot of American food cooked in my household, but when I went to college Kittencal taught me to expand outside always eating fried rice. Anyway, this recipe I’m sharing is one of the classic Kittencal recipes, with a few small adaptions.
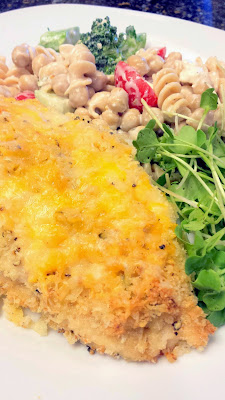
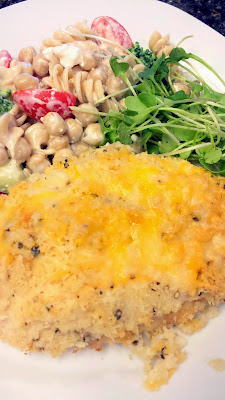
Recipe for Cheddar Garlic Oven Baked Chicken Breast Cheddar Garlic Oven Baked Chicken Breast with gluten free pasta with cherry tomatoes and broccoli and microgreens and a touch of feta

The garlic chicken smells wonderful as it is cooking, and let me assure you this is not overly garlicky at all. But, if you’d like you can reduce the amount of garlic you use. Or increase it! The cheese on top or in the recipe could also be reduced if you’d like… but of course I would not even consider doing that myself.
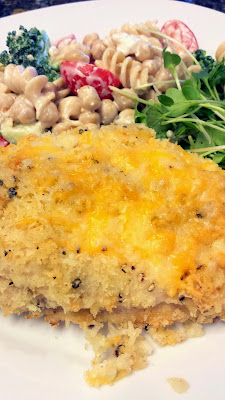
Cheddar Garlic Oven Baked Chicken Breast with gluten free pasta with cherry tomatoes and broccoli and microgreens and a touch of feta

Ingredients:

  • 1/3 cup of melted butter + a little spray or bit more butter for the pan
  • 2 tablespoons minced garlic
  • 2 teaspoons garlic powder, divided in half – one 1 teaspoon for the “wet” and another for the “dry” mix
  • 1/2 teaspoon seasoning salt
  • 3/4 cup seasoned dry bread crumbs or panko – I used panko
  • 1/2 cup finely grated cheddar cheese
  • 1/4 cup freshly grated Parmesan cheese
  • 1/2 teaspoon ground black pepper or to taste
  • 4 boneless skinless chicken breasts
  • Extra 1/2 cup of shredded cheddar and/or Parmesan cheese or Monterey Jack or whatever your would like cheese for topping (optional)

Directions:

  1. In a bowl, make your butter mixture. You will combine your melted butter with the 2 tablespoons of fresh minced garlic, 1 teaspoon garlic powder and salt.
  2. In a separate bowl, you will combine the dry breadcrumbs or panko, 1/2 cup finely grated cheddar cheese, the 1/4 cup Parmesan cheese, other 1 teaspoon garlic powder and finally the ground black pepper.
    Recipe for Cheddar Garlic Oven Baked Chicken Breast, the dry mix
  3. It’s your choice whether you want to pound your my chicken breasts a bit to flatten them a bit. Or, cut your chicken breasts thinner so they will be moister. Either way, dip each chicken breast on both sides in the wet butter mixture; then in the panko dry mixture.
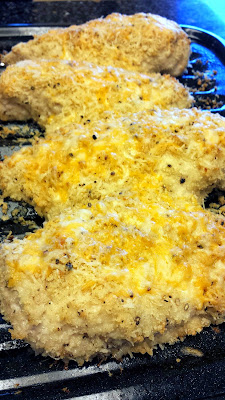
  4. Preheat oven to 350°F. As it is heating up, butter an 11 x 7-inch pan or use a butter spray. I didn’t have a rack, but if you do consider using that as well so the bottom will be crisper. Lay out your chicken breasts in this prepared pan and bake uncovered for 35-45 minutes or until cooked through.
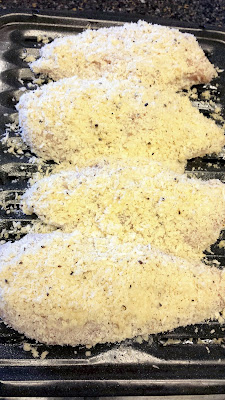
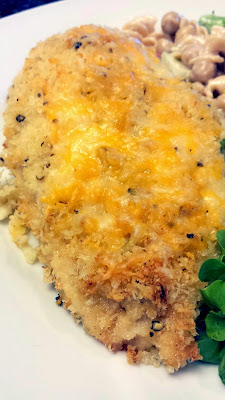
    Recipe for Cheddar Garlic Oven Baked Chicken Breast Recipe for Cheddar Garlic Oven Baked Chicken Breast
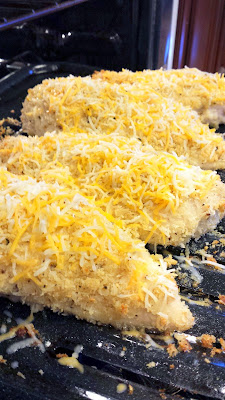
  5. As an optional touch (but really, why would you not do this), during the last 10 minutes of cooking top your chicken breasts with extra shredded cheddar
    Recipe for Cheddar Garlic Oven Baked Chicken Breast Recipe for Cheddar Garlic Oven Baked Chicken Breast Recipe for Cheddar Garlic Oven Baked Chicken Breast
  6. Make sure you let it cool for 5-10 minutes before you serve!
    Cheddar Garlic Oven Baked Chicken Breast with gluten free pasta with cherry tomatoes and broccoli and microgreens and a touch of feta

There are a lot of great ways to pair this chicken. One time, I had a gluten free quinoa pasta salad that I added cherry tomatoes I cut in half and also some steamed broccoli and microgreens and a touch of feta.
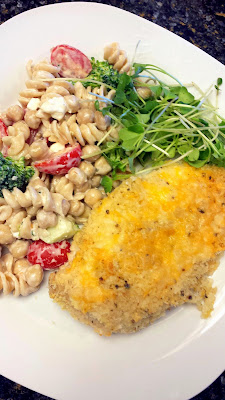
Cheddar Garlic Oven Baked Chicken Breast with gluten free pasta with cherry tomatoes and broccoli and microgreens and a touch of feta Cheddar Garlic Oven Baked Chicken Breast with gluten free pasta with cherry tomatoes and broccoli and microgreens and a touch of feta Cheddar Garlic Oven Baked Chicken Breast with gluten free pasta with cherry tomatoes and broccoli and microgreens and a touch of feta Recipe for Cheddar Garlic Oven Baked Chicken Breast

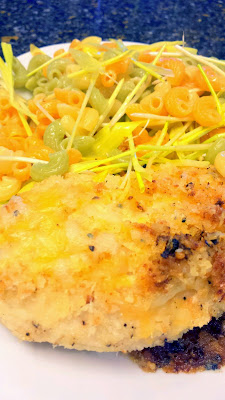
Another time, I went with a veggie pasta and was a little lighter on the cheese on the chicken, but instead of all cheddar I used more Parmesan which crisps up more in the oven. The veggie pasta you see below is mixed with popcorn shoots.
Recipe for Cheddar Garlic Oven Baked Chicken Breast Recipe for Cheddar Garlic Oven Baked Chicken Breast

This is one of the most common ways I make chicken for myself at home because I can buy many chicken breasts and freeze them, and just make one or two of these. Thr prep is fast then pop it on the oven and enjoy the aromas while going on a work call, cleaning, exercising, etc.

I show the chicken breasts whole here, but you can also slice it up to top on salad. I love fried chicken, but this gives me some crispiness but without having to deep fry or eat chicken skin. Of course it’s not as good as fried chicken skin, but it’s enough to pass muster for me.

Do you have a favorite way that you prepare chicken for your family? What was the first new way of making chicken you learned from outside your family and do you still make it?

Signature

Ravioli with Corn Sauce Recipe

I can’t believe it’s already November. I haven’t posted a recipe here since August! I admit though, I haven’t been cooking as much at home and have been dining out a lot because of my hectic days in September and October. And now, here we are approaching the holidays. Honestly though as soon as it turns November I think I am in holiday mode. It’s the time of year that people all reach out to their family and friends to try to connect and celebrate, which means it’s great rationalization to try new recipes out.

At the farmers market there is still some corn left, and so I hurried to make this recipe. The use of corn here is the main sauce, almost like a pesto recipe but using corn instead of basil (although there is still plenty of basil, just not in the sauce itself!). F really liked this dish because it wasn’t super cheesy, and I liked celebrating corn while it’s about to finish its season. It also takes advantage of the last of the cherry tomatoes before it’s time to batten down the hatches.
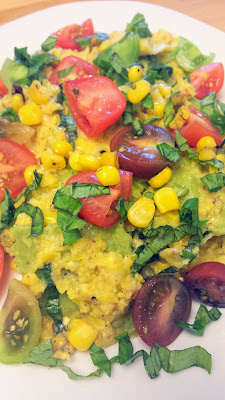
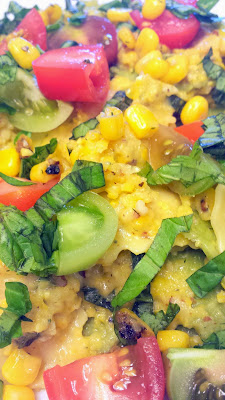
Ravioli with Corn Sauce Recipe with Basil and Grape Tomatoes. The corn sauce is almost like a pesto but with corn and toasted almonds instead

The original recipe comes from Lillian Julow in Gainesville Florida that I saw in Taste of Home. That original recipe includes bacon and uses bacon drippings with fettuccine, so you might want to check out her version if you are not vegetarian and that intrigues you.

But to make it vegetarian instead I swapped it out by using grilled corn kernels. If using fresh corn is too time consuming for you, use thawed frozen corn and roast it in a skillet with a little butter until the corn just begins to brown.

I love the colors of this dish too.
Ravioli with Corn Sauce Recipe with Basil and Grape Tomatoes. The corn sauce is almost like a pesto but with corn and toasted almonds instead

Ingredients:

  • 20 ounces of refrigerated ravioli (I used Giovanni Ravioli Caprese Duet, in your refrigerated section, this one is stuffed with either basil pesto or caprese and mozzarella, and offers two colors, green and white! I’m a fan of the various ravioli of this brand as there are many options, such as also their artichoke, mushroom, chicken rosemary and more)
    I used Giovanni Ravioli Caprese Duet, in your refrigerated section, this one is stuffed with either basil pesto or caprese and mozzarella, and offers two colors, green and white! I'm a fan of the various ravioli of this brand as there are many options, such as also their artichoke, mushroom, chicken rosemary and more
  • 4 cups fresh corn kernels after being grilled in the husk (or you could use thawed frozen corn as well)
  • 1 tablespoon butter
  • 3 garlic cloves, minced
  • 1/4 teaspoon salt
  • 1/4 teaspoon freshly ground pepper
  • 1/4 teaspoon dill weed
  • 1/2 cup grated Parmesan cheese plus additional to taste
  • 1/3 cup unsalted toasted almonds (I recommend toasting them yourself as it tastes better and makes the house smell wonderful. Always make extra because you will snack on some)
  • 1/3 cup olive oil for the pasta sauce, plus an extra drizzle on the pasta
  • 1 cup of fresh basil chiffonade (see here how to chiffonade a basil leaf)
  • Two handfuls or so of grape tomatoes, cut in half
    Almonds, Basil, and Colorful Grape Tomatoes for a Corn Ravioli Recipe

Directions:

  1. Cook the ravioli in boiling water for a couple minutes and then drain from water and toss with a quick drizzle of olive oil so the pasta does not stick. Reserve at least a cup or so of the pasta water to marry the sauce later.
  2. In a skillet, melt 1 tablespoon of butter. After removing the corn from the cob after grilling it, or after thawing your frozen corn kernels, add it to the melted butter along with the 3 minced garlic cloves, salt and pepper, and dill. Stir over medium-high heat until everything is well incorporated.
  3. Remove 3/4 a cup of the corn mixture to reserve for later. With the rest of the corn mixture, add it to a food processor, along with the 1/2 cup grated Parmesan, toasted almonds, and 1/3 cup olive oil. Process until well blended. You’ll notice here that for this corn sauce, it essentially is like a pesto in using corn, olive oil, and toasted almonds (instead of pine nuts). I personally always do the olive oil glugging last so that I can continue to taste it and get it to a consistency I like (although keep in mind some of the pasta water will also be added to marry the sauce with the pasta). F is not a fan of pestos that have too much oil, which is why I only used 1/3 but if it had just been me I might have added more.
    Recipe for a corn sauce for pasta, which is much like a pesto in using corn, olive oil, and toasted almonds (instead of pine nuts)
  4. Return the processed corn portion to the skillet and add the reserved 3/4 of the unprocessed corn mixture and heat until everything softens. Then add the pasta and 3/4 cup of the chiffonade basil to the skillet and mix. Add a small bit of the pasta water at a time until the sauce is the consistency you want- I kept mine pretty thick and used maybe 3/4 cup of pasta water.
    Making a corn sauce for a pasta dish for my recipe of Ravioli with Corn Sauce Making a corn sauce for a pasta dish for my recipe of Ravioli with Corn Sauce
  5. Add the halved grape tomatoes and toss. Top with the remaining Parmesan (optional) and basil and serve!
    Ravioli with Corn Sauce Recipe with Basil and Grape Tomatoes. The corn sauce is almost like a pesto but with corn and toasted almonds instead Ravioli with Corn Sauce Recipe with Basil and Grape Tomatoes. The corn sauce is almost like a pesto but with corn and toasted almonds instead

This dish serves four.
Ravioli with Corn Sauce Recipe with Basil and Grape Tomatoes. The corn sauce is almost like a pesto but with corn and toasted almonds instead Ravioli with Corn Sauce Recipe with Basil and Grape Tomatoes. The corn sauce is almost like a pesto but with corn and toasted almonds instead

Although it’s almost time to say goodbye to tomatoes and corn, I know we are saying hello to so many squashes, romanesco and beets and other root vegetables.

What winter food are you looking forward to?

And what do you think of those refrigerated raviolis? I don’t mind making pasta myself if it’s just plain (like fettuccine, or spaghetti) but when it comes to stuffing them like tortellini or ravioli, I’m all into convenience, and there are so many interesting flavors out there! Do you have a favorite kind?

Signature

Recipe for Cheddar Whiskey Burgers

Recipe for Cheddar Whiskey Burgers
Obviously, this is not a vegetarian recipe. But I can’t resist the aroma and sounds and sights and taste of a burger fresh off the grill. This is inspired by the Whiskey Barrel Burgers from Better Home and Gardens with just a few adaptations to my personal taste.

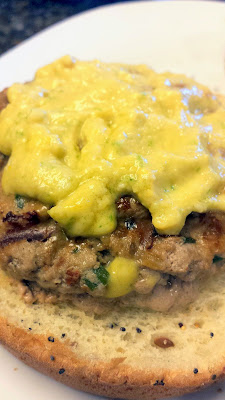
This recipe makes 8 patties that are stuffed with Cheddar Whiskey Filling, and then topped later during the grilling with a little Cheddar Whiskey Filling as well.
Recipe for Cheddar Whiskey Burgers

The original recipe called for putting these on your toasted kaiser or hamburger roll along with lettuce, red onion, red or yellow tomatoes, and barbecue sauce. However, I didn’t want to use that lovely whiskey and then bury it in the flavors of bbq sauce.

Ingredients:

  • Cheddar Whiskey Filling
    • 2 cups (about 8 ounces) shredded cheddar cheese
    • 1/3 cup finely chopped green onions
    • 2 cloves garlic, minced
    • 2 tablespoons whiskey
    • 1 1/2 teaspoons Worcestershire sauce
  • Whiskey Burger Patties
    • 2/3 cup finely chopped green onions
    • 2 cloves garlic, minced
    • 1/4 cup fine dry bread crumbs
    • 1/3 cup whiskey
    • 2 tablespoons Worcestershire sauce
    • 2 tablespoons of melted butter
    • 1/2 teaspoon seasoned salt or garlic salt
    • 1/2 teaspoon crushed red pepper flakes
    • 1/2 teaspoon ground black pepper
    • 1 pound ground beef
    • 1 pound ground pork

Directions:

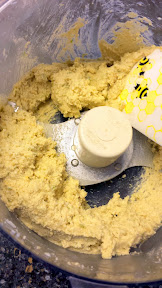
  1. First, let’s make the Cheddar Whiskey Filling. This is going to make a cheddar whiskey mixture, half of which you put inside the burger patty and half of which you are going to put on top later during grilling. Pretty straightforward- in a food processor, mix together until almost smooth all the ingredients: shredded cheese, chopped green onion, minced garlic, whiskey and Worcestershire sauce. Partially through the processing, make sure you pause to scrape down the walls and then finish processing! Set aside for now.
    Recipe for Cheddar Whiskey Burgers
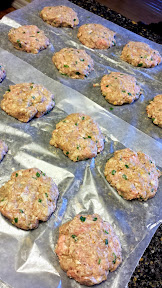
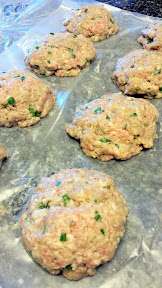
  2. Now, for the Whiskey Burger Patties. In a large bowl combine green onions, minced garlic, bread crumbs, whiskey, Worcestershire sauce, melted butter, garlic, seasoned salt, crushed red pepper, and black pepper. Add ground beef and ground pork; mix well. You know you will have to be doing all this with your clean hands to really get in there. When everything is well incorporated, you are going to make sixteen 1/2-inch-thick patties: each patty will probably start out as you pull it from the bowl as a an amount about the size of a chinese medicine ball that you then flatten out, to give you some idea.
    Recipe for Cheddar Whiskey Burgers Recipe for Cheddar Whiskey Burgers Recipe for Cheddar Whiskey Burgers
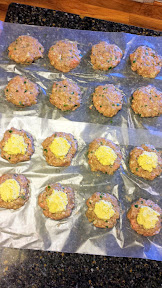
  3. Next to bring some of that Cheddar Whiskey Filling in. Add 1 tablespoon of the Cheddar-Whiskey Filling on the center of each of eight of the patties. This should use half of your Cheddar Whiskey Filling that you have set aside (you are going to use the rest later during the grilling process).
    Recipe for Cheddar Whiskey Burgers Recipe for Cheddar Whiskey Burgers
  4. Now, top the eight patties that have the Cheddar Whiskey Filling with the other unadorned eight patties, sealing the Cheddar Whiskey Filling in.
    Recipe for Cheddar Whiskey Burgers Recipe for Cheddar Whiskey Burgers
  5. In a storage container layer patties between sheets of waxed paper and put in the refrigerator to chill overnight.
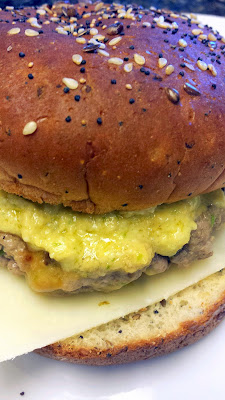
  6. Next day: it’s grilling time! You are going to wait until your charcoal grill is at medium heat, and of course you are going to have a drip pan, right? Place patties on the grill rack over the drip pan and then cover your grill for about 10 minutes. Turn patties; cover and grill for 5 minutes. Top each patty with 1 tablespoon of the remaining Cheddar Whiskey Filling. Cover and grill about 5 minutes more or until done (160 degrees F. If using a different kind of grill other than a charcoal grill, adjust according to your grill).
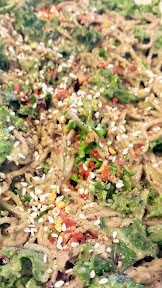
Because I wanted a little more spice to this, I added a pepperjack cheese to my burger.
Recipe for Cheddar Whiskey Burgers Recipe for Cheddar Whiskey Burgers


These burgers were delicious! In the future, I may add more spice, possibly even dicing in some jalapenos for more kick.

What are you grilling this summer? How do you like to put together your burger?
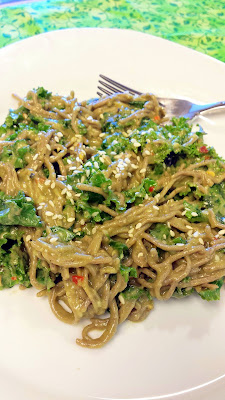
And, if you don’t want to stand in front of a fire grilling, I have another option for you: August 11 (Monday of next week) kicks off Portland Burger Week thanks to Portland Mercury, Nicky USA, Widmer Brothers Brewing and Jim Beam. This year there will be 20 locations varying from Ate Oh Ate or Burnside Brewing to Hop & Vine, Mi Mere Mole, Smallwares, and White Owl Social all offering $5 burgers for one week only (Aug 11 – 17). Check out the list, find something conveniently located to you, and plan some burger awesomeness next week!

Signature

Avocado Breakfast or Brunch Recipes

These Avocado Breakfast Recipes or Brunch Recipes are very simple ways to eat avocado, but so satisfying. I don’t know if I can really call them all of them recipes as much as ideas that are self explanatory. And they are my favorite ways to incorporate avocado into a breakfast or brunch.
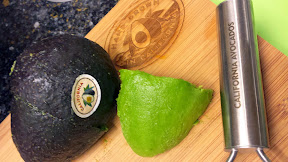
The delicious ways to incorporate California Avocados into your breakfast or brunch. When removing avocado, I like to cut them and then peel off the skin rather then trying to scoop the avocado from the skin!

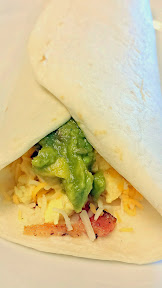
The most obvious way is of course with a breakfast burrito. I decided to make one with bacon and jalapeno with avocado spread This is the recipe for 1 portion, for 1 person.

Bacon Avocado Jalapeno and Cheese Breakfast Burrito

Bacon Avocado Jalapeno and Cheese Breakfast Burrito

Ingredients:

  • 1 avocado, pitted
  • 1/3 of a  jalapeno, finely diced (your call on the seeds)
  • 1/2 of a lime for the juice (about 1 tablespoon)
  • 1 slice of bacon
  • 2 eggs, beaten
  • 1/4 cup of cream
  • pinch of salt
  • freshly ground pepper, to taste
  • 1 flour tortilla
  • 1/4 cup of shredded Mexican cheese

Directions:

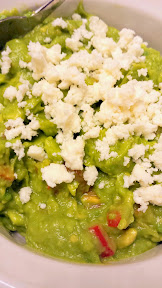
  1. In a small mixing ball, add the avocado (I like the cut the avocado in half and then peel off the skin rather than trying to scoop the avocado out of the skin) and the lime juice and mash together.  When you chop the jalapeno, it is your choice whether to leave the seeds in for heat, and how much seed to leave in (I only left in 1/4 the seeds of the whole jalapeno) – add this in as well and mash together. When I made mine, I made 3 avocados worth and with the rest I added some crumbled queso fresco and served it with the breakfast burrito.
    Bacon Avocado Jalapeno and Cheese Breakfast Burrito - the Guacamole topping
  2. On a cold frying pan, add the slice of bacon and turn up the heat. Cook the bacon, turning it halfway, until crispy. Set aside on a paper towel to absorb excess oil and to cool so that you can later crumble it into the breakfast burrito.
  3. In the pan, I poured out the bacon fat until only about 1/2 tablespoon was left (I reserved the rest for other cooking. If you are making multiple portions at once, you can leave more in the pan). I then poured in the egg and cream and scrambled, adding a pinch of salt and bit of freshly ground pepper to my taste.
  4. On 1 flour tortilla, spread out the scrambled egg in the middle, and then crumble the bacon and add on top of the egg. Sprinkle the shredded Mexican cheese (a mix of cheddar, monterey jack, and asadero and queso quesadilla cheese), and then add 1 1/2 tablespoons of the avocado jalapeno mixture.
    Bacon Avocado Jalapeno and Cheese Breakfast Burrito Bacon Avocado Jalapeno and Cheese Breakfast Burrito
English Muffins and Avocado

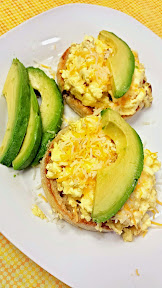
Another way is after toasting some English Muffins, I scrambled some eggs and instead of a rich Hollandaise sauce, I just sliced up 1 avocado and added a sprinkle of some shredded triple cheddar cheese and it was luxurious without all the fat.
After toasting some English Muffins, I scrambled some eggs and instead of a rich Hollandaise sauce sauce, I just sliced up some avocados and added a sprinkle of some shredded triple cheddar cheese and it was luxurious without all the fat.After toasting some English Muffins, I scrambled some eggs and instead of a rich Hollandaise sauce sauce, I just sliced up some avocados and added a sprinkle of some shredded triple cheddar cheese and it was luxurious without all the fat.

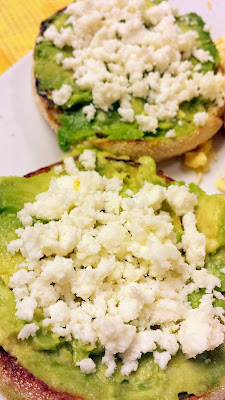
Or on a weekday, I simply mash 1 avocado in a bowl and spread it on toasted English Muffins, top it with sprinkles of queso fresco or cojita cheese, and off to the rest of the workday we go!
Avocado on toasted english muffin topped with queso fresco cheese

What are your favorite ways to have avocado?

Signature

Soba Noodles with Kale, Miso, and Avocado

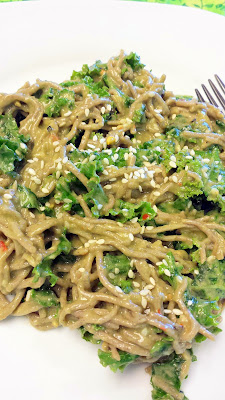
Recipe for Soba Noodles with Kale, Miso, and Avocado, vegetarian and gluten free and healthy and easy!
When I was gifted a few avocados from the California Avocado Commission, I knew that I wanted to try one of the recipes I’d seen and pinned a while ago from A House In the Hills: Soba Noodles with Kale, Miso, and Avocado.
Recipe for Soba Noodles with Kale, Miso, and Avocado, vegetarian and gluten free and healthy and easy!

I added ginger and red pepper flakes for mine for a little more heat and burn, and used the kale that I could find even though she had recommended dino kale. After prepping and mixing it, I then put it in the refrigerator to chill for a couple hours to make for a refreshing lunch on a hot summer day that is also healthy!
Recipe for Soba Noodles with Kale, Miso, and Avocado, vegetarian and gluten free and healthy and easy!

Make sure you taste your miso avocado sauce several times- the guidelines here may vary based on how salty your miso may be and your preference levels. Serves 4.

Ingredients:

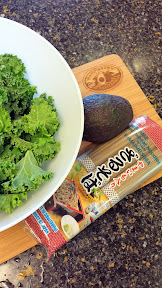
  • 2/3 package of buckwheat soba noodles (enough for 4 servings – usually 1/2 a bunch is 1 serving. I used King Soba Organic Sweet Potato and Buckwheat Noodles)
  • 1 teaspoon of sesame oil
  • 1 small bunch of kale – mine came out to about 4 cups
  • 1 ripe avocado
  • 1 clove of garlic
  • 1 tablespoon olive oil
  • 3 tablespoons miso – I used shiso miso
  • Juice from 1/2 lime (about 1 tablespoon)
  • 3/4-1 cup of water
  • 1/2 teaspoon of ground ginger
  • 1 teaspoon of red pepper flakes
  • 1 tablespoon of sesame seeds plus additional to garnish
  • freshly ground pepper to taste

Directions:

  1. Cook the soba noodles according to directions in unsalted boiling water. Be careful that you do not overcook them as when you add the avocado miso dressing later it will be adding a lot of moisture and can make them soggy (unfortunately I made that mistake with this batch, but I’m warning you not to!). After they are ready, drain and rinse with running water at least twice to wash off the extra starch. I might even recommend using chopsticks or a fork to lift and swish the noodles a little bit in the new water to make sure the starch is washed off all the noodles. Then mix with 1 teaspoon of sesame oil, distributing well so the noodles will not stick together. Let cool.
  2. While the soba noodles are cooking, cut the kale leaves from the stalk and into either ribbons or small bite size pieces. I then mixed in the kale leaves with the still steaming hot noodles and sesame oil so they did wilt a little. Depending on how much you like kale, you could also consider a quick blanch to soften it further, but the mixing with the hot soba for me was enough.
  3. In a food processor, combine the pitted avocado, 1 clove of garlic, 1 tablespoon olive oil, juice from the 1/2 lime and 1/2 cup of water. Puree, and then taste and continue to add the water and mixing until to your taste. The consistency should be a silky sauce. I happened to have used 1 cup or so to balance out the saltiness of my miso. bring large pot of salted water to boil, add noodles and follow the package instructions to cook
  4. In a large bowl, mix the soba noodles, kale, and avocado miso dressing until well combined. This is when I also added the ground ginger, red pepper flakes, and tablespoon of sesame seeds and ground pepper to taste.
    Recipe for Soba Noodles with Kale, Miso, and Avocado, vegetarian and gluten free and healthy and easy! Recipe for Soba Noodles with Kale, Miso, and Avocado, vegetarian and gluten free and healthy and easy!
  5. When well mixed, chill in the refrigerator for a couple of hours if you can, and enjoy cold! When serving, feel free to garnish with another little sprinkle of sesame seeds. You could also add tofu or fish or other protein of your choice on top!

Recipe for Soba Noodles with Kale, Miso, and Avocado, vegetarian and gluten free and healthy and easy!

This goes well with a crisp white wine and sitting outside on a summer day.

Signature