


Have you ever had Pão de Queijo?
It’s a little cheese bread bun. They are popular in South America, and I first had it at churrascarias in Chicago where you are supposed to avoid them in order to focus on the all you can eat served tableside by the gaúchos, but these pãos were the highlight for me. So of course I had to figure out how a Pão de Queijo Recipe to make them at home without having to also eat all that meat! I was reminded of Pão de Queijo recently because I am jealous of a couple I know who are spending a few months in Uruguay- what a fun adventure! I wish I could go off and stay in a country for a few months. I suppose I did that when I was in college- I was in China for a summer- but I would appreciate living abroad so much more now that I am experienced and bolder.
Also, since I made and shared those Mini Cream Cheese puffs earlier, I thought about how they were the fourth variation of cheese bread I have made- which is the only kind of breads I make. The kind with cheese (I’ve also made gougeres- maybe I’ll cover those for New Year’s as those are great with sparkling!). Cheese and bread = win!
I have done Pão de Queijo two ways in the past. One starts with making a roux on the stovetop, and then adding the tapioca flour, then the cheese and egg to form the dough and then make drops on a cookie sheet.

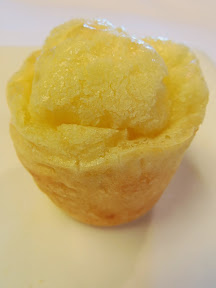
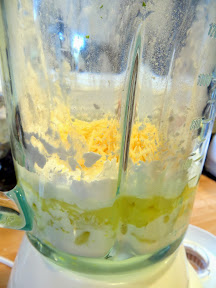
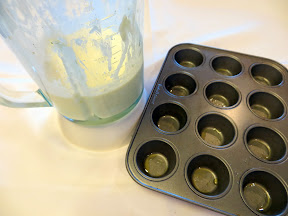
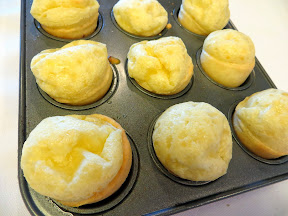
The other uses a blender with all the ingredients together, and results in lighter pão, but it is much faster because after mixing you just pour them into muffin tins and bake in the oven, an easy 3 steps!
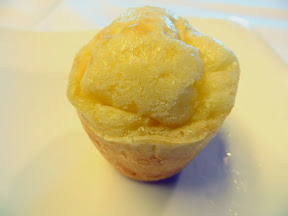
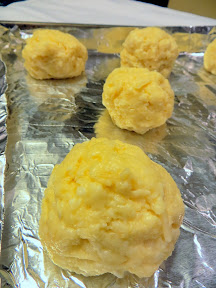
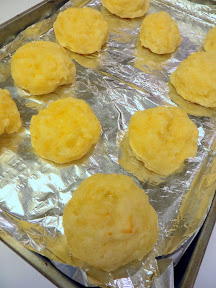
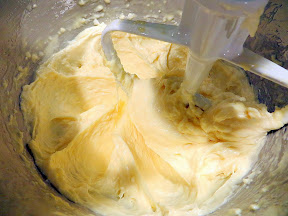
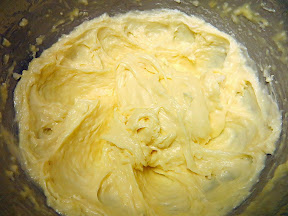
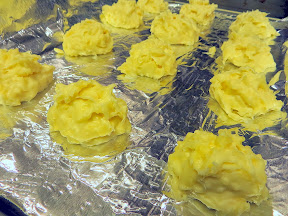
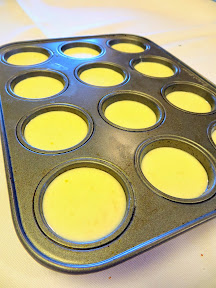
However, there is a chewy dense texture to pão you won’t get as much with that shortcut method. The dough of the roux method allows you to make balls/buns or you can make it in large or small muffing tins. The easy way requires muffin tins because it will be a liquidy dough before you bake it (see the difference in the photos above?).
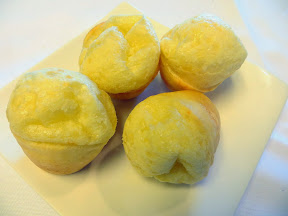
I have made both kinds below to show you since the last time was a couple years ago and the photos aren’t very good/non-existentm I and my co-workers gobbled both up so rest assured, both are still yummy. And I’m going to show you both!
By the way, since they use tapioca flour, Pão de Queijo are gluten free! I used Bob’s Red Mill tapioca flour, because Bob’s Red Mill is the best.
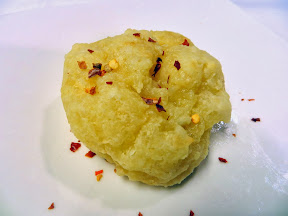
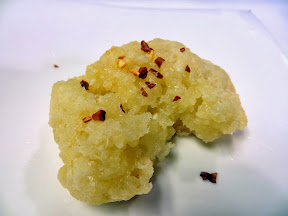
In both of these I just use cheese, but you can also upgrade your pão by using garlic, caramelized onion, and herbs or spices of your choice. Sometimes I like to sprinkle mine with red pepper flakes. And, as you will see in my Ingredients list, I totally doubled up on the cheese but you don’t have to! I personally prefer the roux method version the best. I like having them with a nice glass of wine- I think the last time I made these actually was for a wine and cheese party I hosted! I had them all prepped already, so once the oven timer went off I would dump them into a basket for everyone, and often it would be empty before the next batch came out!
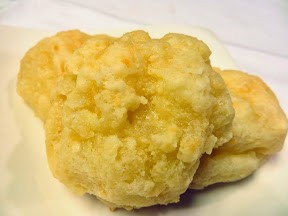
Roux Method for Pão de Queijo – cheesy Biscuit-look version
So, I have two ways I use the roux method. First I’ll list my favorite, more cheesy version.
Yields 10 large pao (about half your palm size) or you can make smaller balls. This yielded about 10 pãos for me.
Ingredients:
- 1/2 cup water
- 1/3 cup butter or olive oil
- 1/3 cup milk or soy milk
- 1 teaspoon salt
- 2 cups tapioca flour
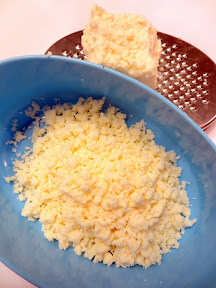
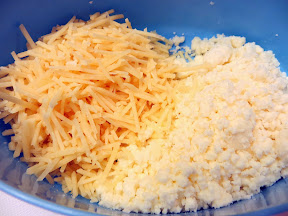
- 2/3 cup freshly grated Parmesan and Romano cheeses with queso fresco if you have it. I will admit though the original recipe calls for 2/3 cup, I used 2/3 cup parmesan and 2/3 cup queso fresco for more cheesiness. And then while I was measuring it I kept breaking off and eating more of the Cacique queso fresco. And I also ate it while it was cooking. I had to stop myself so I would have some left for the blender version of this recipe. If you are looking for this in the grocery store, I usually find queso fresco by the cream cheese which is by the pre-shredded and sliced deli cheese rather than in the cheese case.
- 2 beaten eggs, room temperature
Directions:
- Preheat oven to 375 degrees F.
- Pour the water, olive oil, milk, and salt into a large saucepan, and place over high heat. When the mixture comes to a boil, remove from heat immediately, and stir in tapioca flour until smooth. This will probably take 10 minutes, unless like me you can use a dough hook on a stand mixer for this then it will only take a few minutes. Doing it by hand works too- I’ve done it that way before I owned the mixer. Either way, once mixed, set the dough aside to rest for 10 to 15 minutes.
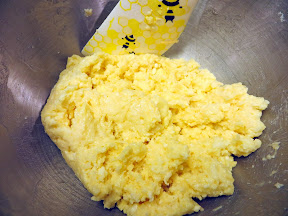
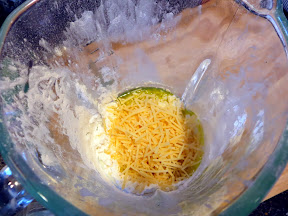
- Stir the cheese and egg into the tapioca mixture until well combined. The mixture will be chunky like cottage cheese.
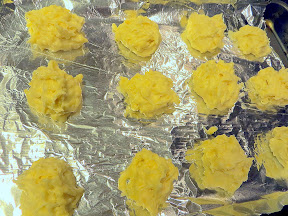
- Drop rounded, 1/4 cup-sized balls of the mixture onto an ungreased baking sheet, or you can choose to make ones in muffin or mini muffin tins or make smaller balls, your call.

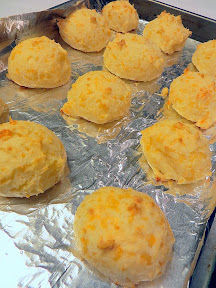
- Bake in preheated oven for 15 to 20 minutes or so- look for the tops to be lightly browned.
As you would expect, the better the cheese complexity, the better the pão, and also if you use butter and real milk it will taste better.
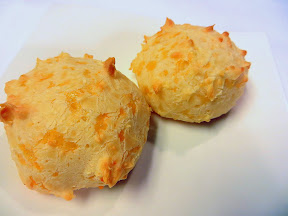
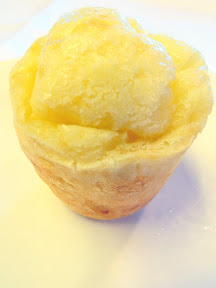
They taste great fresh and hot, or rewarmed later!

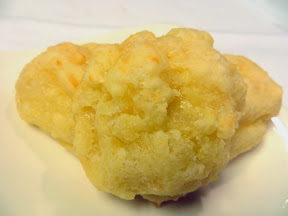
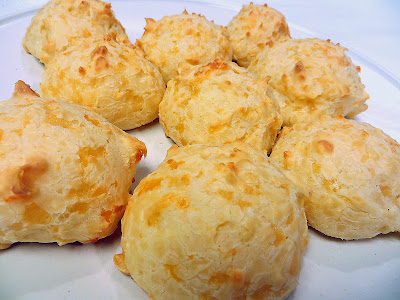
I personally like the “biscuity” one because of it’s cheesiness ratio and the chewiness. So taste and texture win. But I admit it is not round like the original Pão de Queijo should look like. I have made that version, which is more aesthetically close to the original and looks a bit more like gougeres, that “other” cheese bread). Follow all the exact same steps as above, but with the following ratios (this yielded about 20)
- 1 cup of whole milk
- 1/2 cup of vegetable oil
- 1 teaspoon of salt
- 2 cups of tapioca flour
- 1 1/2 cup of parmesan
- 2 beaten eggs

To make more perfect circular buns, use an ice cream scooper instead of a regular spoon like I did, and you can dip it in water to prevent it from sticking.
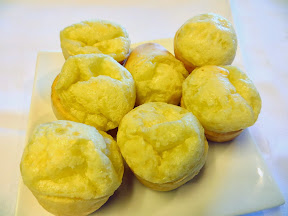
Mini-Muffin with Blender Method Pão de Queijo
Yields about 24 mini muffin sized cheese breads.
These are so easy- you can make it with one eye closed. Which I literally did because I had to stay home from work one day because I couldn’t open my left eye because it kept stinging/tearing. But that didn’t stop me from successfully making these even as one eye just kept crying. The hardest part turned out to be pouring when you only have one eye open- messes with your depth perception. I like these because of the yield and ease, and they are much more light and airy. The roux method will have a bit more of a crunch on the outside and soft chewy inside rather than this poofy chewiness.
- 1 egg, room temperature
- 1/3 cup olive oil
- 2/3 cup milk
- 1 1/2 cups tapioca flour
- 1/2 cup packed grated cheese, your preference, parmesan, romano, or queso fresco, mix of the three… ok I totally used 1/2 cup of Parmesan and 1/2 cup queso fresco for more cheesiness
- 1 teaspoon of salt (or more to taste)
Directions:
- Preheat oven to 400°F. Grease a mini-muffin tin.
- Put all of the ingredients into a blender and pulse until smooth. Don’t forget to use a spatula to scrape down the sides of the blender so that everything gets blended well. At this point you can store the batter in the refrigerator for up to a week if needed.

- Pour the batter (it should be thick but liquidy) into each of the mini-muffin openings- they will rise so leave some space at the top, maybe about 1/8 of an inch from the top. Bake in the oven for 15-20 minutes, until all puffy and just lightly golden browned- if you wait too long it will start to lose it’s light fluffyness inside.
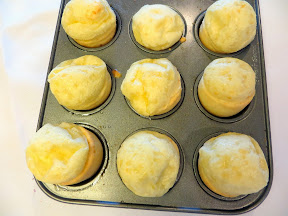
Eat while warm or save to reheat later.
Which version of the Pão de Queijo Recipe are you interested in?


Its amazing how many different ways you can make one recipe! These sound really yummy. I would probably like the biscuit version the best!
I love these but have never tried making my own, now I can try them 3 different ways and see what works best for me. The mini muffin version makes me wonder if I could put them in popover pans. Yum!