Simple and Crisp Fruit Crackers

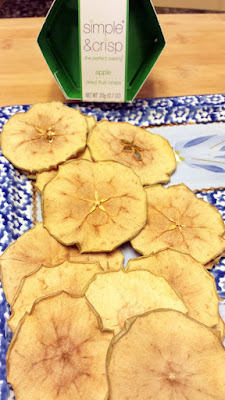
Have you ever heard of the Simple and Crisp Fruit Crackers before? This is a great healthy alternative to crackers that also satisfy those in the party group who may be gluten-free. They are 100% fruit that are simply thinly sliced, dried, and that’s it. Simple and healthy since unlike a regular cracker vehicle they offer fiber and antioxidants, and after a month of parties it’s a welcome change from the regular cheese and crackers.
simple & crisp - apple orange, and pear
The crackers pair great with wine – whether red or white – and a variety of cheeses, here you can see I have a cream cheese and vegetable spread. Cheddars, Swiss, Brie, Blue cheeses and more work equally well. We didn’t finish all the crackers at the wine party, and I snacked on some of the leftover fruit with cheese and tea too. If I had chocolate around I might melt it and dip the fruit crackers in the chocolate too.

There are four types of fruit they offer:

  • Blood Orange (my favorite)
  • Orange (second favorite for me)
    simple & crisp - orange simple & crisp - orange
  • Pear
    simple & crisp - pear simple & crisp - pear
  • Apple
    simple & crisp - apple simple & crisp - apple

As you can see, they look fancy even though I did nothing but dump it out of the package, so perfect for the holidays. I’m not being compensated for this post – I just really like this product.

Simple and Crisp fruit crackers are a Northwest non-GMO local product created from Seattle by Jane Yuan a couple years ago. So not only are you supporting local, but also a female entrepreneur. The apples and pears are sourced from Washington and Oregon partners, and the oranges from California.

S&C Producer Profile: Jane Yuan, Founder & Chief Pairing Purveyor from Simple & Crisp on Vimeo.

Especially during this time of years when I’m attending many get togethers, I appreciate something that looks impressive but is so stupid easy to put together, especially when I have to go straight from after work.

I get these Simple and Crisp crackers at Whole Foods, though I’ve seen them at other specialty markets too (for instance Zupan’s here, and nationally at Williams Sonoma).

Which of these fruit crisps sounds most appealing to you? What is your favorite combo to bring to a get together that is easy when you are going straight from after work?

Signature

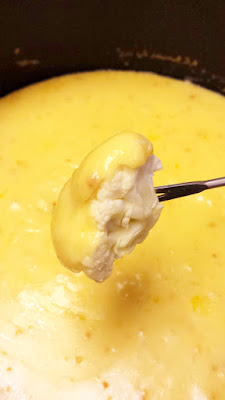
Gluten-free Cheddar Fondue Recipe

Last week, for a ladies wine night I hosted at my home, I prepared a Cheddar Fondue. This is so easy to do- the most time consuming part will be grating the cheese. You want to use freshly grated cheese rather than pre-grated because the kind that come in the bag already have starches and powder added to them during packaging. I generally do this while watching TV – I did this while watching Amazing Race and Walking Dead!
Gluten-free Cheddar Fondue Recipe with broccoli as your dipper instead of bread is healthier. You can have the broccoli raw or blanch it quickly to soften it (but not too much) Cheese fondue with cauliflower as your dipper instead of bread is healthier. You can have the cauliflower raw or blanch it quickly to soften it (but not too much)

Otherwise, it’s pretty straightforward, but so worth it for a party. Or dinner. Or lunch. Is there ever a wrong time to enjoy melted cheese?  My secret for this version is that besides the cheddar, I add additional flavors via a pinch of nutmeg, dry mustard, and sometimes a  few tablespoons of pesto (you can make your own or buy it from the store, whatever works for you) if no one in your party has a nut allergy. Other optio nsmight be to add in diced tomatoes or red peppers.

For dippers, I sliced up apples and had blanched broccoli, but other veggies would work like cauliflower, asparagus – and this was too time consuming for me, but boiled fingerling potatoes would be a perfect addition too. If you’re not trying to be vegetarian, you could also slice up some cooked sausage. Since this time I was intentionally striving to be gluten free I didn’t have bread – though you could seek out gluten free bread if you’d like.
Great dippers for a cheese fondue that is healthier than bread - broccoli and cauliflower! Just quickly blanch them to soften them up

Since this time I was intentionally striving to be gluten free I didn’t have bread – though you could seek out gluten free bread if you’d like.
Cheddar fondue, a fun interactive way to eat together

A particular guest I had coming not only was gluten-free, but also has corn allergies. So, as a subsitute for the cornstarch that most fondue recipes call for, I used tapioca flour! Tapioca flour, also known as tapioca starch, is gluten free as it’s made with a root. I first became acquainted with tapioca flour when making pao de quejio Brazilian cheese bread rolls in the past, and often have it on hand.

I also admit I had 3 times as much of all the ingredients below- as I was making the fondue I measured 8 ounces of recipe at a time, but I prepped more than that in case the cheese ran low so I could add another 8 ounces or 4 ounces as desired. You should do this even if you aren’t sure of your party size because having a little bit of extra cheese or wine available will mean you can adjust the thickness and amount of your cheese as you need based on the way your cheese is melting to get the desired melty texture.

Make sure you don’t get your cheese too hot, as it will start to glomp together and fats will ooze from it. You want it just warm enough to be melted.

Ingredients:

  • 8 ounces of sharp Cheddar cheese, grated
  • 2 cloves of garlic
  • 1 cup of dry white wine
  • 4 teaspoons of tapioca flour
  • 1/4 teaspoon of nutmeg
  • 1/2 teaspoon of dry mustard
  • 2 tablespoons of pesto –  regular basis or red pepper sauce
  • Blanched broccoli (you can also use raw or steamed, but I like blanched because it softens it slightly but not too much so you still get great green color and firmness to stay on your fondue fork)
  • Sliced apples
  • Whatever else you’d like to dip into your cheese!

Directions:

  • Grate the sharp Cheddar cheese and then set aside – it will melt better if it’s closer to room temperature rather than cold from the refrigerator when you start to melt it.
  • In a small bowl, mix the 4 teaspoons of tapioca flour with 2 tablespoons of cold water. Stir until it dissolves.
  • Peel the 2 garlic cloves  and rub the inside of the surface of your pot or saucepan with the cloves. I then minced the garlic and put it in the pot along with 1 cup of the white wine. Heat the wine until it is simmering.
  • Slowly whisk in a handful of the 8 ounces of cheese at a time so that it will melt evenly. The liquid cheese should still be at a simmer.
  • Once the cheese has melted, whisk in the tapioca and water mixture, then the 1/4 teaspoon of nutmeg and 1/2 teaspoon of dry mustard until it is smooth and fully incorporated.
  • Swirl in the 2 tablespoons of pesto at the end for a little extra depth of flavor
  • If you want to use a slow cooker to keep it warm, you may have to start this on a pot on the stove to get the heat needed to first melt and incorporate everything, and now move it into the slow cooker.

From here, just dip and eat! If for some reason you have leftovers, I will often refrigerate it and add it in an omelette or on open faced sandwiches or other veggies later.
Cheese fondue with broccoli as your dipper instead of bread is healthier. You can have the broccoli raw or blanch it quickly to soften it (but not too much)

Other fondues we had were broth (a great shortcut for this is to buy pho broth!) with meat and seafood, chocolate (dip crackers, cookies, fruit, cream puffs and eclairs…). It’s a fun theme for a party as it kept everyone standing around my table to move around to the various stations and accompaniments. Or, it’s lovely for a dinner with close friends or your loved one because the constant dipping as you eat helps with conversation as you are interacting with your food together!

What’s your favorite type of fondue?


Signature

Holidays with Pendleton Midnight: Apple Cranachan Recipe and Whiskey Pomegranate Cocktails

Have you ever heard of a dessert called Cranachan?
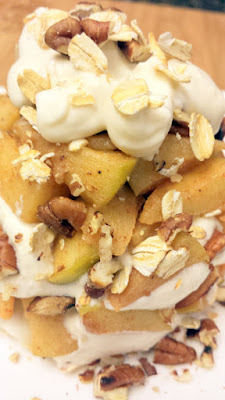
Build your Apple Cranachan Recipe in layers of oat honey cream, nuts, and apples in a glass to show off the layers - either do this for your guests or let your guests built it on their own! Complete by topping with the toasted oats

It’s a traditional Scottish dessert with whipped cream, toasted oatmeal, whiskey, honey, and raspberries. Usually, these ingredients are individually in dishes when served so each guest can mix up their dessert dish (usually a clear dessert glass) to fit their own taste preferences. As each person layers the ingredients, it’s like your own personal trifle.
Build your Apple Cranachan Recipe in layers of oat honey cream, nuts, and apples in a glass to show off the layers - either do this for your guests or let your guests built it on their own! Complete by topping with the toasted oats

The use of oats in this dessert makes it hearty and I also like adding in some toasted pecan nuts for more texture. Some might consider also folding in some chocolate, and topping with a bit more honey.
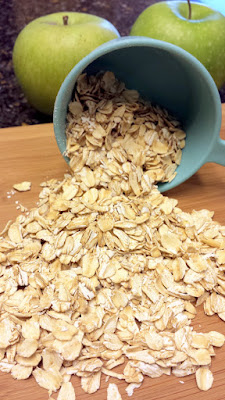
Oats to be toasted for a Apple Cranachan Recipe

This would be a great dessert to serve at the end of a holiday meal instead of a pie (or heh heh along with pie on the food buffet). I like how the layers and the build it yourself approach makes the dessert both casual but fancy because of the freshness of easy prep of the ingredients just before serving. You can toast the oats and nuts and cook the apples before hand – though doing them just before serving makes the house smell great! You can serve it in a glass, or just on a plate.
Or, layer your Apple Cranachan Recipe on a plate instead for a more rustic presentation and so you don't have to worry about perfect placement with no smears in a glass

The reason this dish is so popular to Scotland is how it celebrates ingredients Scotland produces locally. Similar to how Oregon blackberries and Hood strawberries taste unique (and better!) than other available blackberries and strawberries IMHO, so does the traditional use of Scottish steel cut pinhead oats, whiskey, honey (they use a heather honey), the specific local cream from their Scottish cows, and very seasonal Scottish raspberries.

Since I don’t have access to all of those since I’m not in Scotland, the best I can do in my version of this apple cranachan recipe is to embrace the celebration of local by using what is seasonal and local here. Since apple and whiskey are also a great combination, I decided to give it this change for colder weather to apples picked from the orchards here in the area.
Build your Apple Cranachan Recipe in layers of oat honey cream, nuts, and apples in a glass to show off the layers - either do this for your guests or let your guests built it on their own! Complete by topping with the toasted oats

This is also perfect dessert for this colder weather now that it’s here,  as a bit of whiskey in your warm dessert and perhaps a shot of this light Pendleton Midnight whiskey along side it will definitely warm you up a little.

Pendleton Midnight is a 90 proof oak barrel aged Canadian whiskey distributed by local Hood River Distillers, Inc. Founded in 1934 and headquartered in Hood River, Ore., Hood River Distillers is the Northwest’s largest and oldest importer, producer, bottler, and marketer of distilled spirits that includes Pendleton as well as several other lines, including Clear Creek Distillery products which was recently added to the Hood River Distillers family in January 2015.

Hood River Distillers also opened a 1200 feet Tasting Room this past July in a historic 1910 National Bank building in downtown Hood River. There, for $5 tasting fee you can taste samples – they rotate sample tastes from a list of 15-20 products from Hood River Distillers and Clear Creek Distillery, including limited edition products!

Pendleton Whiskey is the #1 premium selling Canadian whiskey in Oregon and a top 10 premium Canadian Whiskey in the US. The Pendleton Midnight is a mixture of corn, rye, wheat, and barley, with glacier-fed spring water from Oregon’s Mt. Hood and a portion of the whiskey blend is aged over six years in American brandy barrels.

Pendleton Midnight Whiskey

Although this is a 90 proof, the taste does not have a lot of alcoholic heat at all and is incredibly smooth. This is great for many of you who don’t think you like whiskey and are just getting started, since Pendleton Midnight is so light on the heat. Yet, it also offers great layers of flavors that include florals, toast, and grain along with some warming spices.

Because of it’s smoothness, I thought I would layer the flavors of Pendleton Midnight in this layered dessert. I used 1/3 cup of whiskey for soaking the oats, but depending on the strength of flavor of your Whiskey that you use, you might want to dial it back to 3-4 tablespoons. I personally liked how in my amounts, you can really taste the whiskey at first – I like my whiskey cake and rum cakes so that I can taste the alcohol and it’s not just in the name.

This recipe serves four.

Ingredients:

  • 1/2 cup of rolled oats
  • Pendleton Midnight whiskey – 1/3 cup for soaking the oats, 1 tablespoon for cooking the apples
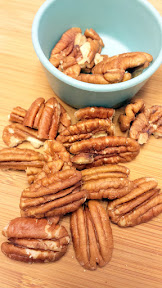
  • 1/4 cup of pecans – I toasted them whole and then chopped them, but you can chop them first if you’d prefer
  • 2 tablespoons of butter
  • 2 apples, cored and diced. You don’t need to peel them unless you want to.
  • 1/4 teaspoon of cinnamon
  • 1 1/4 cup of heavy whipping cream
  • 3 tablespoons of honey – my favorite is from Bee Local

Directions:

  1. First, you will need to prepare the oats the night before. Set a pan on medium heat and add the 1/2 cup of oats to toast. Make sure you stir and keep your eye on these. Keep stirring until the oats have browned a bit and begin to smell fragrant, about 5 to 6 minutes.  In a small bowl, put only some of the oats (1/3 cup of the toasted oats in with 1/3 cup of the whiskey and cover, letting them soak overnight so all the whiskey is absorbed). Set the rest of the toasted oats aside – instead of soaking these, they will be kept dry and toasty to be used as another layer.
    Oats to be toasted for a Apple Cranachan Recipe After toasting the oats, use most (but not all) to soak up some whiskey overnight for this Apple Cranachan Recipe. Set some of the toasted oats aside for topping the dessert later After toasting the oats, use most (but not all) to soak up some whiskey overnight for this Apple Cranachan Recipe. Set some of the toasted oats aside for topping the dessert later
  2. The nuts are optional, but I like the extra texture they provide. You want to toast the pecans – before you add the pecans, turn the heat down to medium. You may want to spray a little cooking oil or smidge of butter so the nuts don’t stick. Make sure you watch them carefully so they don’t burn, and continuously stir with a wooden spoon. You’ll know you’re done when they are aromatic. I may always toast slightly more nuts than I need because I have to sample the toasting to perfection and eat like a handful just doing that… Set the rest aside for another topping layer.
    Optionally, toast some nuts (here pecans) for this Apple Cranachan Recipe Optionally, toast some nuts (here pecans) for this Apple Cranachan Recipe
  3. In your pan, heat the two tablespoons of butter over medium high heat until it melts. Add the cored and diced apples to the pan along with the 1/4 teaspoon of cinnamon and 1 teaspoon of whiskey.  Stir and cook until the apples soften. The apples should be soft enough that they can easily be cut with a spoon, but not mush on the verge of applesauce. Set aside – if you are pre-making this, you will possibly want to warm the cooked apples a bit when serving, but you don’t want to serve them hot from the pan either! Or, serve the apples cold – they taste good either way.
    Chop apples (peeling is optional depending on the apple you use) and cook in butter with a bit of cinnamon and whisky for this Apple Cranachan Recipe Chop apples (peeling is optional depending on the apple you use) and cook in butter with a bit of cinnamon and whisky for this Apple Cranachan Recipe
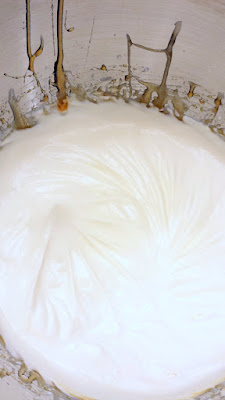
  4. For the cream, whisk the 1 1/4 cup of cream until it thickens, about 5 minutes in a stand mixer using medium speed – don’t go any higher speed. You should start to see trails from the whisk. Now add the 3 tablespoons of honey and whisk again for a few more minutes until peaks form. You should see the honey cream double in size into the whipped cream. Finally, fold in the 1/3 cup of whiskey soaked oats.
    When you whip your cream, add honey and whip until you get firm peaks Fold in the toasted oatmeal which has absorbed most of the whiskey overnight into your honey whipped cream for this Apple Cranachan Recipe
  5. To serve, let guests put together their own layers of the oat whiskey cream, apples, toasted oat, and have the honey handed so they can add a little more honey to suit their taste. Or, make your own layers on clear glasses beforehand a couple hours before dinner and refrigerate and serve when you are ready for a controlled pretty presentation.
    Build your Apple Cranachan Recipe in layers of oat honey cream, nuts, and apples in a glass to show off the layers - either do this for your guests or let your guests built it on their own! Complete by topping with the toasted oats Build your Apple Cranachan Recipe in layers of oat honey cream, nuts, and apples in a glass to show off the layers - either do this for your guests or let your guests built it on their own! Complete by topping with the toasted oats
    Alternatively, layer your Apple Cranachan Recipe on a plate instead for a more rustic presentation and so you don’t have to worry about perfect placement with no smears in a glass.
    Or, layer your Apple Cranachan Recipe on a plate instead for a more rustic presentation and so you don't have to worry about perfect placement with no smears in a glass Or, layer your Apple Cranachan Recipe on a plate instead for a more rustic presentation and so you don't have to worry about perfect placement with no smears in a glass

Instead of cream, you could consider yogurt instead. And, you can ignore the nuts if you have a nut allergy – the traditional cranachan doesn’t have it anyway.

To wash this down and add a little bit more color with a whiskey pomegranate cocktail. This is a version of a julep.
A take on a julep with 2 ounces of Pendleton Midnight whiskey, 1 ounce of Pomegranate juice, 1 ounce of simple syrup, Sprig of mint
Ingredients:

  • 2 ounces of Pendleton Midnight whiskey
  • 1 ounce of Pomegranate juice
  • 1 ounce of simple syrup
  • Sprig of mint

Directions:

  1. Combine all the ingredients and shake well with ice
  2. Pour and serve with a bit of mint leaf garnish

A take on a julep with 2 ounces of Pendleton Midnight whiskey, 1 ounce of Pomegranate juice, 1 ounce of simple syrup, Sprig of mint A take on a julep with 2 ounces of Pendleton Midnight whiskey, 1 ounce of Pomegranate juice, 1 ounce of simple syrup, Sprig of mint

Alternatively, you could also choose to throw in a little spice emphasis with whiskey, pomegranate, and ginger beer or ginger soda (I like Dry Ginger soda) instead for a variation of a moscow mule.
Moscow mule pomegranate variation
Ingredients:

  • 2 ounces of Pendleton Midnight whiskey
  • 1 ounce of Pomegranate juice
  • 3 ounces of ginger beer or soda
  • 1 wedge of lime
  • 1 mint leaf garnish (optional)

Directions:

  1. Add all the ingredients into a glass with ice
  2. Serve with the slice of lime and if you’d like, a bit of mint leaf garnish

Have you ever heard or had Cranachan before?

Disclosure: I was provided a complimentary sample of Pendleton Midnight, but I will always provide my honest opinion and assessment of all products and experiences I may be given. The views and opinions expressed in this blog are entirely my own.

Signature

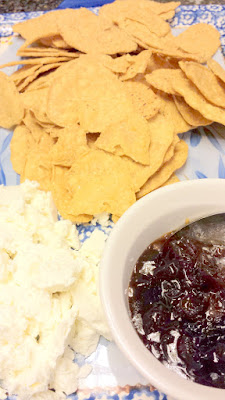
Caramelized Onion Jam with Goat Cheese and Sweet Potato Tortilla Chips

For a get together with a neighbor to discuss some shared property plans, they provided the wine and fruit plate along with cheddar, and I pondered what to bring with my wine. I wanted something that was a snack, but was above and beyond just regular chips and dip, or throwing more sliced cheese on a platter.

A recipe that I recall several of the reps from a Food Should Taste Good event mentioned came to mind. They had raved about one of the recipes on the website, a Caramelized Shallot Jam with Goat Cheese for being super easy and tasty. I had onions instead of shallots in my pantry, but otherwise I had the ingredients on hand and decided to give a try.
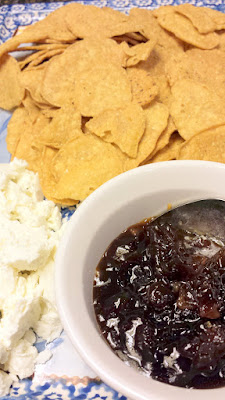
Caramelized Onion Jam with Goat Cheese and Sweet Potato Tortilla Chips and Willamete Valley Farmstead Brindisi

I paired this with sweet potato tortilla chips. Food Should Taste Good chips are gluten free, vegan, non GMO, low sodium and ingredients that when I read the list, I understand and recognize: Stone Ground Corn, High Oleic Sunflower Oil and/or Safflower Oil and/or Canola Oil, Dried Sweet Potatoes, Cane Sugar, Sweet Potatoes, Sea Salt. No weird science names.
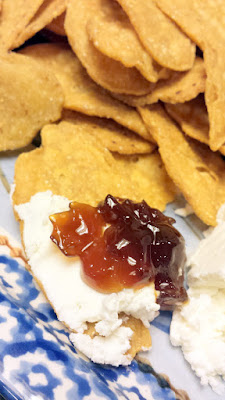
Caramelized Onion Jam with Goat Cheese and Food Should Taste Good gluten free GMO free Sweet Potato Tortilla Chips Caramelized Onion Jam with Goat Cheese and Food Should Taste Good gluten free GMO free Sweet Potato Tortilla Chips

The sweet potato chips were one of the discoveries I made when I attended a Food Should Taste Good promotional event a couple months back – I have always stood by the multigrain chips. That event, plus the fact that while I was in Denver, they had these sweet potato chips at Denver Airport’s beer flight event, put them onto my radar for a great chip that embodies fall without having to go to pumpkin spices and apple cinnamon donuts and ciders.

This Caramelized Onion Jam with Goat Cheese and Sweet Potato Tortilla Chips is great for a small get together for 6-10. You will want to start making the jam at least an hour ahead of time so it has time to cool off from hot to warm before you serve it. At the same time, make sure you have your goat cheese out from the fridge so it can soften and warm to room temperature to be spreadable.
Caramelized Onion Jam with Goat Cheese and Food Should Taste Good gluten free GMO free Sweet Potato Tortilla Chips

Ingredients:

  • 1 tablespoon olive oil
  • 1 cup of diced onions (or 4 large shallots, thinly sliced to equal about 1 cup)
  • 1/2 cup brown sugar
  • 1/4 cup red wine vinegar
  • 1/8 teaspoon salt
  • 6 oz plain goat cheese
  • 1 bag of Food Should Taste Good Sweet Potato Tortilla Chips (or other chips or bread or vehicle of your choosing for the onion jam and goat cheese)

Directions:

  1. In medium saucepan over medium-high heat, heat the oil for a few minutes. Now add the 1 cup of diced onions and saute for a minute or until the onions start turning translucent.
  2. Add the 1/2 cup of brown sugar. Stir constantly to combine the two for the next 5 minutes or so. Turn down the heat to medium and let cook, stirring once in while, so that it all reduces into a consistency like jam.
  3. Then carefully pour in the 1/4 cup red wine vinegar (it may steam up) and generous pinch of salt to your caramelized onion and brown sugar jam. Stir well, let reduce for another couple minutes, and then remove from heat.
    Caramelized Onion Jam uses onions, brown sugar, some red wine vinegar and heat and just a lil patience for it to reduce! Caramelized Onion Jam uses onions, brown sugar, some red wine vinegar and heat and just a lil patience for it to reduce!
  4. Place the Caramelized Onion Jam in a small serving dish and let it cool from hot to warm. Now place it on a serving platter or alongside a small serving dish of your softened goat cheese (mash it down if it comes in a tube or other odd shape to encourage spooning and spreading it).
  5. Serve with the Sweet Potato Tortilla Chips and it’s all fancy when you know this was all silly easy.

Caramelized Onion Jam with Goat Cheese and Food Should Taste Good gluten free GMO free Sweet Potato Tortilla Chips Caramelized Onion Jam with Goat Cheese and Food Should Taste Good gluten free GMO free Sweet Potato Tortilla Chips

Even if you don’t make this recipe for Caramelized Onion Jam with Goat Cheese (I could also see the combo working in a sandwich), you should definitely check out these delicious Sweet Potato Chips!

Signature

Spicy Mayo Baby Shrimp Sandwich

Do you like the taste of the spicy mayo sushi rolls, but 8 rolls is not enough to satisfy you for lunch? I have an alternative way to get those flavors that I sometimes pack for lunch – I make a Spicy Mayo Baby Shrimp Sandwich.
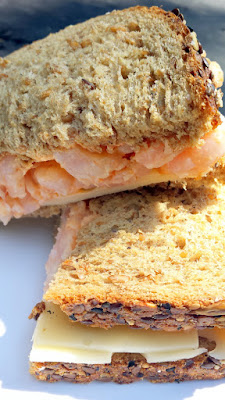
Ridiculously easy way to get a spicy mayo sushi flavor but in a more fulfilling meal via this recipe for Spicy Mayo Baby Shrimp Sandwich Ridiculously easy way to get a spicy mayo sushi flavor but in a more fulfilling meal via this recipe for Spicy Mayo Baby Shrimp Sandwich

This is barely a recipe and more just a guideline, and takes only minutes. In this sandwich form it is more filling and only a fraction of the price of sushi, but I still get my craving fulfilled. This recipe makes 4 sandwiches.
Ridiculously easy way to get a spicy mayo sushi flavor but in a more fulfilling meal via this recipe for Spicy Mayo Baby Shrimp Sandwich Ridiculously easy way to get a spicy mayo sushi flavor but in a more fulfilling meal via this recipe for Spicy Mayo Baby Shrimp Sandwich

Ingredients:

  • 8 pieces of bread – you can see here I used Dave’s Killer Bread 21 Grain
  • ~ 1/2 pound of cooked baby shrimp
  • 1/4 cup of spicy mayo (you can mix 1/4 cup mayo with 1 tablespoon Sriacha hot sauce and an optional 1 teaspoon of lemon juice. Taste and add more Sriracha hot sauce as needed to your desired level of spiciness. Or you can even be lazy and if your grocery store has a sushi section, they often have a small container of spicy mayo you can buy. F often does this when he gets cucumber rolls to help punch up his vegetarian rolls).
  • Optional – slices of Swiss cheese for the sandwich

Directions:

  1. In a mixing bowl, toss the cooked baby shrimp with the spicy mayo sauce. Spoon into the sandwich. You can optionally add cheese or lettuce if you want (I used Swiss).
    Ridiculously easy way to get a spicy mayo sushi flavor but in a more fulfilling meal via this recipe for Spicy Mayo Baby Shrimp Sandwich Ridiculously easy way to get a spicy mayo sushi flavor but in a more fulfilling meal via this recipe for Spicy Mayo Baby Shrimp Sandwich
  2. Eat.

Yep, that’s it.

Are you a fan of the spicy sauce on sushi?
Ridiculously easy way to get a spicy mayo sushi flavor but in a more fulfilling meal via this recipe for Spicy Mayo Baby Shrimp Sandwich Ridiculously easy way to get a spicy mayo sushi flavor but in a more fulfilling meal via this recipe for Spicy Mayo Baby Shrimp Sandwich

Signature